Difference between revisions of "Adventures in Haggelthorn"
(Pushed from realm.) |
(Pushed from realm.) |
||
| Line 150: | Line 150: | ||
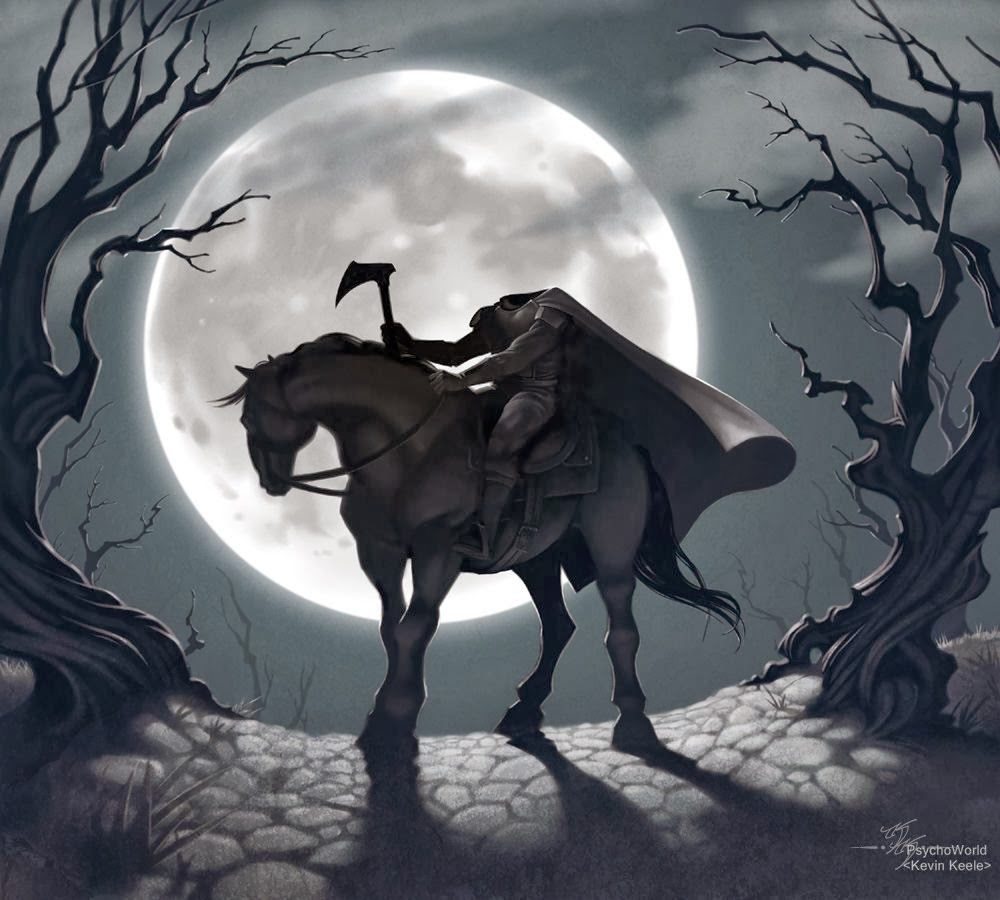
Whether spectral cavaliers from distant lands who lost their heads in battle or jilted equestrians decapitated by jealous rivals, headless horsemen are dangerous and deadly pursuers known to haunt dark roadways and abandoned bridges in the late hours of the night. The key in the roadway must be found and blessed, and then the haunt must be reunited with its head. The headless horseman is destroyed when it charges over the blessed key. | Whether spectral cavaliers from distant lands who lost their heads in battle or jilted equestrians decapitated by jealous rivals, headless horsemen are dangerous and deadly pursuers known to haunt dark roadways and abandoned bridges in the late hours of the night. The key in the roadway must be found and blessed, and then the haunt must be reunited with its head. The headless horseman is destroyed when it charges over the blessed key. | ||
| + | |||
| + | '''Brimbleweed Dream''' | ||
| + | |||
| + | For those who encounter the headless horseman, the following dream will happen the next night. | ||
| + | |||
| + | <div style="text-align: left; border: 1px solid gray; padding:5px; margin:5px; overflow:hidden;"> | ||
| + | Your dream is composed a whirl of images. From these images, you remember three distinct scenes. In the first scene, a man is sitting at a table in what looks like a tavern. He is a disheveled middle-aged gentleman with grey hair and a beard. He is wearing brown riding clothes stained with a reddish mud. Across the table, a person sits in the shadows. He is dressed in the familiar black robes of a priest. He is tall and thin, but his features are hidden in the darkness. The middle-aged man is drinking a tankard of ale when suddenly he begins to choke. Grabbing his throat he begins to gasp, collapses on the hard stone floor, and dies. | ||
| + | |||
| + | The next scene is even more disquieting. You are in a large banquet hall. The room is filled with shadows and the only features of the room that you can make out are a long wooden table on which four silver candlesticks with white tapers are burning, some heraldic banners hanging on the darkly-panelled walls, and two shadowy figures. The first figure you recognize as the middle-aged gentleman of your first vision. He is now dressed in clean riding clothes and is neatly groomed. The middle-aged man appears to be arguing with a younger man. The younger man is tall, thin, and has black hair. He is dressed in a brown tunic stained with blood. As the two men's argument grows more heated, the young man turns to leave. Just then, the middle-aged man picks up one of the candlesticks and hits the younger man on the back of the head. The younger man falls behind the long banquet table. As the scene fades, you see the older man with a knife in his hand bending down towards the body. | ||
| + | |||
| + | The final scene is the most gruesome of all. A young woman dressed in a white gown is sleeping in a large canopy bed. She looks peaceful and quite content. Suddenly, a dark figure intrudes on the scene carrying a large sword. The woman wakes and screams, but the shadowy figure swings the sword and.... | ||
| + | </div> | ||
== Mission 3: The Family == | == Mission 3: The Family == | ||
Latest revision as of 13:30, 11 September 2018
| Type | Dungeon |
|---|---|
| Status | Explored October 907 TA |
| Location | Haggelthorn |
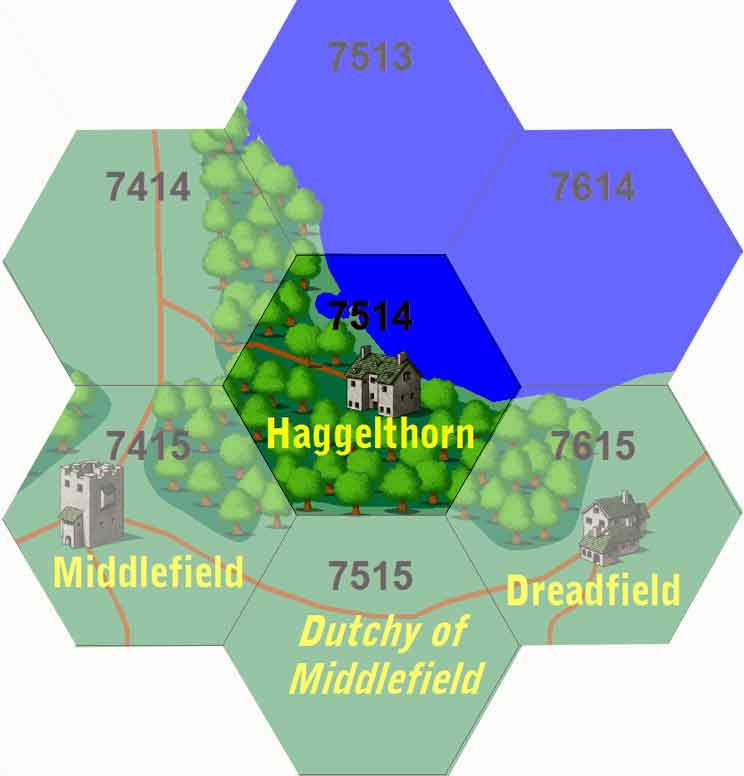
| Hex | 7514 |
| Campaign | Voyage of the Wanton Wench |
| Adventure # | 125 |
DM's Note: The Town of Haggelthorn is described here. What follows are the actual missions undertaken in this campaign. Only a few rooms of Haggelthorn Hall were explored.
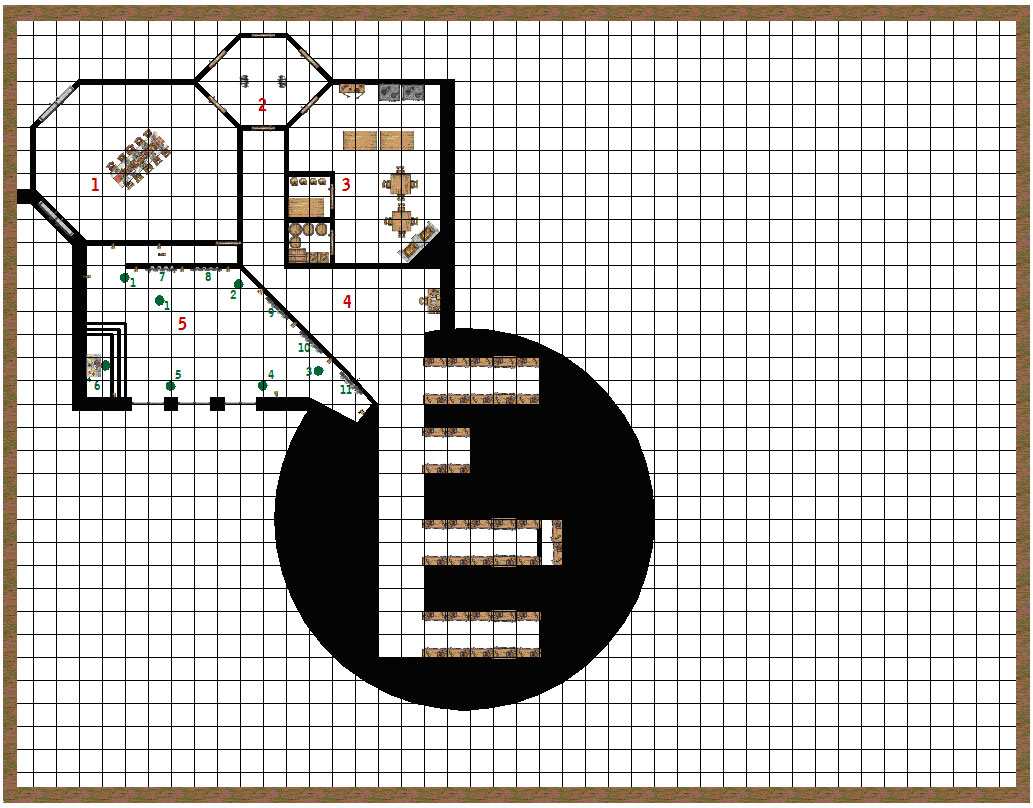
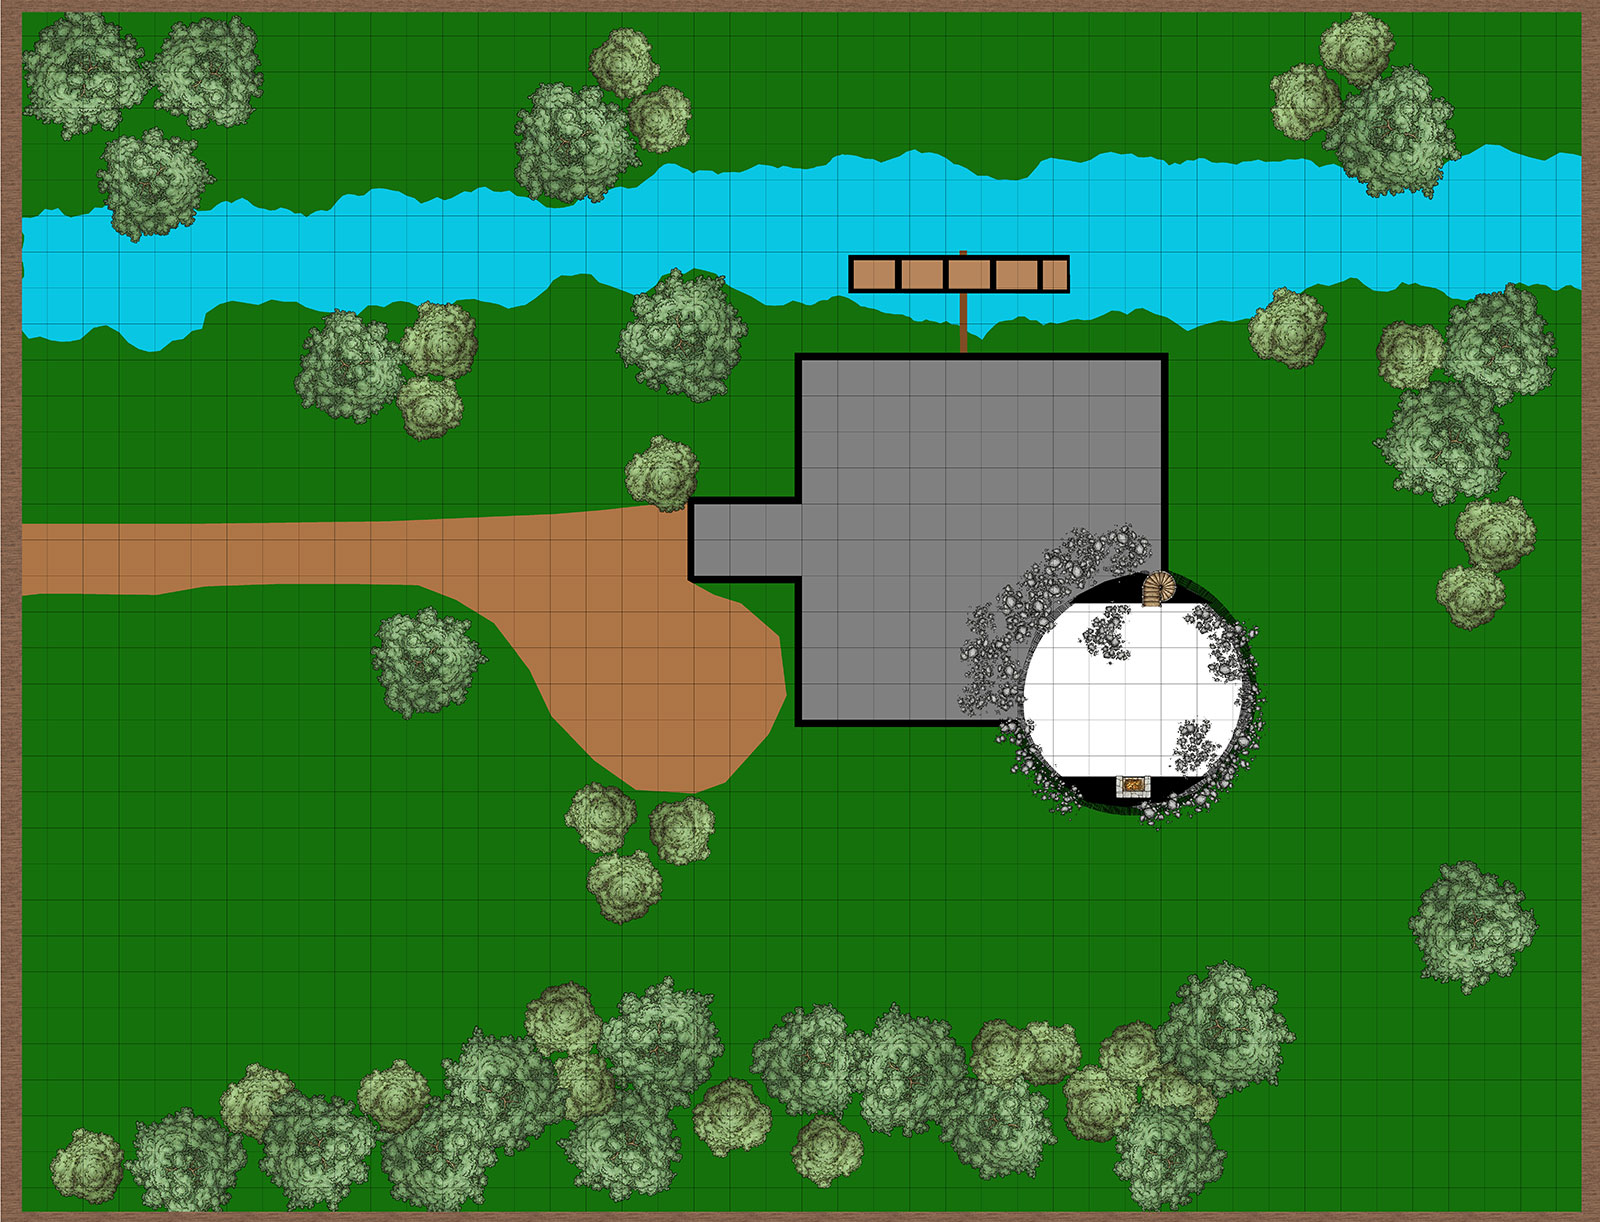
Haggelthorn Hall
Graveyard
Room 1: Entryway
The three silver candlesticks are quite heavy, and you think that they may be solid silver.
Room 2: Anteroom
Room 3: Kitchen
Room 4: Hallway
DM's Note: This room was unexplored.
Room 5: Gallery
- This is a statue of a old woman wearing a large hooded cloak. Her hunched form and disfigured face is quite revolting. In one old gnarled hand is a staff, and the other carries a lantern. The workmanship of the statue is very good.
- The scene portrayed by the gruesome statue makes your character turn away. Carved in a black polished stone is the effigy of a young man being eaten by a large lizard-like creature. From the look on the young man's stone face, it appears that he is in great pain.
- This is a statue of a young man dressed in a chain mail shirt, leather trousers, and leather boots. The young man is dark-featured. From his belt, hangs a plain longsword. On his right hand, the young man wears a falconry glove. A young hunting hawk sits on the extended forefinger of the man. This statue seems to face statue 4.
- This is a statue of a young woman. She is very pretty with fair features. She is dressed in a formal court dress with a large voluminous cloak. Her hands are crossed and she seems to be watching statue 3.
- This object is not really a statue. On a dark pedestal sits a large glass crystal. The crystal is about three feet in diameter. It is a sphere with many facets. The crystal seems to glow slightly.
- This looks like an ancient wooden altar of some sorts. The altar sits on a large dias. Several steps lead up to the altar. There is a canopy hanging over the altar. In front of the altar is the statue of a priest wearing robes. All that you can make out of the priest is that he is praying. The altar area is very dark, but you can see four small objects on the altar. To the left side of the altar is a standing candelabra. A black taper sits in the holder, but it is not lit. On the back wall (above the altar), several strange runes of some kind can be seen.
- This is a painting of three figures. The first figure is that of a dead boar. Sticking from the bloodied hog is the shaft of a dagger. Next to the boar is an injured young man. His blood stained shirt belays the fact that he has been gored by the boar. He is crawling towards the third figure, an old man. The old man is sitting just out of reach of the young man. His hands are cupped and filled with water. An evil grin runs across the old man's face.
- This painting is mostly black. From the blackness peers the leering face of an old man. Yellow stained teeth and wild unkept gray hair are the most prominent features of the painting.
- This is a painting of a young knight dressed in plate armor carrying a lance. He sits on his horse overlooking a great chasm. On the far side of the chasm is a large white castle. The knight seems to be watching the castle closely.
- Two figures are battling on a great battlefield of corpses in this painting. The stormy plain shows no signs of life except for the two figures. The first figure faces you. He is dressed in a red cloak and tunic. He is fighting with a spear and wears a silver helmet with golden wings on top. He sports a red beard and long red hair. The second figure is dressed entirely in black. He wears black plate and a black cloak. He is fighting with a black longsword.
- The final painting is simply an dark silhouette of a skeleton against a red background. The skeleton is standing with arms crossed, but no other features can be determined.
NOTE: There are only two magical items in the room: the door in the northeast corner and the altar.
The door in the northeast corner of the room radiates an aura of magic. The exact source of the magic seems to be strange runes, a Glyph of Warding of petrification.
The canopy overhanging the altar radiates a strong aura of magic (or perhaps something on top of the canopy). It is impossible to climb up to see on top of the canopy.
The priest statue is actually a human skeleton bent into a kneeling position. Over the skull of the skeleton is a mask of sorts. The mask looks like a symbolic representation of a hideous demon. Covering the rest of the skeleton is its cloak. The mask, cloak, and skeleton do not seem to be magical.
The candelabra is a large brass object, very large and very heavy. It is obviously not the same as the ones on the table in the dining hall. The black candle in the holder radiates a dim aura of magic.
On the back wall (above the altar), several strange runes of some kind can be seen. These runes seem to be different from the ones on the magical door. One might interpret the symbols as a chant of sorts. The symbols radiate an aura of magic.
The four objects on the table are: a tinder box (with flint), a book, a jar of dried herbs, and a small brazier (with a candle underneath). The brazier and herbs seem to be magical. The book is bound in a dark red leather. The pages are very well worn and a black bookmark is present in the tome.
DM's Note: No items were touched
Mission 1: Meeting with Elias Haggelthorn
The necklace stones will glow when a Haggelthorn needs him. It also lets him know where the Haggelthorns are all times.
The party is ushered into the ballroom of Haggelthorn Manor to meet with Elias, who is sitting in an overstuffed leather chair near the fire. A small table with a whiskey decanter sits in the middle of five additional chairs that have been arranged around the fire.
Elias Haggelthorn is the patriarch of the family. He is in his mid-fifties, although he looks quite a bit older. He is balding and somewhat short - a fringe of grey hair and a round belly. He typically wears a green smoking jacket, a pipe continuously hanging from his lips.
He was married to Henrietta Haggelthorn, but she died many years ago - apparently of a poisoning. His father took the Hall back over from the Brimbleweeds who squatted on the property some seventy-five years ago. Elias has two sons - Mortimer and Maxwell. Mortimer is tall and fair, Maxwell is tall and dark. Both look slightly elven, although their mother Henrietta was a short, stout woman of human descent. Mortimer is currently is Teufeldorf, and Maxwell is on a Tang Trader on the Great Sea - both on family business.
- He will ask their tale.
- He knows of the Wanton Wench having met with Henry Hyde in early May (May 1-3) and concluded business with him - giving him a chest to take to the Overlord. Where is it?
- He is intensely interested in Java. He had heard about her from his man in town (Ashby Baker) who had bought a few barrels of coffee beans from Jareth just a few months ago. Ashby had told stories about how Java could imitate any sounds and even cast spells. He will treat Java like a most important person.
- Elias takes the letter and reads it. After a few moments, he gets up and paces to the fireplace, crumples the letter and tosses it in. "You don't know any assassins in Portsmith, do you? I need to have Jana Blackfire killed. The bitch is proposing a search of all ships and cargo coming into the port for contraband and other items of a sinister nature. Sinister nature. Bah. Enough. She is going strangle my trade east to the dwarves."
Mission 2: Haggelthorn's Headless Horseman
Who is the Horseman?
In 803 TA, Haggelthorn Hall was taken over by the Brimbleweed Family. The Brimbleweeds were herbalists from the village of Darkwood. They moved into Hall after the Haggelthorns failed to return from an extended buying expedition. The Brimbleweed family consisted of Jonah Brimbleweed, Charolette (his wife), and Derek (his brother). Once in "control" of the Manor, the Brimbleweeds threw lavish banquets and hired local townsfolk for servants.
In 832 TA, Jonah, Charolette, and Derek Brimbleweed were killed. The appearance of the headless horseman began shortly thereafter.
According to the tales of a housemaid, the curse started with clandestine meetings between Charolette and Derek in the early hours of the morning. It seems Charolette and Derek had a romance going for some time without Jonah's knowledge. On the night of the Brimbleweed's demise, the three herbalists had just finished a fine meal. The table was cleared, and hot mead was served. Shortly thereafter, Jonah excused himself from the table and went to bed. After a brief embrace, Charolette told Derek that their secret must be revealed. It seems that the guilt of their affair had finally crushed Charolette's conscience. Derek went crimson and stormed from the room and Charolette followed him.
According to the maid, as she was clearing the table, Derek came back into the room covered in blood. He slumped at the table and poured himself a glass of wine. About five minutes later, Jonah ran into the room. He was red with anger. The two men began yelling. Jonah accusing Derek of adultery. Derek responded by saying that it wouldn't happen again, for Charolette was dead by his sword. At this, Jonah picked up a candlestick and hit Derek over the head. He bent down and severed the younger man's head with his knife. The maid claimed Jonah took the head with him and exited through the front door. About twenty minutes later, the elder Brimbleweed returned and dragged the younger man's body out the front door.
It is known that Jonah stayed in the mansion for only a few more weeks when the Haggelthorns returned to the Hall. Jonah and the town "servants" disappeared.
Derek is cursed and his head and body are buried separately. One part was buried in the graveyard at Haggelthorn, and one part was buried in the graveyard at the church. To remove Derek's curse, one must reunite the body and head. Derek can be seen twice a night. At dusk, he rides to the village. At dawn, he rides back to Haggelthorn Hall.
Encounter with the Headless Horseman
Peering closer, you see that the rider and his steed are covered in blood. The blood and mud look fresh. The mud is a reddish clay.
Searching carefully, you cannot find any signs of hoofprints in the dirt. In fact, you can find no trace that there has been any recent travel on the road. You do notice a glimmer of metal near the spot where you first entered the road. Bending down, your character finds a brass key. It is a large skeleton key (the kind that fits into gates and large doors). The brass key is somewhat plain. It has no unusual markings, but it shows signs of much use. From the mud and dirt on caked on its surface, it is also probable that the key has been sitting in the road for a time. Your character deduces that the key was lost in the road and was not "placed" there to be found.
Whether spectral cavaliers from distant lands who lost their heads in battle or jilted equestrians decapitated by jealous rivals, headless horsemen are dangerous and deadly pursuers known to haunt dark roadways and abandoned bridges in the late hours of the night. The key in the roadway must be found and blessed, and then the haunt must be reunited with its head. The headless horseman is destroyed when it charges over the blessed key.
Brimbleweed Dream
For those who encounter the headless horseman, the following dream will happen the next night.
Mission 3: The Family
Normally, I would never share this information outside of the Family, but times are dire and necessity requires a pragmatic solution. This news also alters our agreement somewhat.
Let me tell you a story.
Around 650 TA, when my family was still in Teufeldorf, Elias Haggelthorn found in his wanderings an unusual set of sixteen artifacts. While their origins are still unknown, perhaps gnomish, their workings are now well understood.
We call these items, the Family Jotters. They appear as simple wooden writing desks, like those used by travelling monks. A compartment below the writing surface holds ink and paper securely, and several have folding legs for easy transport. What is unique about these desks is that each has a slot near the top. Any note written on the desk can be sent by simply dropping the parchment into the slot. The note then appears magically beneath the door of the recipient within a few hours.
Using the Haggelthorn Family Jotter, I can send a message to any Jotter or anyone who voluntarily wears the Elderberry signet ring. As you can imagine, the Jotters are central to running the Family - a network that stretches across the Reaches.
There are some peculiarities to using the Jotters. One such oddity is that a copy of all messages are sent to the nearest Jotter. We are not sure why this happens, but we have incorporated this feature into our operations - security against rogue elements, so to speak.
My Jotter is connected by proximity to Mycroft Mistsworn's Jotter in Dragonsford. So, Mycroft should have received a copy of all my messages to you, Finn. After the first message, however, Mycroft's Jotter stopped receiving my messages.
From this, we concluded that another Jotter has been moved near Haggelthorn. After some trial and error, we have identified the missing Jotter as that of Jon Singleshadow of Portsmith.
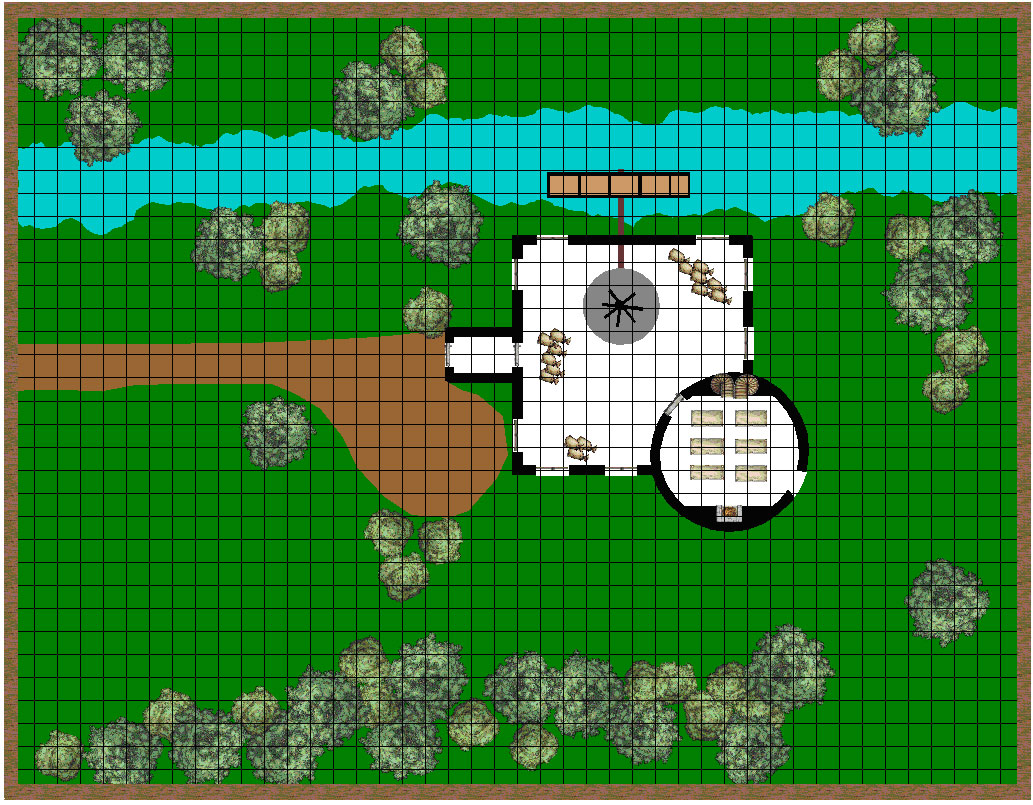
Yesterday, I sent a message to a local operative, Basil Drake, here in Haggelthorn. The message instructed Drake to take the road south to Dreadfield and then east into the storm to Portsmith. His "mission" was to assassinate Jana Blackfire. Knowing the message had been intercepted, my man was moving into a trap. As expected, he was ambushed just south of Haggelthorn near an old abandoned mill.
I need you to go to the mill and recover the Jotter. And, please bring back a head.
The Mill
Mill Room
Bedroom
Kitchen
It is a 10' jump down onto the roof of the mill from the ruined tower.
Laboratory
The dust on the floor is undisturbed by the soldiers upstairs.
The soldiers are led by Patrick Wood - red-robed Order of the Silver Throne. He is blond, tall and thin. The other soldiers with Wood are: Natalie Wilson, Maisy Young, Jamie Bradley, and Graysen Barnes.
DC 20: This is Amelia Wood's brother, Paladin Knight of the Holy Order of the Crusaders
See Encounter: The Sea Hags
Near dusk, a cry from the crow's nest brings the crew rushing to the front of the Wanton Wench. A pod of narwhals have pulled alongside the ship pacing the Wanton Wench as she moves through the water.
"Aye. Good luck narwhals are. This is a sign of smooth sailing ahead."
After a few hours, the narwhals begin to veer slightly off course to the starboard side. If the party follows, then they will - as night falls - find the ship suddenly slowing as it plunges into a thick bed of sea kelp.
Not sure how they get out, but they will have a few "new" visitors on board. Two sea hags - Moira and Mardella. They are looking for food. They will strike at night.
Each has a gem amulet around their neck worth 1200 gp. One is a ruby and the other an emerald leaf (Necklace of Adaption).
