Break-in at Broken Teeth
| Type | Dungeon |
|---|---|
| Status | Explored October 907 TA |
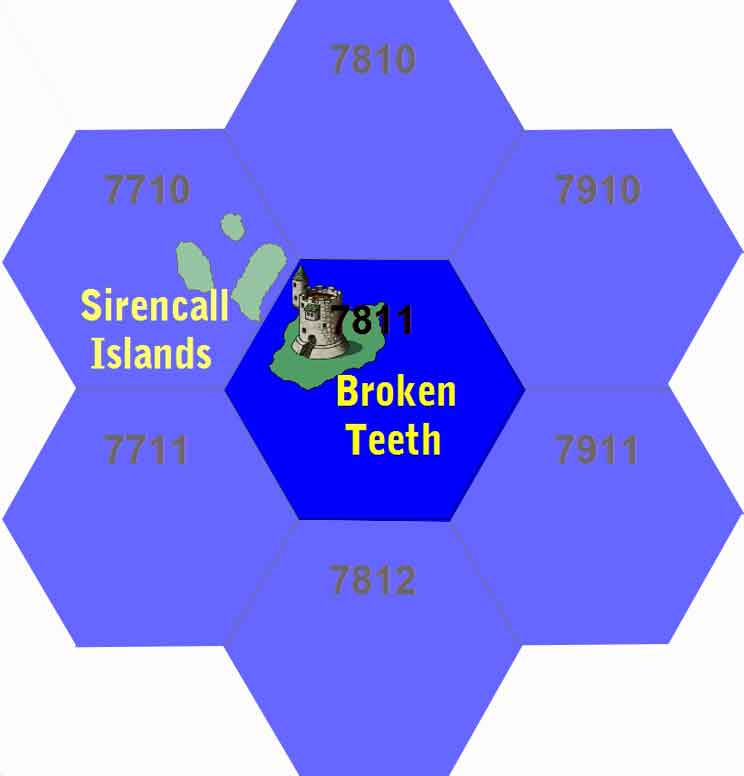
| Location | Broken Teeth |
| Hex | 7811 |
| Campaign | Voyage of the Wanton Wench |
| Adventure # | 123 |
Overview
Stormcrow has taken the following items from the Wanton Wench on June 24, 907 TA.
- The Wanton Wench figurehead - which she thought Mastway might like to sculpt and which has some sort of life force in it - see Room 28.
- The Log Books volumes 1-7 which are in the Minor Library - see Room 18.
- The gold has been added to the treasure in Room 25
- Bartlett (1st Mate), Carroll (2nd Mate), Hays (Rigger), Hickman (Rigger), West (Cabin Boy), Cookie (Cook), Horton (Night Watch), Webb (Botswain). See Room 20.
The main forces of the Fifth High Baron Mastway, Roland Carver, are housed in a military compound in the nearby village of Murkwell. The castle has the following garrison.
Roland Carver, Fifth High Baron Mastway - a thin, sickly man with stringy black hair and a most foul disposition. Mastway is an artist who is fascinated by mechanical beasts, golems and things that cannot betray him. Mastway is paranoid about traitors. He uses the statues in the docks to make sure his men are trustworthy. He loves Stormcrow. Gremlins as minions.
Stormcrow, Sorceress - a beautiful woman with blond hair and piercing blue eyes. Her countenance is haughty, her gaze piercing, but her smile is enough to melt the coldest of hearts. She sleeps with Roland when absolutely necessary. Stormcrows as minions.
- 8 guards - always rotating, dressed in chain and undyingly loyal to Mastway. These are drawn from the officers in his army who take 1 month tours of the castle. They live in the Old Keep.
- 8 staff - butler, lady's maid, housekeeper, maids (2), cooks (2), handyman
- 4 gargoyles - see area 27
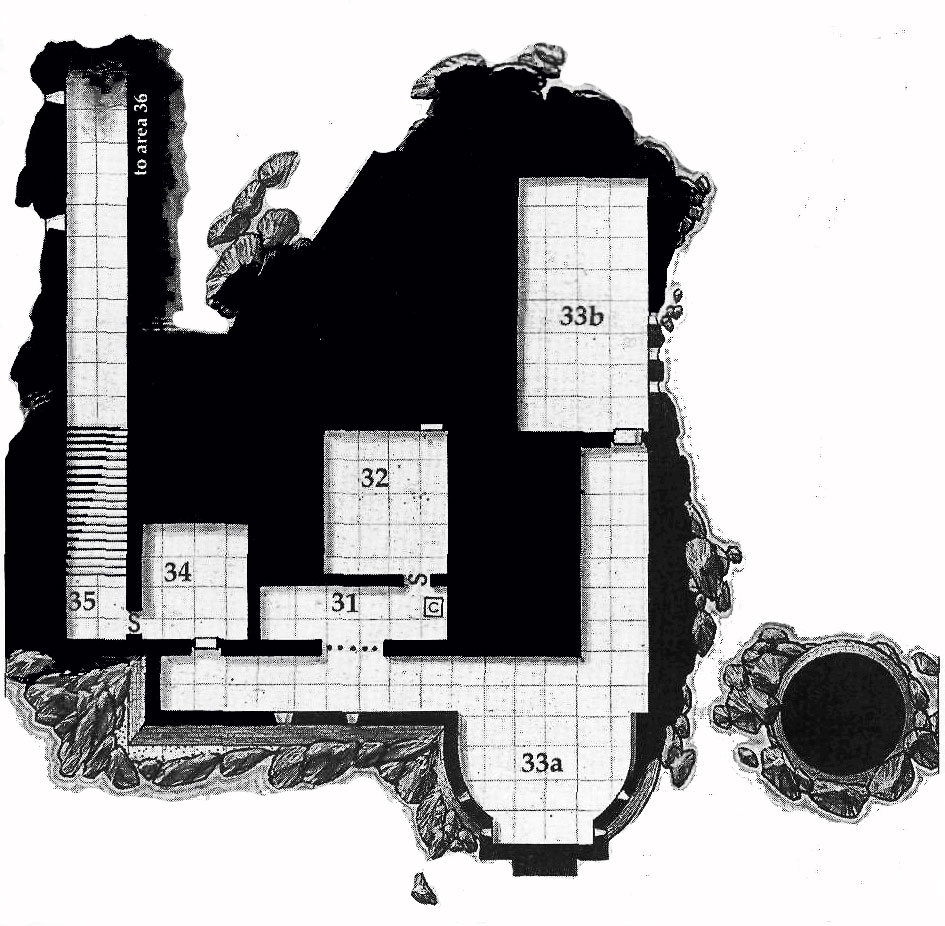
- 5 ogres - see area 33
Names: Wilber Weakman (guard), Buck Fallow (guard), Roger Toll (guard), Duncan Bilton, Amos Willoby, Mitchell Hunter, Albert Macks, Talmage Sullivan, Zona Sweet (cook), Beatrice Maltby (cook), Hessie White (maid), Winona Penn (maid), Ethelyn Bent, Maybell Magrath, Nelle Lamb, Miriam Fawn
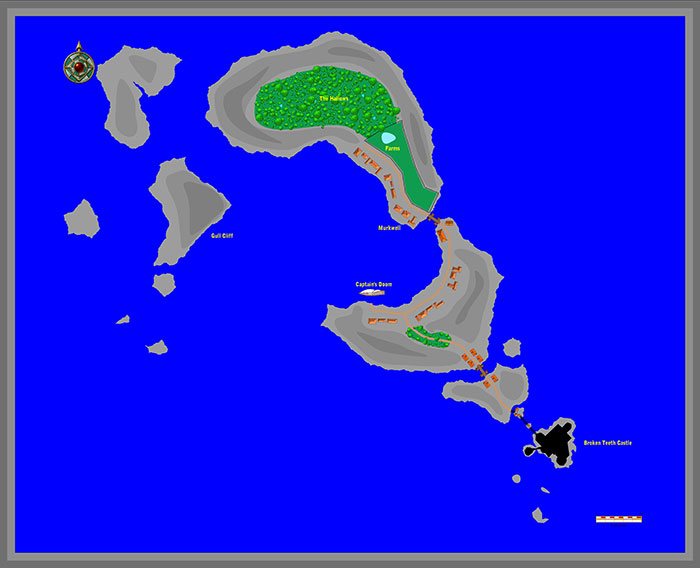
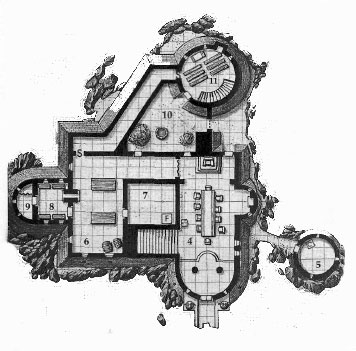
Broken Teeth Map
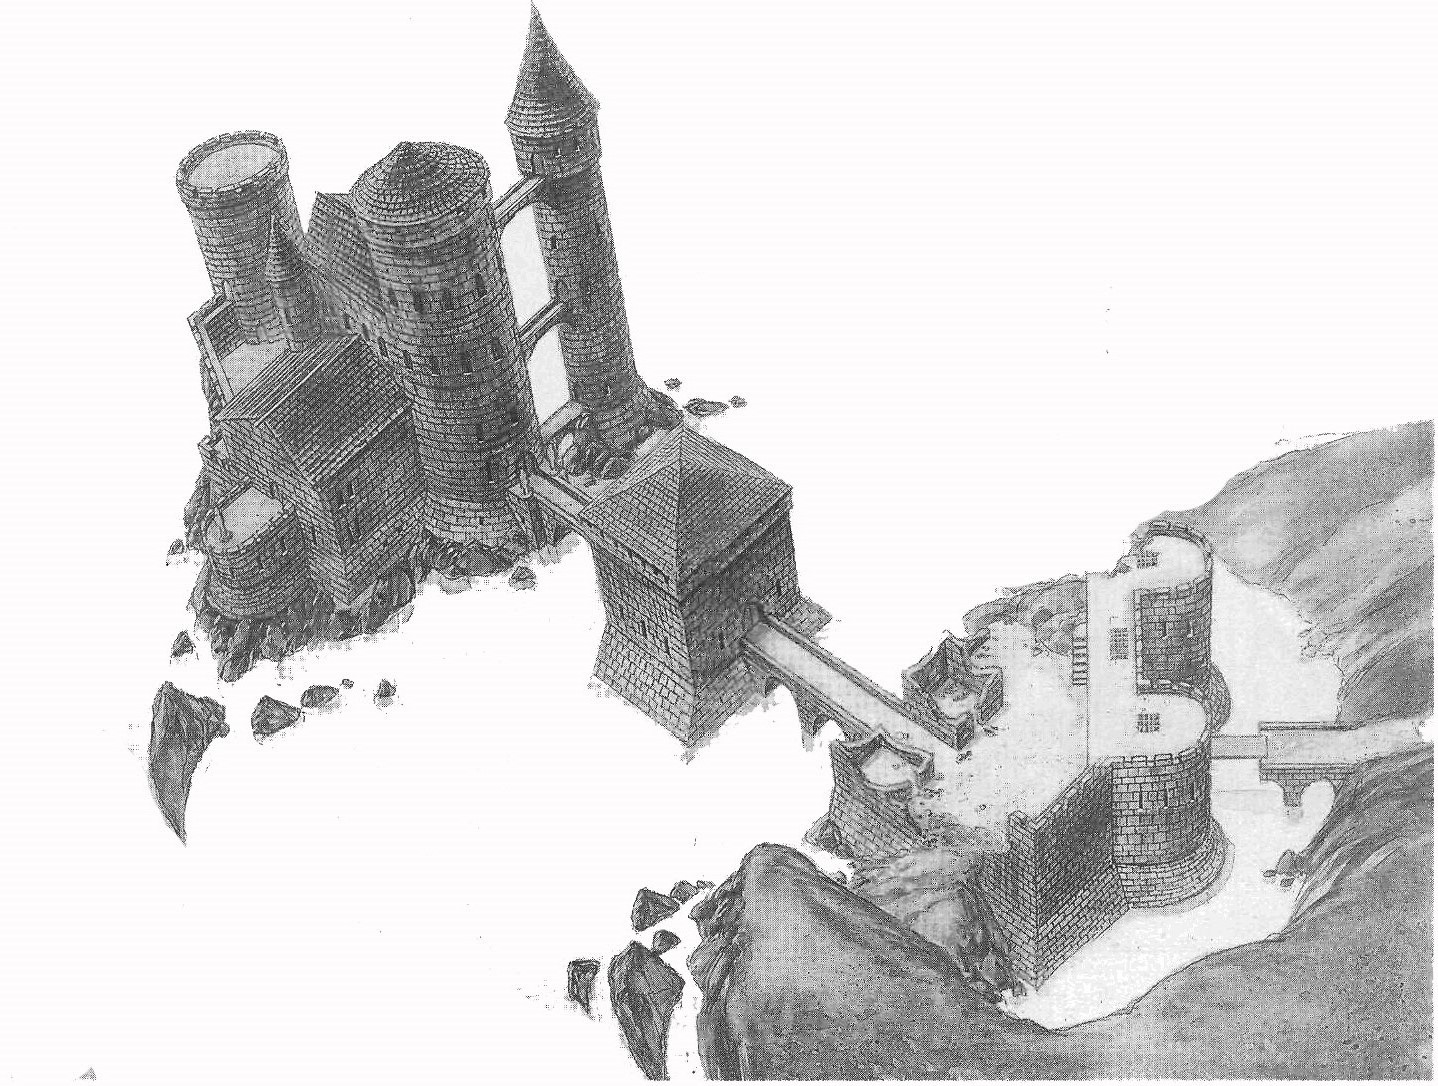
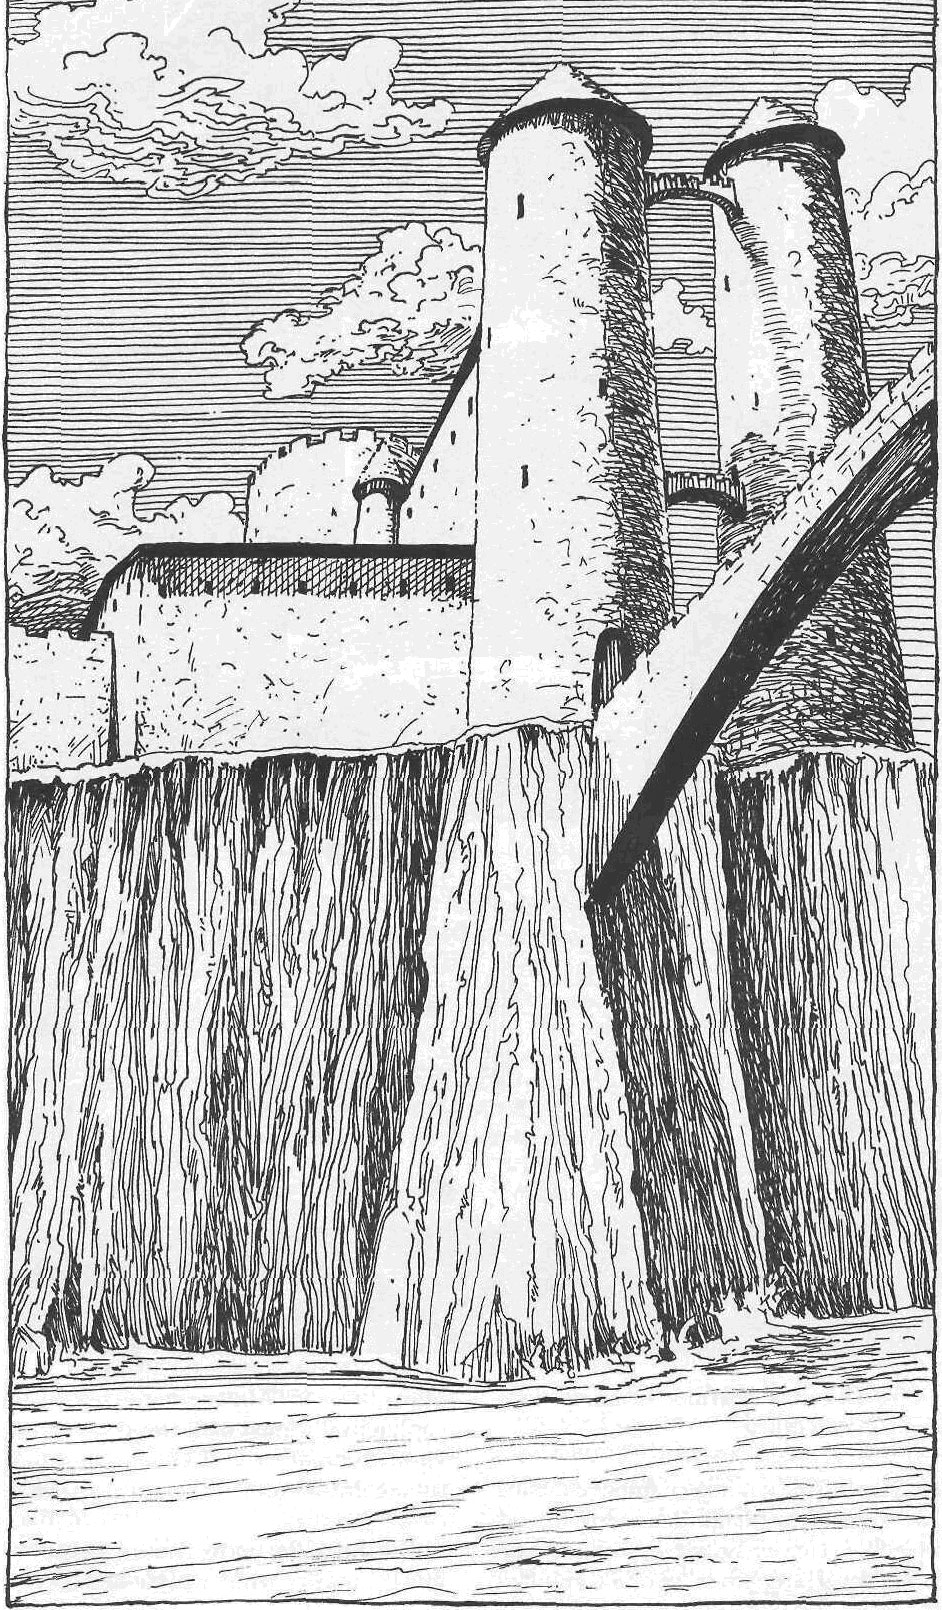
Broken Teeth Castle
Unless otherwise noted, the main castle walls, floors, and vaulted ceilings are composed of smooth stone blocks. The windows are made of leaded glass, cut into diamond shapes, with hinges and latches that allow them to open outward. The doors are made of thick oak, either arched or square, with heavy iron hinges.
The Old Keep
The keep's hollow, crumbling towers have become nesting places for stormcrows.
Castle Bridges
NOTICE 20: If the PCs are quiet, they might hear the gremlins' squeaky voices coming from within these vines, for the gremlins use them to travel to and from the castle. The gremlins fear the gargoyles in area 27 and would rather travel unseen.
Guard Tower
Stormcrows hang from the rafters. Movement through the debris is reduced by half.
Level 1
The doors are unlocked.
Room 4: Great Hall
Of note:
- Gremlins often hide within the clock and play with its springs and gears.
- The old coat of arms is the original banner from 760 TA. It is fragile from age but otherwise unremarkable.
- A secret compartment beneath the seat contains a pair of magical spectacles that act as a Gem of Seeing.
Room 5: Torture Chamber
NOTE: Gremlins avoid this place. It is haunted by a poltergeist. A ghostly, skeletal figure rises up amid a whirling cyclone of tools, plates, utensils, and other loose objects.
Room 6: Kitchen
DC 20: A secret door disguised as a set of shelves along the north wall swings open on squeaky hinges, leading into a hidden tunnel that travels the length of the castle wall.
Room 7: Storage
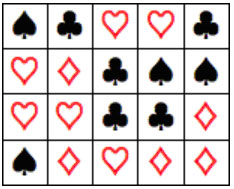
There is a trapdoor in the floor of the southeast corner of this room.
The trapdoor is locked with a strange grid of symbols.
If the party fails, both Mastway and Stormcrow will be alerted. Either can unlock the trap door from anywhere in the castle. The butler also knows the pattern.
Room 8: Servants' Quarters
May hear the sounds of a woman crying (see Room 9).
Room 9: Privy and Bathing Room
The wind blowing through one of the broken windows sounds oddly like a woman crying.
Room 10: Garden
DM's Note: Unexplored
Room 11: Abandoned Chapel
DM's Note: Unexplored
Level 2
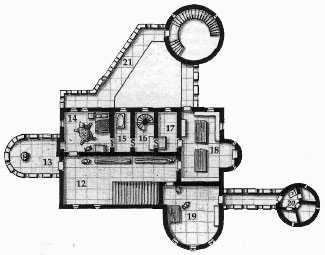
Room 12: Hall
Room 13: Porch
Encased within the clay is a giant skeleton enchanted by magic. Mastway does not activate this monstrosity unless he thinks that he can surprise the party with it. He may wait until the PCs re-enter the castle before he sends the giant skeleton after them. When the skeleton is activated most of the clay, covering it cracks and crumbles away.
Room 14: Bed Chamber
The first of the drawers in the nightstand contains a silver, gem-encrusted comb and brush worth 100 gp each and a silver, handheld mirror worth 50 gp. The second drawer contains an engraved wooden box holding 53 sheets of delicate parchment, four slightly used quills, and seven vials of black ink. A second, smaller box contains fine-grained sand, used to dry ink.
Hanging within are numerous robes, cloaks, chemises, jerkins, and doublets of various sizes, colors, and fashions.
This wardrobe is actually a magical tool. Upon opening the wardrobe's double doors, the PCs feel a chill draft blowing from within. When the hanging clothing is taken out, the only thing visible is the wooden back of the wardrobe. However, if the PCs squeeze in between the clothing, they find themselves somewhere along the along the rocky coast of the island. The outline of the castle is 1/2 mile away. However, the teleport is one-way only.
This is an escape route.
Room 15: Bathing Chamber
The secret door that these shelves conceal opens outward on squeaky hinges, exposing the secret chamber (area 16 below).
Room 16: Secret Room
NOTE: When the castle was first constructed, this chamber was easily accessible from the rest of the keep. Eric later decided to change the room's two entrances into secret doors to deter any intruders from finding his studio and workshop in the levels above.
- This bookcase is actually a secret door that opens into area 17.
- Another secret door disguised as part of the stone wall opens into area 15.
- Both of the secret doors in this room open easily when pushed.
Four of shadows are hiding in the dark recesses of this room.
Room 17: The Second Magic Wardrobe
Like the first wardrobe, this one is also magical. It works with a third magical wardrobe in area 29. Mastway uses these wardrobes as escape routes should the need arise. If the PCs pass between the cloaks and robes stored in this wardrobe, they are teleported to the wardrobe in area 29 and vice versa.
A secret door in the west wall beside the wardrobe opens into area 16 when a loose stone in the wall behind the wardrobe is pushed.
Room 18: Minor Library
Behind the painting of the First Baron is Sea Barons Treaty dated 768 TA.
The treaty is protected with a preserve spell and has been hidden for centuries. The log books from the Wanton Wench - Volumes 1-7 are here. They are guarded by a demon put into their pages by Stormcrow.
Seven puzzles to trick the demon and gain control of the books:
- Volume 1 - I am a man. If the son of this other man is the father of my son, what is the bond of kinship between this man and myself?"
- Volume 2 - Complete this series: E O E R E X
- Volume 3 - Two fathers accompanied by their respective sons go fishing. Each person catches a fish. Yet only three fish are caught. Why?
- Volume 4 - I am four times as old as you were when I was the same age as you are now. I am forty years old, how old are you?
- Volume 5 - Lady Bertha is twenty-one years older than her son. In six years, he will be one-fifth of his mother's age. Where is the father?
- Volume 6 - A water lily doubling its surface area every year covers an entire pond at the end of ten years. If there had been two water lilies with the same properties, how much time would it have take to cover the pond entirely?
- Volume 7 - An alchemist must let a potion settle for exactly 45 minutes, but he has no device for measure time. On the other hand he does have a torch and two fuses, which he knows burn in 1 hour, but in an irregular fashion (half of a fuse will not be consumed in 30 minutes. How can the alchemist measure exactly 45 minutes?
Solutions
- 1 - He is my father. (The father of my son is me.)
- 2 - N, T. Last letter of one, two, three...
- 3 - Grandfather, father, son.
- 4 - The pupil is 25 years old.
- 5 - On top of Lady Bertha. X = -9 months.
- 6 - Nine years. It would have covered 1/2 the pond in 9 years. So, the other would have covered the other half.
- 7 - Light both ends of one (30 minutes to consume) and one end of the other. When the first is burnt, light the second end (15 minutes to consume).
Room 19: Workshop
In the east wall, a door with squeaky hinges opens to a bridge that spans the area between this tower and one of the castle's other towers.
A bronze incense burner in the shape of a dragon sits on a stool next to the north door. A table stands against the west wall, covered with tubes, beakers, vials, mortars with pestles, jars, boxes of sand, and loose sheets of parchment depicting mathematical equations. The papers rustle in the chill breeze blowing through the broken window in the south wall. A 6'-tall alabaster statue of a beautiful woman with long hair stands next to the table. Sitting on the floor next to the statue is a decanter with a brass stopper shaped like a nixie.
Decanter of Endless Water
Shelves against the east wall next to the door contain jars, vials, boxes and bags of spell components. Amid these items is a bone scroll tube with an quasitshaped plug made of platinum (worth 50 gp).
Removing its plug triggers a fire trap spell that detonates for 1d4+18 points of damage. Within the scroll tube is a magical scroll with the spell and freedom (the reverse of imprisonment). The scroll is not damaged by the fire trap spell.
Scroll of Freedom
Room 20: Prison Cells
Bartlett (1st Mate), Carroll (2nd Mate), Hays (Rigger), Hickman (Rigger), West (Cabin Boy), Cookie (Cook), Horton (Night Watch), Webb (Botswain).
Room 21: Walkway
Behind a loose stone in the battlements is a 1'-square compartment. Within this compartment is a skeleton-shaped key on a leather thong. This key opens any door within the castle and its surrounding towers. Near the secret compartment is a door that opens onto a landing on the spiral staircase in area 11.
Level 3
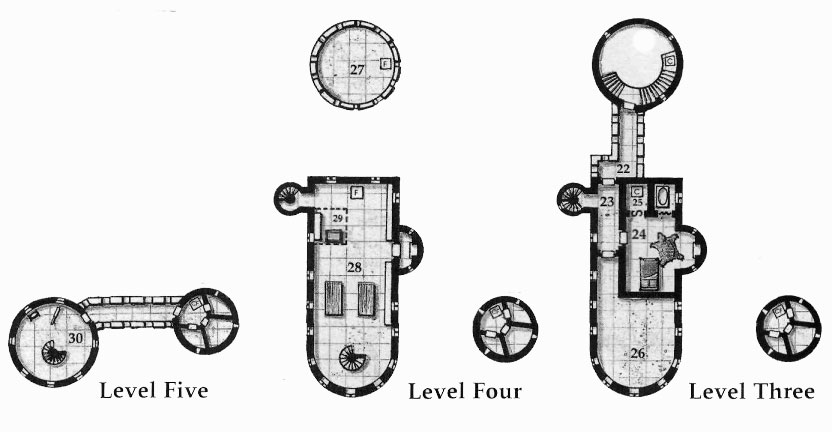
Room 22: Bridge
The door at the north end of this bridge opens onto a landing on the spiral staircase in area 11. The south door leads to area 23.
Room 23: Hall
This hall is lit by a window in the southwest wall. An archway in the northwest wall leads to a stone spiral staircase going up and down. Partway up, this spiral staircase is blocked with a magical wall of stone, preventing passage between this level and the above floors. Unless the PCs are able to break through the wall, they must access the level above either by using the magic wardrobe in area 17 or by scaling the castle's outer walls.
Against the east wall, across from the staircase, stands a set of full plate mail . The doorway in the east wall (see area 24 for details) has been bricked up.
The plate mail is actually a mechanical device invented by Eric (for his own amusement) to be used by his gremlin servants. This half-magical, half-techno logical device requires four gremlin drivers to operate it. When fully manned, the suit can walk and attack almost as effectively as a real man. The "tank" always attacks last every combat round. Since the tank's four gremlin drivers are completely enclosed within a metal shell, spells such as heat metal inflict an additional 1-4 points of damage to the gremlin. Once the tank loses all of its hit points, it falls over and the gremlin within scurry away if they can.
Room 24: Sorceress' Bedroom
The gremlins do not enter this room because they fear Stormcrow. There will always be a raven familiar here.
The paintings are the Second Baron and his wife - who scratched his eyes out.
Room 25: Secret Room
The secret door to this room opens when a latch hidden behind a nearby still-life painting is pulled. A ladder against the north wall leads up to area 28.
Piled against the west wall is the following treasure: a painting of a woman playing a lute, done by the famous artist Gerald Morbius, worth 600 gp; a small, unlocked chest containing 6,000 gp; and a leather purse containing two potions of extra-healing and a scroll of protection against demons
Room 26: Forgotten Antiques
Level 4
Room 27: Tower Peak
They appear to be normal statues, but when night falls, they fly from their perches in search of prey. Though these gargoyles have no love for Mastway, they fear him and attack the PCs when so commanded . The gremlins fear these gargoyles and do not approach their perch.
Room 28: The Studio
Mastway uses the northern part of this room to paint and sculpt. Stormcrow uses the center tables for experiments.
NOTE: This large chest is actually a secret trapdoor. When opened, the PCs find a ladder descending to area 25. How the sorceress gets in.
The western portion of the room contains a secret room (area 29). The illusionary walls hiding the secret room appear to be fitted with tall bookcases, stuffed with ancient, moldering tomes. If a PC removes one of these illusory books from the illusory bookcases and flips through it, he or she has the vague perception that the book in question is boring and contains nothing of interest.
In the south section of the room, a wrought-iron spiral staircase ascends to the next level. Hanging by wires from the ceiling, near the staircase, is a skeleton with each bone labeled in red ink.
Room 29: Secret Room
A 10'-square area of the western portion of area 28 has been sectioned off by three illusionary walls (indicated with dotted lines on the map). This area contains a magic wardrobe that works in conjunction with the wardrobe in area 17 and can be used to teleport between these two areas. How Mastway gets in.
Sitting on a wrought-iron stand next to the wardrobe is the Sorceress' crystal ball.
A shelf against the west wall holds a collection of old junk: dolls, books on various cults, some bone necklaces, knives, blank books, sheet music, a lute, a box of harp strings, and a flute. An old jester's suit with bells lies on the floor next to the wardrobe and the crystal ball' s stand.
An apparently blank book sits on the jester suit's lap. This is actually the sorceress' most valuable spellbook. All the spells written in this book are invisible. A gem of seeing, true seeing spell, or similar magic is required to read the book.
The book contains the following spells: chain lightning, conjure animals, control weather, death fog, death spell, disintegrate, globe of invulnerability, mass suggestion, permanent illusion, programmed illusion, project image, reincarnation, shades, stone to flesh, true seeing; banishment, delayed blast fireball, duo-dimension, finger of death, mass invisibility, monster summoning V, phase door, shadow walk, statue, teleport without error, vanish; incendiary cloud, mass charm, maze, trap the soul; energy drain, gate, imprisonment, meteor swarm, power word kill, shape change.
A secret niche behind one of the shelves contains a small chest with a poison needle trap. The chest contains 12,000 gp, a deck of many things. While inside the niche, these items are invisible. They become visible when they are removed. If returned to the niche, the items become invisible again.
Deck of Many Things
Level 5
Room 30: Observatory
In front of one of the eastern windows is a telescope (spyglass).
A 2'-long silver scroll case worth 100 gp contains two artistically drawn celestial maps. Next to the telescope is a large, gilded harp (worth 250 gp).
Lower Level
Unless otherwise noted, the walls, floors, and ceilings of the lower level have been smoothly carved from the rock on which the castle stands. All doors are 7 feet tall, 3 feet wide, and made of thick oak with iron hinges. Unless otherwise noted, windows are 2 feet wide, 3 feet tall, and stuffed full of bones and skulls mixed with mortar to keep out the light of day.
Room 31: Wine Cellar
The trapdoor leads to area 7. NOTE: The trapdoor has been wizard locked by Mastway.
In the floor in front of the northern secret door is a keyhole. The skeleton key from area 21 opens the secret door.
Room 32: Forgotten Room
This chamber is the secret treasure chamber of the Fourth Baron.
Piled against the west wall is the following treasure: three large, unlocked chests containing 1,200 gp each; a 5'-tall marble statue of a nude female, crafted by a famous artist and worth 1,000 gp; and a finely crafted wooden chess set worth 500 gp. The chess set rests atop a finely wrought mahogany table carved in the shape of two grasping claws. Adorning one of the table's "talons" is a ring of spider climbing that allows its wearer to duplicate the effects of a spider climb spell thrice per day.
Ring of Spider Climbing
Room 33a: Ogre's Lair
The ogres are normally encountered here. If and when the Mastway or Stormcrow desires to set these creatures upon the PCs, he can unlock the trapdoor in area 31 (which has been wizard locked) at any time, from anywhere in the castle.
33b: Smelly Room
Room 34: Guard Room
There will always be a guard or two here sitting at a small table sharpening weapons or drinking.
Room 35: Stairway and Passage
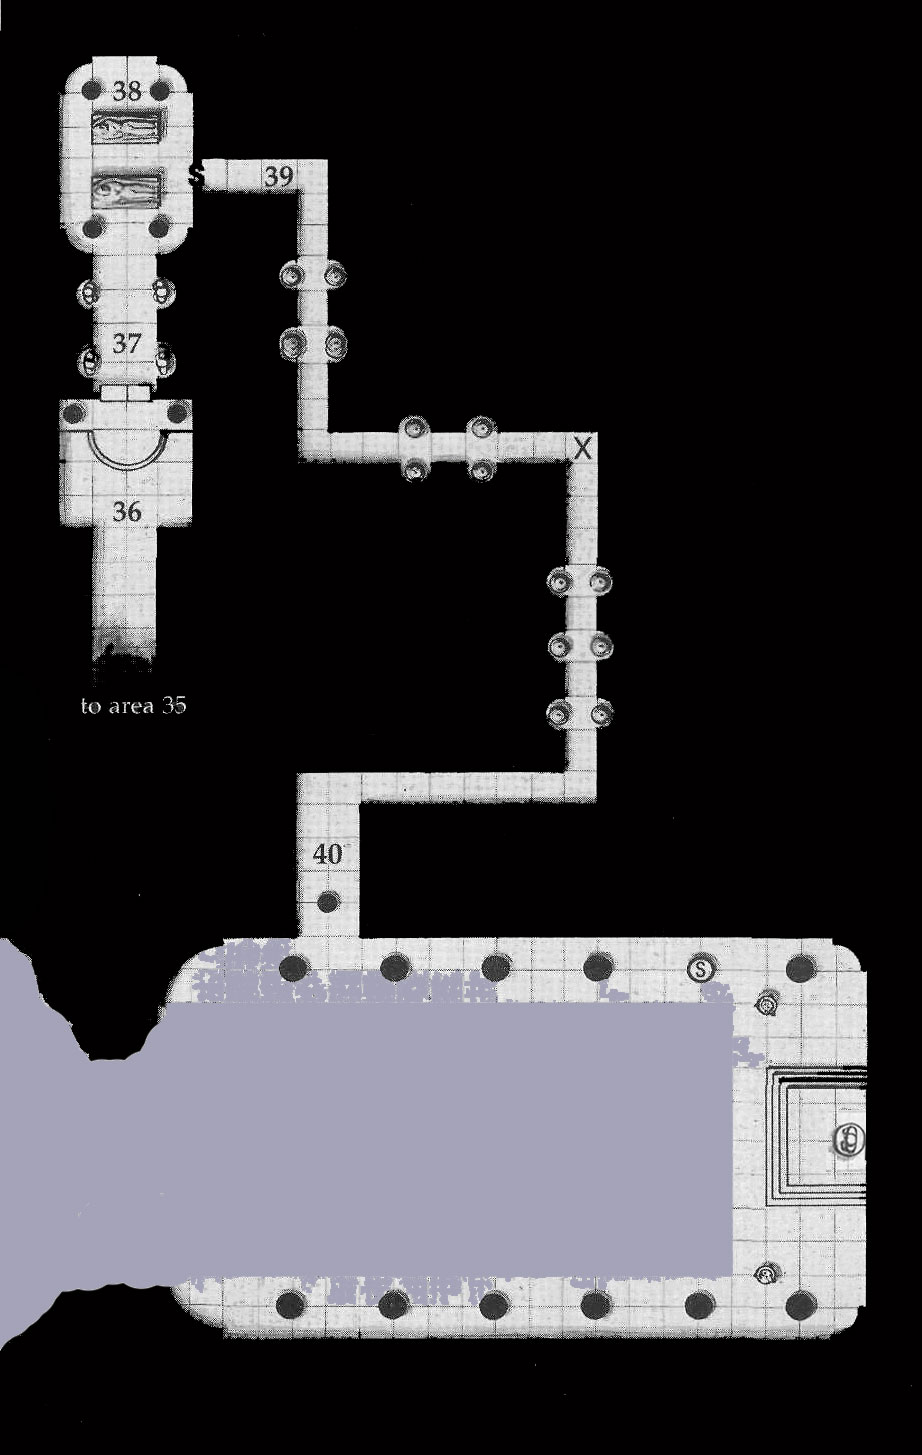
The passageway is long and it leads north to area 36.
The Underground Docks
Room 36: First Baron's Tomb Entrance
Room 37: Sentinels' Hall
The suits of armor seem ominous but pose no threat.
Room 38: Tomb
Removing the lid of either sarcophagus requires a single character's Strength of 19 or a combined Strength of 45. Anyone removing a sarcophagus lid must make a saving throw vs. spell or suffer a -1 penalty to future saving throws until a remove curse spell is cast.
The corpse inside the stone coffin is that of the First Baron's wife. It wears a long white dress, and a veil covers its face. A pearl necklace worth 500 gp is strung around its neck.
The other coffin is empty.
The secret door in the east wall opens when a loose, dragon-shaped tile in the floor is stepped upon.
Room 39: Dark Passage
Room 40: Blade Trap
If anyone but the Baron's men walks around this pillar, blades eject from the walls, inflicting 2d12 points of damage.
Type mechanical; Perception DC 15; Disable Device DC 18; Trigger proximity (by operator); Reset manual (full-round action); Effect (6) blades; Atk +15 melee (2d6+1/x3 slashing); blade passes through the area once per round until it hits something, at which point it stops moving and needs to be reset; resetting the trap affects all pendulum blades.
Room 41: Traitor's Gate
The statue radiates intense magic (divination). It is said to judge those who speak the truth. It is also extremely fragile. If the PCs knock over the statue, thousands of hairline cracks cover it entirely. Black blood seeps from these cracks and then, slowly, the statue crumbles to dust.
Bronze censers on tripods flank the statue on both sides (indicated by the small circles on the map), their coals magically enchanted to burn sweet incense constantly. Anyone who stands within 10 feet of these censers must make a saving throw vs. spell or suffer the effects of the 4th-level wizard spell confusion. The confusion lasts for 20 rounds. PCs who are unaffected must continue making saving throws every round they spend within 10 feet of the incense burners.
Near the chamber's walls, ornately carved pillars twist into the darkness.
A secret door in one of these pillars conceals a stone spiral staircase. This staircase climbs to a tunnel that runs east to another staircase that climbs to a secret door in the side of a tree above ground, atop the cliffs on the seashore.
Two guards will almost always be here.
