Hammerheim Hall
| Type | Dungeon |
|---|---|
| Status | Explored January 918 TA |
| Location | Old Kingdom |
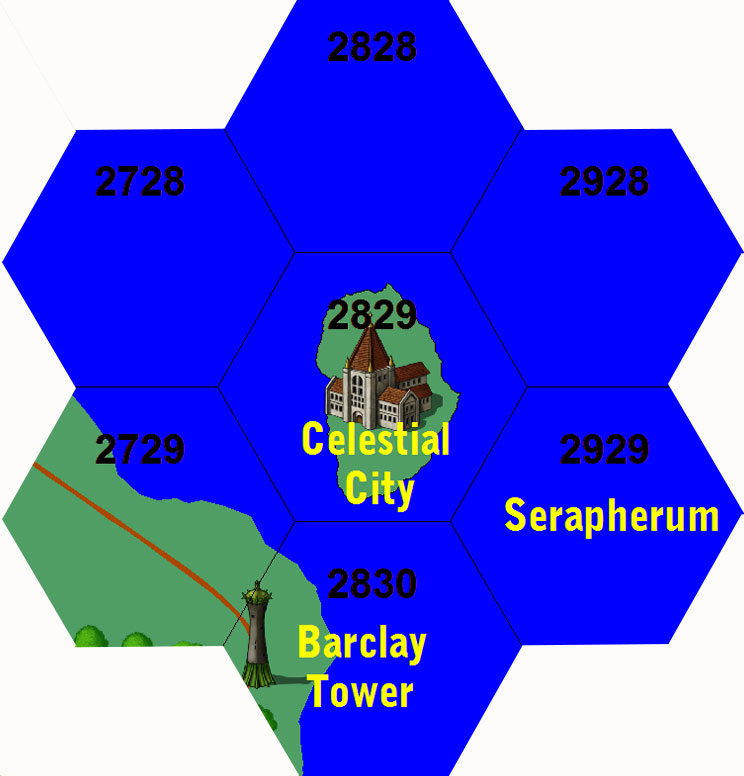
| Hex | 2829 |
| Campaign | The Old Kingdom Campaign |
| Adventure # | 150 |
Alfric's Amulet, Part 4: Dwarven Chalice of Hammerheim
From Ginger Beddington's Research: A stone was said to have been installed as part of the Dwarven Hammerheim Hall exhibit. There is also a note that a stolen dwarven artifact of immense value is there, although all accounts of the room show nothing remarkable.
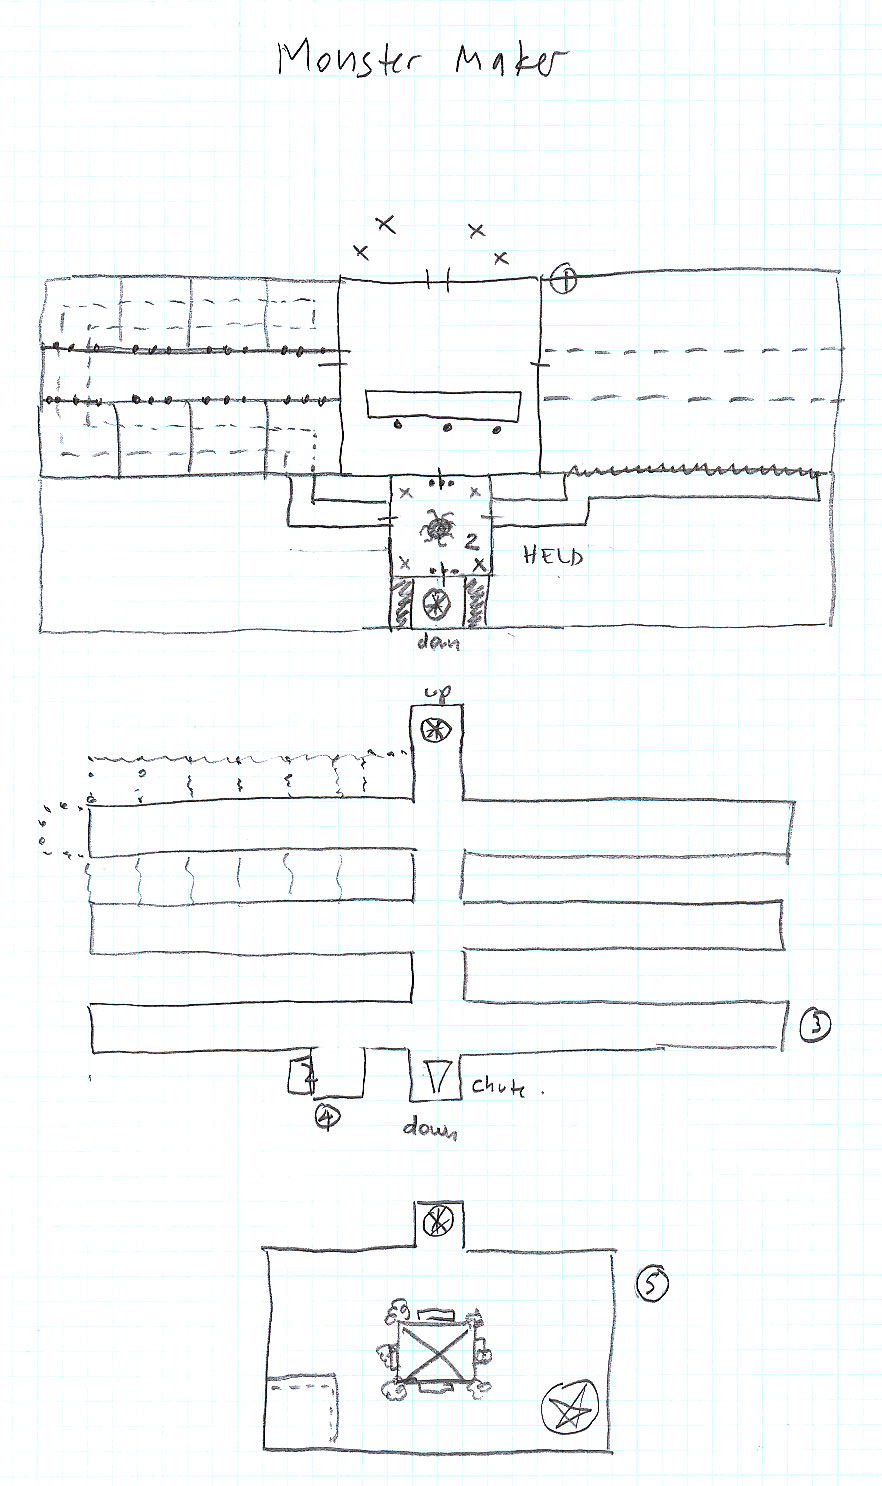
Encounter 1: "Public" Dwarven Feasting Hall
U-Gene notices that there are six specific items placed on the table at the end of the hall: a chess board, a wine goblet, a large stone six-sided dice, a hand axe thrust in the table, a large metal key thrust into the table, and a large steel-tipped quill thrust into the table, and a large tankard of ale. These are used in a dwarven pub challenge - a drinking game puzzle, so to speak.
Unlike the other items on the table which are real, and in some cases expensive, dwarven artifacts from the First Age, these items appear ethereal - a hand passes through them.
All dwarven drinking games start with a puzzle to activate them!
If inspected closely, the party will notice the weapons are very real and slightly used. The statues appear to be made of stone but the joints show some wear as if stone has rubbed on stone.
- Angmar Deepstone (Miner)
- Balin (Mason) carrying his giant axe that is rumored to cut stone.
- Calin (Blacksmith)
- Clanggedin Silverbeard (Warrior, the Master of Axes, and the Father of Battle)
- Dugmanen Brightmantle (the Caretaker, Wise One, Keeper of Secrets, Warden, or Steward) wearing robes with a book.
- Durin (Gemsmith)
- Gildrith the Great (Brewer, Mistress of the Hall)
- Kalmirn (the Merchant)
- Moradin (the Forger)
- Thorin (the Goldsmith)
Encounter 2: Entrance to the "Real" Hall
When the party reaches the dead end and turns around there is a brick wall, essentially trapping them inside the corridor. The new brick wall has an inscription that reads “Keep your eye on the wall.” If they walk backwards while staring at the brick wall they will walk into the next room - which happens to be the Dwarven Feasting Hall.
Encounter 3: "Real" Dwarven Feasting Hall
This room appears identical to the Dwarven Feasting Hall you entered previous except:
- The beer mug is real - filled with proper dwarven ale from the House of Thorinshold.
- The doors to the hall are now closed and appear to be fused with the wall.
Drinking the beer, one will then notice:
- The white chess pieces and board are real.
- The dice glows slightly with the number 4 showing.
- The wine goblet and hand axe, key and quill are still ethereal.
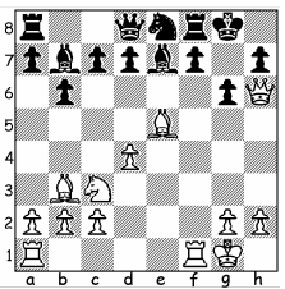
1. Qxf8+ Kxf8 (black moves automatically)
2. Rxf7+ Kg8
3. Rg7+ Any
4. Rg8#
Moving the white piece correctly, will make the black piece move automatically. At this point, the pieces will be again ethereal. The dice will now show the number 3.
The party must choose the challenge of the hand axe, key, or quill.
Each successful challenge will bring the party back to the mug of beer. Drinking a draft, the party can again move a white chess piece. The black move will be made, and the remaining items will become substantial.
After the final checkmate, all the items except the goblet will shimmer and disappear. The goblet is substantial and U-Gene will recognize it immediately as the Dwarven Chalice of Hammerheim - stolen from the Thorinshold dwarves in the First Age. It is a priceless relic of that Dwarven Clan's War.
Encounter 4: The Quill Challenge
- Deathbringer - Warhammer, Bright yellow with leather handle
- Oath Shatterer - Great Sword, Blood red with Elvish inscriptions
- Mercy Climber - Glaive, Bright blue blade with black leather braided handle
- Giant Toe - Maul, Giant’s skull with mouth open and maul protruding
- Quicksilver - Pike, Dark green Jade blade with bamboo handle
- Bad Samaritan - Trident, Dark golden highly reflective with Abyssal inscription
- Midnight Sun - Quarterstaff, Braided dark and light wood with teal crystal inlays
- Peacemaker - Longsword, Rusted with olive branch wrapped around it
- Kingslayer - Morningstar, Black handle with milk white head sculpted with face
- Widowmaker - Longbow, Cherry wood with yellow crystal inlays
Putting any weapon in the hand of the statue causes it to become an animated weapon that attacks. Among the weapons is a sword called “Peacemaker” with an olive branch wrapped around the rusted blade. Placing the olive branch in the hand of the statue solves the puzzle.
Encounter 5: Key Challenge
When enough weight is placed on the scales of the first dwarf, the first steel mesh door will rise, and the archer will pivot firing its bolt across the room into small slit in the stone, a clicking sound will be heard from the dwarf warrior statue.
The dwarf statue can now be rotated, and if faced towards the exit wall, a mechanism will be triggered to cause the portcullis bars to fall into the ground, and cause a portion of the floor to fall several inches downward, and slide inward, revealing a keyhole in the metal door.
Touching the metal axe of the dwarf, it breaks off and rusts - revealing a small metal puzzle piece in the shape of the keyhole.
Inserting this into the lock causes the room to flicker and the party to return.
Encounter 6: Hand Axe Challenge
The characters must put out all sources of light, and any characters with darkvision must close their eyes. The bottom of the stairwell will reveal itself to the players if they continue to walk in complete darkness.
It can not be seen whenever it's there
It fills up a room, it's much like the air.
It can not be touched, there's nothing to hear
It is quite harmless, there's nothing to fear.
Encounter 7: Leaving the Dwarven Feasting Hall
Once the Dwarven Chalice of Hammerheim is touched, the room shimmers and you find yourself back in the "Public" Dwarven Hall.
The statues will animate and move to attack. If the party had thought to disable them in some manner, then the encounter will be trivial, otherwise it will rage on. The statues will attempt to recover the chalice - even leaving the dwarven hall.


