The Rescue of Worldswing
| Type | Dungeon |
|---|---|
| Status | Explored March 832 TA |
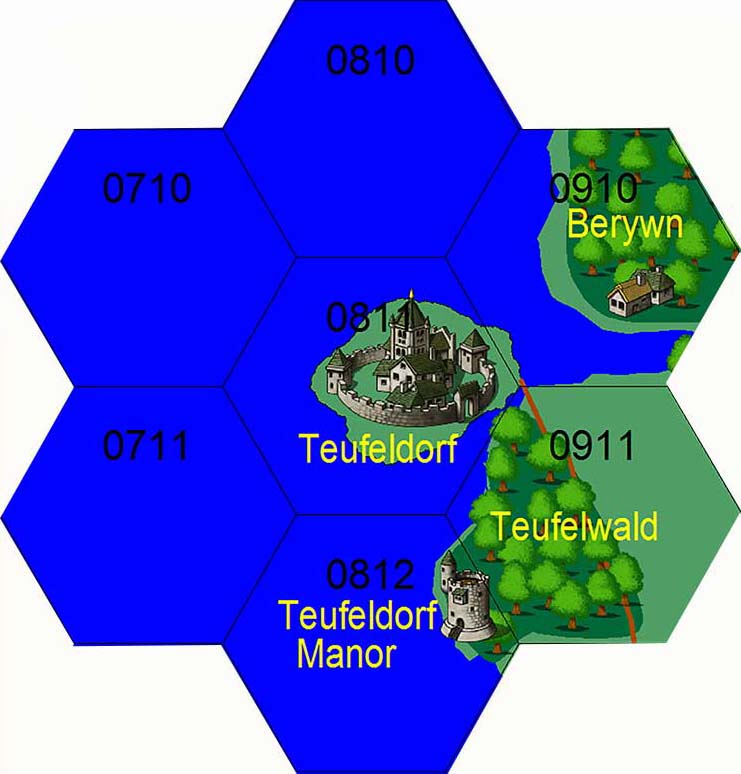
| Location | Teufeldorf |
| Hex | 0811 |
| Campaign | The Third Age of Man (middle) |
| Adventure # | 38 |
The Last Few Days
Today is March 13, 832 TA. You are in Teufeldorf at a pub called the Dragon's Egg.
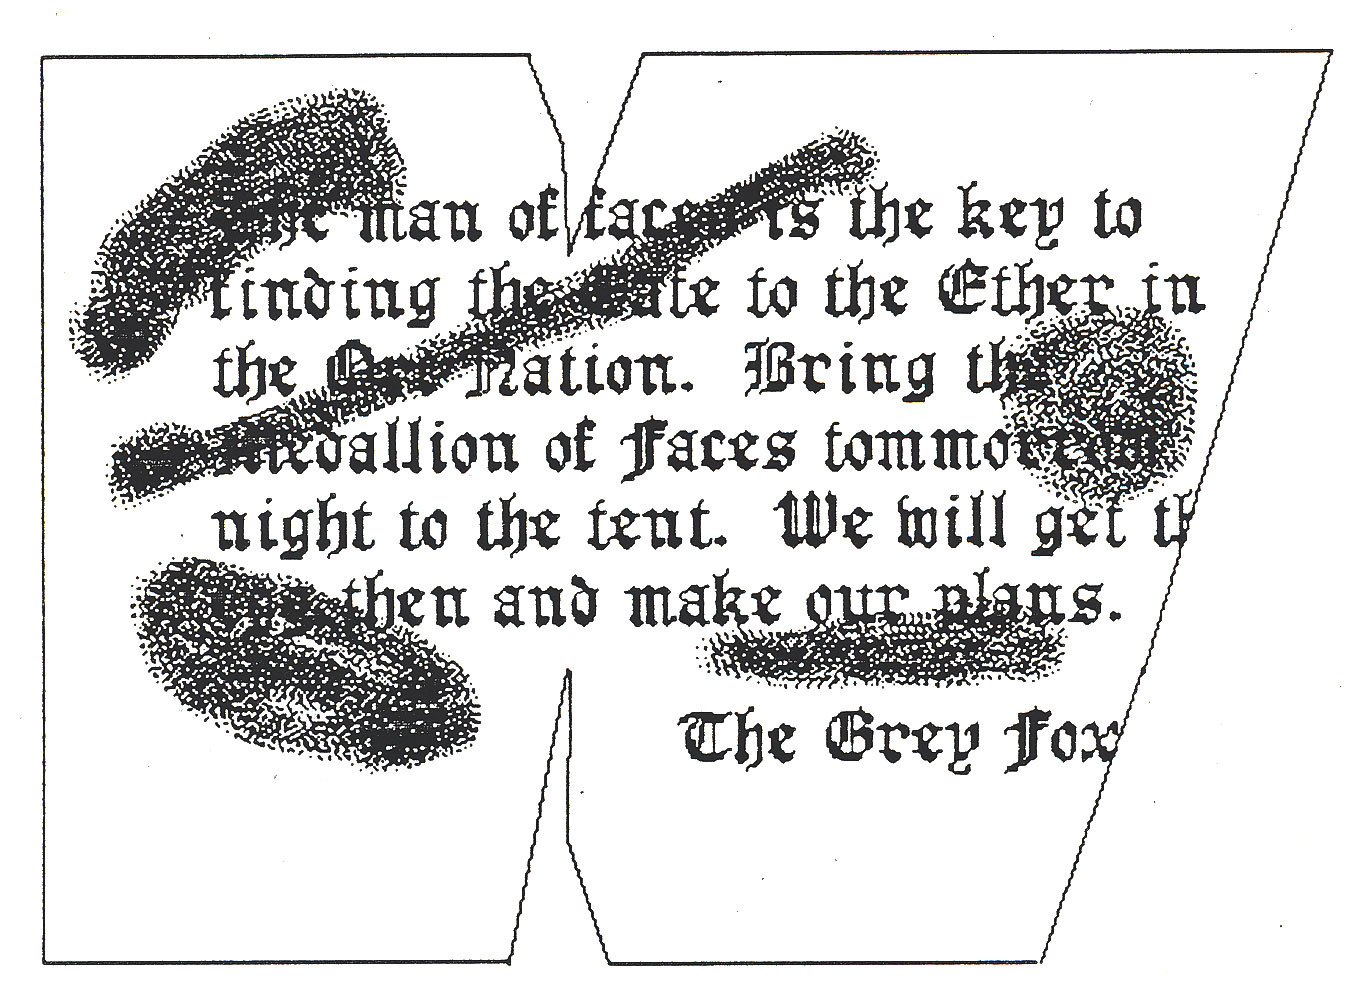
In the morning, you were awakened early by a pounding on your door. When you opened the door, you noticed that a message had been tacked to it. Quickly searching around for the culprit, you could find nobody nearby.* The message reads as follows:
|
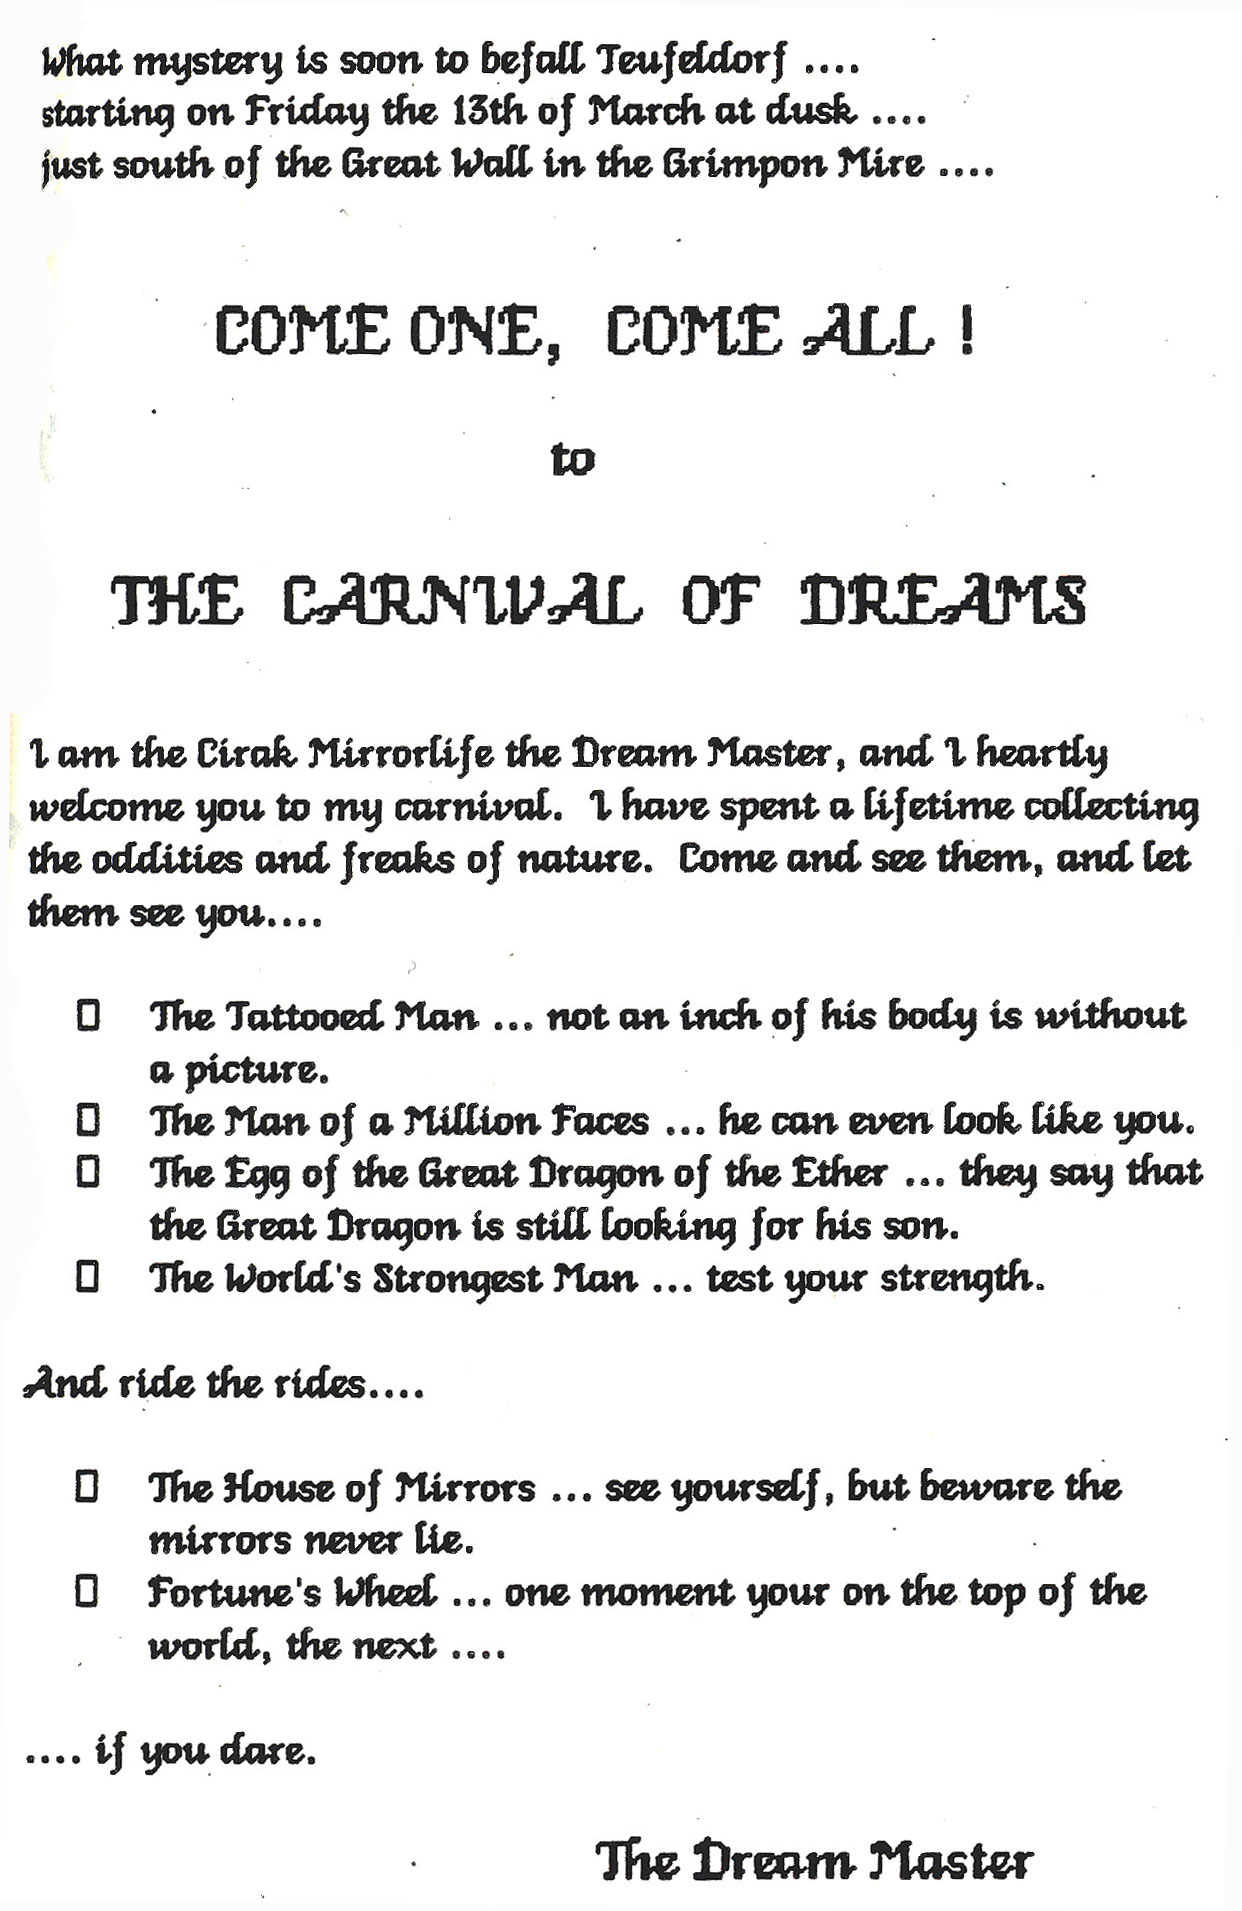
In the afternoon, the streets of Teufeldorf came alive with many young children parading around in bright outlandish clothes. At first, one may have thought the children of Teufeldorf had gone mad, but a closer inspection showed that these small clowns weren't actually children at all. True, they were about the size of young children, but their faces and hands were those of very old people. Gayly laughing, one of them came up to you and handed you a leaflet and winked at you. Before you could question him, the child/man spun off and went jogging down the street.*
In the evening, a strange fog settles on the city, and it is hard to see more than a few feet in front of you. The area of town where the Dragon's Egg is located is known for its unsavory characters and rampant crimes. On a night like this, no sane person would journey in that neighborhood. Undaunted, you set out for the pub. As you near the Dim Fountain, a man staggers towards you and falls. He beckons you over and whispers into your ear: the man of faces... the egg, beware." And he dies. You notice a large knife protruding from his back. Suddenly, you hear the cry of voices, "Murderer, get him!" You can hear the sounds of feet coming towards you. In this part of town, murderers are often punished outside the law. you run onwards to the Dragon's Egg.*
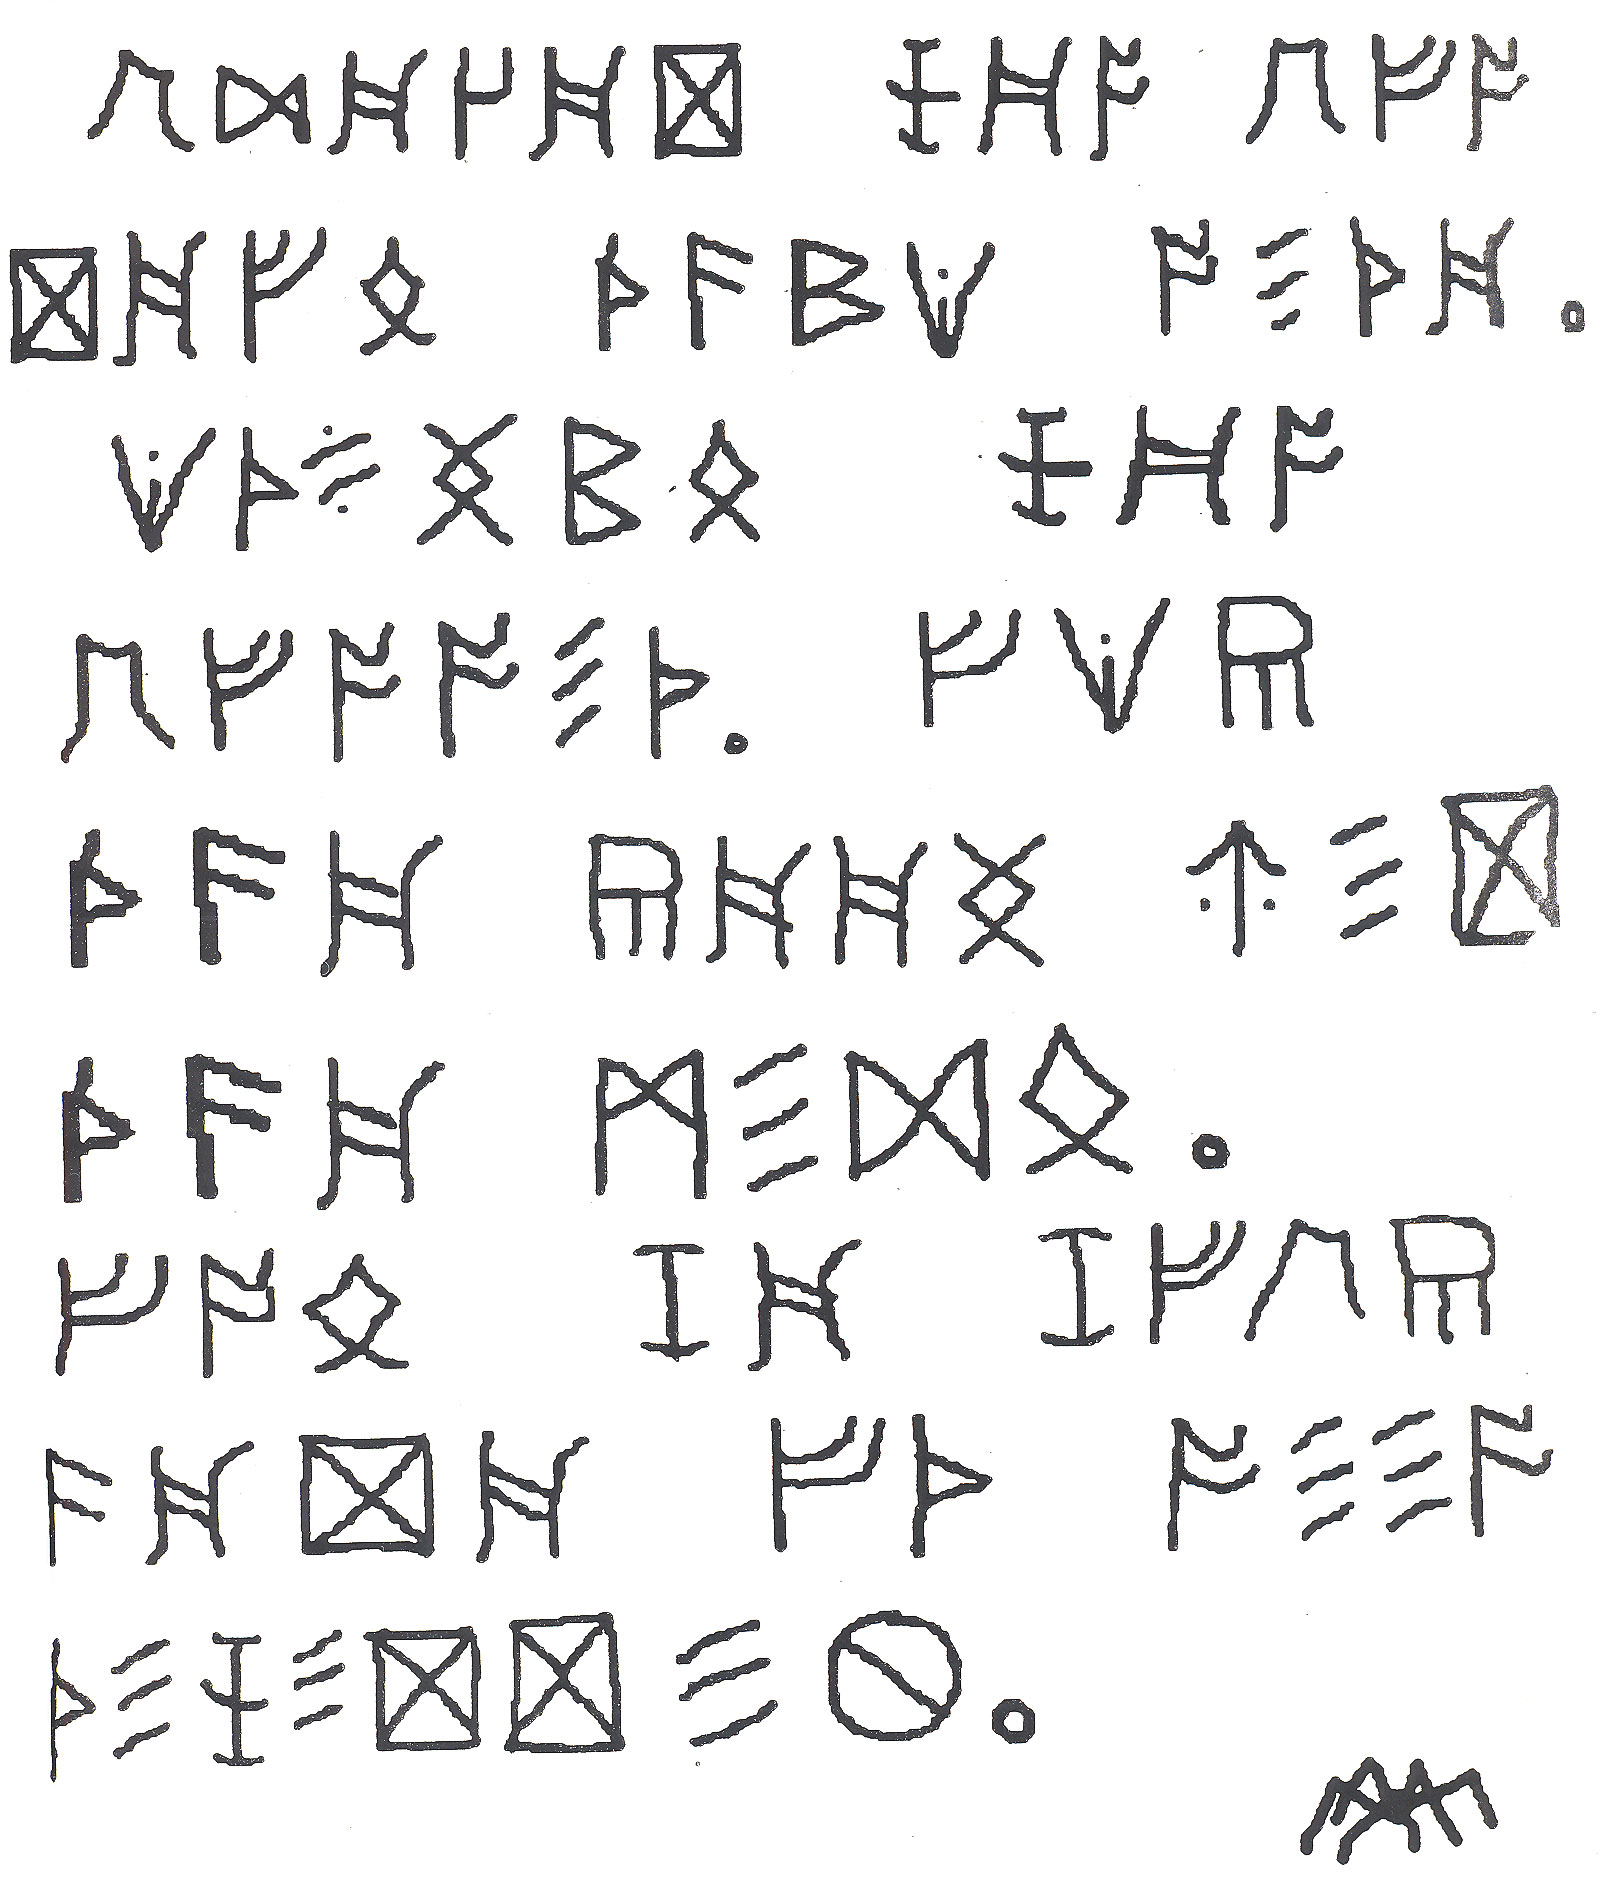
As you arrive at the Dragon's Egg, you notice that the patrons are all crowded around the dart board near the front of the bar. As you move closer, you see that a message has been posted on the board. It is written in a strange tongue. It is about 10 minutes after 10pm.
As you sit in a booth overlooking the crowd, an old man enters the pub and studies the message. He exclaims loudly that what is written is not a foreign language, but it is rather a code. The patrons laugh at the old man, and quiet him with a large drink.
You overhear a conversation in the booth behind you. Four men are planning a trip. One is a large bald man with a scar across his forehead wearing leather armor. The other three are wrapped in black cloaks and hoods, and you cannot see their faces. You can only catch small pieces of their conversations.
- Something about stealing the dragon's egg... the legend
- A mention of the gate within the Orc Nation
- Tomorrow night... the fortune teller
- Treasure beyond all measure
- Murder and the duplicate
What do you do?
Legend: Worldswing the Great Dragon of the Ether
It is said that the Realm of Man is separated from the Realm of Gods and Devils by a substance known as the Ether. The only way one may travel between the different Realms is through this Ether. Since the creation of the world, this Ether has been ruled by the Great Dragon. Being of a neutral alignment, the Great Dragon known as Worldswing has kept the Realms separated, allowed very little travel between them. His control over the Ether supposedly rests on the Artifacts of Ethereal Rulership. Over the centuries, historians have surmised that these items (if they exist) include a crown, a net and a staff. He who possesses these items controls all movement through the Ether. The only other fragment of the legend that you can remember has to do with Worldswing's greatest treasure, his son. However, the Great Dragon's son is yet an egg. Worldswing is said to guard the egg in order to assure that chaos will not reign after his death.
A Guide to The Great Castle of the Ether
To get an idea of how the castle looks, compare your picture and your map. The Great Keep is the large domed tower on the left hand side of your picture, the short tower with a cone-like base in the middle of the picture is the Low Tower, the tall multi-spired tower is the High Spire atop the Square Tower,and the two small turrets on the far right side of the picture are the Gate Towers. If you have not explored the interior of the castle, your map will have a large square labeled the Great Keep. Otherwise, other details will be shown. The black square at the top of your map is the only gate into the Castle (not shown on picture). The entire castle is made of a black shiny substance. The Great Outer Wall is 4 stories (80 feet) in height.
THE OUTER TOWERS: These large round towers are divided into three segments of three levels each. Thus, each tower is nine levels high. Only the top two segments (levels 4-9) have windows. These are much too small for a human to enter. There seems to be some sort of landing on the top of these towers. There are three outer towers.
THE GATE TOWERS: These are more like turrets than towers. They are stuck on the top of the Great Outer Wall on either side of the Gate. They have medium-sized windows which are about of human proportions. The Gate Towers seem to have but one story (level 5) and would most likely lead onto a rampart on top of the Great Outer Wall.
THE GREAT KEEP: The central building of the complex, the Great Keep is entirely within the walls of the castle. It has ten stories. You know only that the top level has small windows. Little can be discerned about the Great Keep.
THE SQUARE TOWER AND HIGH SPIRE: The Square Tower makes up the base for the high spire. All the windows in this complex are small. The Square Tower itself is ten stories (levels 1-10) in height (with windows on levels 4-10). On the tenth story there are four observation turrets of one level each (level 11) and a landing. The High Spire continues on for three more stories (levels 11-13). The highest of these levels has a landing.
THE GREAT TOWER: This tower is segmented similar to the Outer Towers. By looking at the windows, one would conclude that total number of levels in this tower would seem to be five. The three lower levels have no windows. The upper two levels, however, are twice as wide as other towers in the Castle. This tower is also covered by a great dome about two stories in height. The windows in the upper two levels are very large and would easily fit a human. Thus, the lowest three levels are of normal proportions (levels 1-3), the next two are twice as big (levels 4-5 and 6-7), and the dome represents two more potential levels (8-9). Attached to the GREAT TOWER is a smaller tower of three levels. The upper level has the same large windows and a dome. It seems as if this smaller tower is connected only to the Great Tower proper.
THE LOW TOWER: This tower has a total of three levels. The lower two of these are conical in shape and have several small windows. The third level has no windows and a large dome. This tower appears to connect only to the Twin Towers.
THE TWIN TOWERS: These towers are similar in all respects to the Outer Towers except that they are only six stories in height and have windows only on level 5. Also, these towers are domed.
Adventures in the Great Castle of the Ether
Response to having the note tacked to the door: None.
Response to having the leaflet handed to you by the clown: None.
Response to the dead man: Check knife for poison. Take knife. Place into robe.
None found. Taken. Placed in robe. The knife in his back is an ornate throwing knife of foreign make.
Response to the dead man: Search man.
He is wearing a set of chain mail carefully hidden under his cloak. A quick search of his belongings reveals a note written in orcish. It is badly stained with blood.
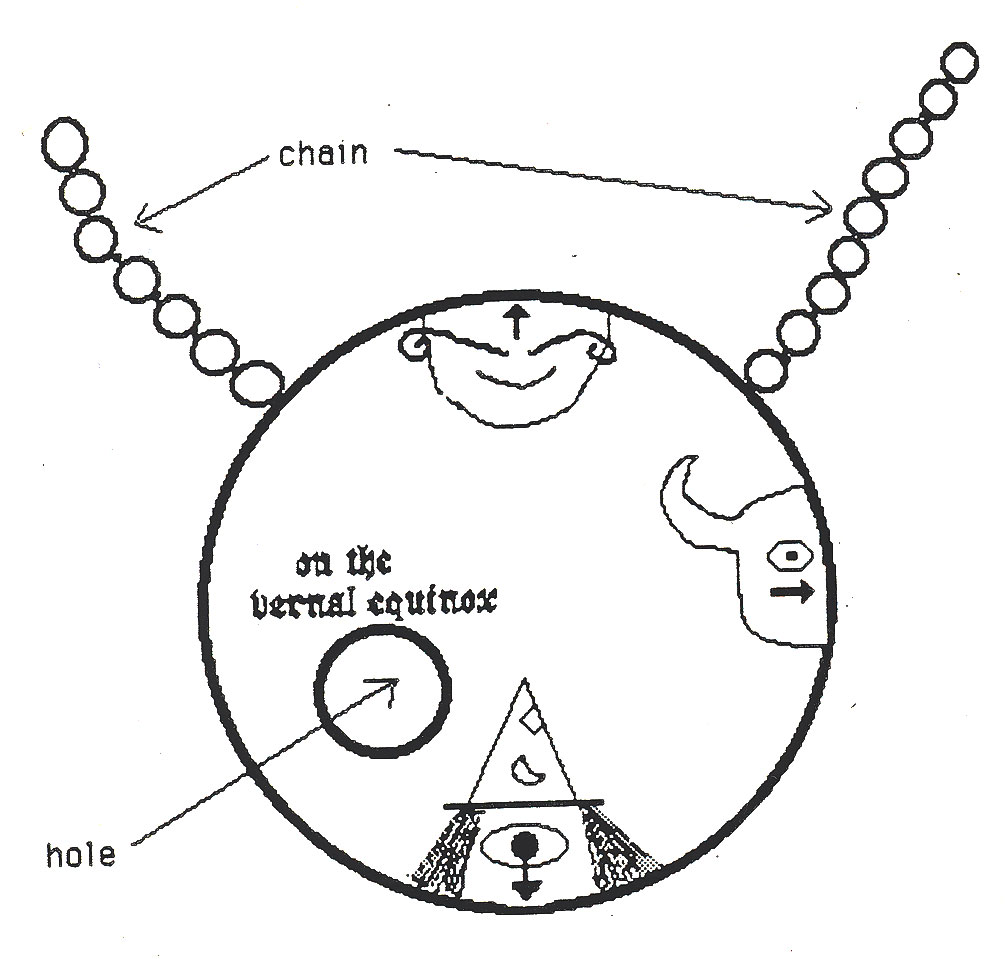
The only other thing that the man has on his person is a medallion. Searching the body has stained your clothes with blood.
Next Response: Face crowd. Attempt to find killer with Ring of Truth.
A group of persons of a most unsavory nature come upon you. They see the blood on your cloak and immediately start screaming murderer. One man yells, "Call the King's Guards!. Another one yells, "They won't do anything. He is not even a man. Justice is in our hands. Get him." And yet a third person yells, "He must be the Waterfront Murderer! And a foreigner at that!"
As the group charges with clubs raised to kill you, you have time for one spell. Hylax polymorphs into a bird and flies away. Angry cries of kill the wizard" and "Did you see his face?" are heard. The crowd is very frightened by the magic and disperses into their own homes. Several men carry the body to the local gravedigger to be buried. You cannot follow and get to the pub.
Response to the pub scene: Check daggers for similarities.
They are of similar make.
Next Response: Ask the bartender for the gold.
He hands you a bag with 36 gold squares in them. Some squares have letters on one side, some both, and some none. The barkeep turns and walks away without saying anything.
Next Response: Try to overhear the conversation of the hooded party.
The most you can gather from the conversation between the men is that the large man with the scar wants to steal the dragon's egg from the carnival and replace it with a forgery. Their plan to meet at the fortune Teller's tent tomorrow night, steal the egg, and head for the ore nation.
Next Response: Leave pub. Go to carnival as a bird.
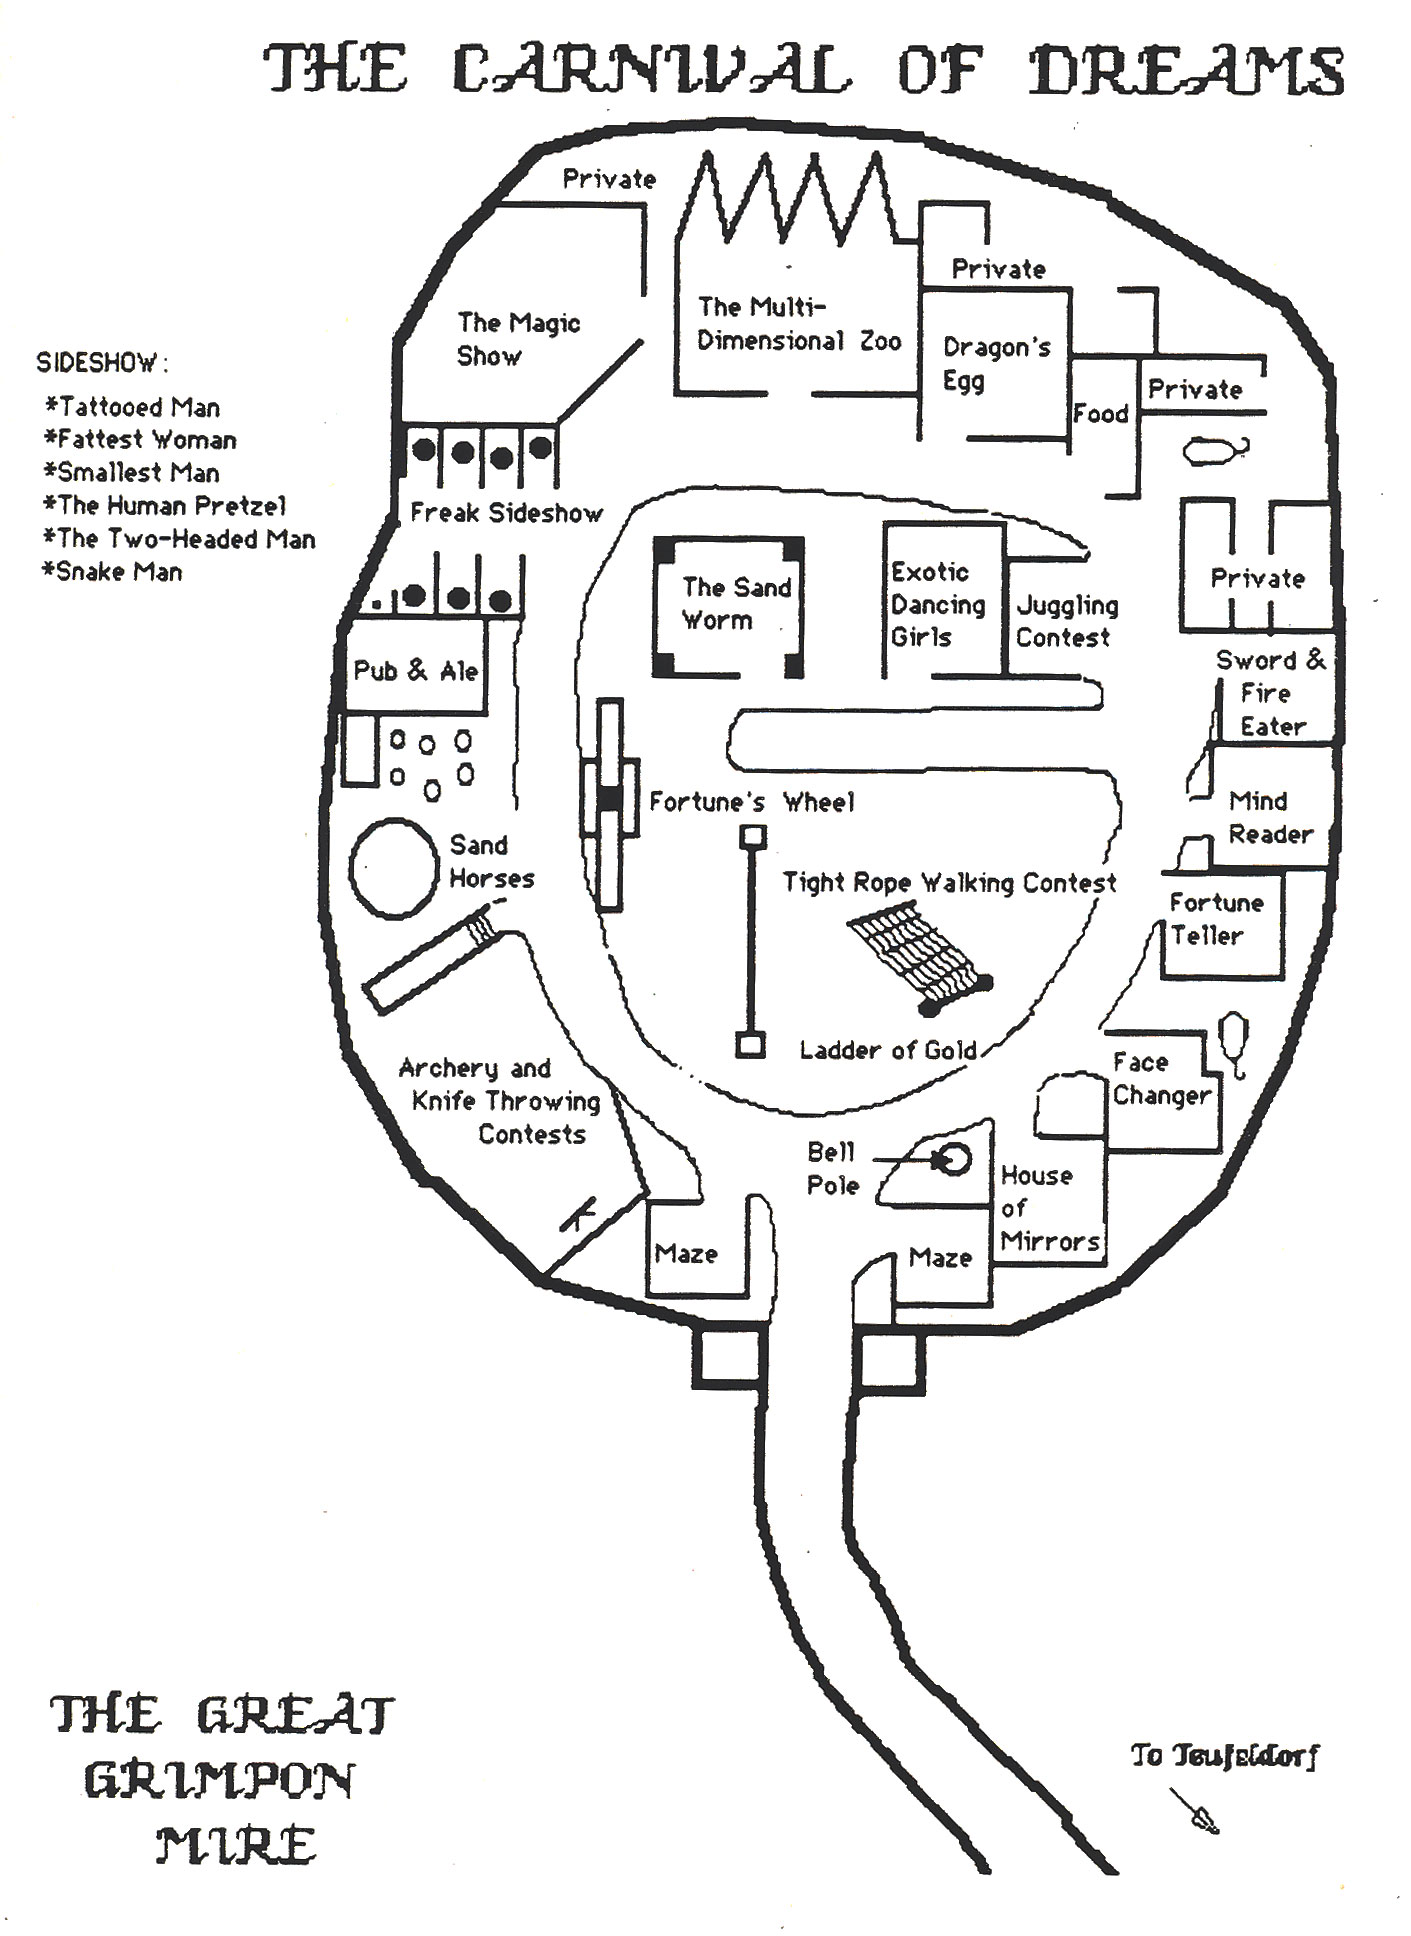
The carnival is closed by the time that you get there and everyone seems to have retired to sleep. You may make a general map of the area.
Next Response: Go to King Gregory to ask about the dagger.
King Gregory knows nothing about the dagger. He suggests that you go to the Trader's Market and see Kevin Knifesblade at the Knives and Wives shop. Kevin is one of the leading experts on knives in the city. King Gregory knows nothing about the mob scene.
Next Response: Go to the Dragon's Egg at noon.
The next day is bright and sunny. There is no hint of the heavy fog that hung over the city the night before. You go to the pub at noon. Upon reaching the pub, you notice that the door is closed and a note is tacked onto the outside. A small group of children (normal ones) are playing around the Dim Fountain. There does not appear to be anyone else around the pub. The note reads:
|
As you approach, the barkeep comes to the door and hands you aprinted on a small scrap of paper. This note reads:
|
The handwriting on each of the notes is the same. The barkeep shuts the door without saying a word to you.
Response to the children around the Dim Fountain: Question them.
Upon a more careful investigation, you realize that the children playing around the Dim Fountain are actually watching something that is going on inside the fountain itself. Floating in the fountain is a miniature replica of a merchant ship. The model is about one foot long. The fountain is about 20 feet in diameter. On the back of the boat is written the name The Lost Horizon. The mainsail of the small ship is adorned with the symbol for infinity written in black. The children seem to be trying to snatch the ship from the water. However just as the ship seems headed directly for one of the groping urchins, it abruptly changes direction and heads towards another part of the fountain.
You ask them about the note and get no response. The children seem intent on catching the elusive ship.
You jingle 10 silver pieces in front of them and get their undivided attention. The largest boy in the group says that the bartender tacked the note onto the wall. He holds out his hand for the money.
You pay him.
Next Response: Go to Knives and Wives.
Kevin Knifeblade is more than happy to help you in strictest confidence for 300 gold pieces. He looks at the knife very carefully. He tells you that it is of southern make. A knife like this is very common in Sandal and the Southern Reaches of the Sands of Time. The knife, he continues, is very well balanced. He says that he knows of no one in Teufeldorf who makes such weapons.
Next Response: Check out the carnival.
The carnival is in full swing when you get there. You pay the 3 silver piece admission, and you are almost immediately swamped in the crowd. People shove you and push you. You continue without incident to the knife throwing contest. You notice that the knives that the carnival champion uses match the one that you have.
Next Response: Investigate the Lost Horizon.
You find out from King Gregory (who is becoming annoyed at your constant pestering) that the Lost Horizon is indeed a ship. It arrived in port several days ago carrying the carnival people and supplies. A special request was made of the king by the DreamMaster to unload the dangerous animals. King Gregory does not know where the ship has sailed from.
Response to the ship in the Dim Fountain: Throw detect magic.
Casting a spell sends the children into screaming panic, and they an run way from the area. Several of the bigger children watch you from a goodly distance. You detect a magical aura. Do you wish to cast Fetch?
Response: Return to carnival. Look for the infinity symbol around the grounds. Check out the tattooed man. Check out the Dragon's Egg.
You rush back to the carnival and pay the 3 sp to enter. A quick but careful search reveals no sign of the infinity symbol anywhere.
To see the tattooed man, you must pay 3 cp. The tattooed man is in a medium-sized tent. He is a very large man with no hair. He is standing on the top of a pedestal, and people are slowly circling about him. His body is covered with thousands of small faces. By rippling his muscles, he is able to make the faces do different things such as wink and smile. The face are similar to those on the medallion.
Next you visit the Dragon's Egg. It is in a very small tent. There are many guards around the tent. People are paying 10 cp to see the egg. Only 4 people at a time are allowed to enter the tent. Upon entering, you see that the egg is very large. It is almost round. It is goldish in color, and it seems to shimmer. as if it is about to disappear. There are 4 guards inside the tent who keep you from touching or getting too close to the egg. Inside the tent, it is very dark.
Next Response: Go to harbor. Find The Lost Horizon.
The harbor is dark and gloomy by the time that you arrive. You find a willing peon and pay him 1 sp to show you the location of the ship. It is easy to find. The ship is a large galley. There are many guards around the gangway. There are no flags or sails flying at this time.
Next Response: Polymorph into bird. Return to Fortune Teller's tent.
By the time that you fly back to the carnival, it is closed. There are many of the carnival people helping clean up. You fly into the Fortune Teller's tent to find that it is empty. However, in the corner you see a large round bundle (of familiar proportions). Using your beak, you manege to tear away a small piece of the cloth. Inside is a shimmering gold surface similar to the one you saw earlier.
Response to the ship in the Dim Fountain: none.
Next Response: Go to harbor. Find The Lost Horizon. Talk to guards.
The harbor is dark and gloomy by the time that you arrive. You find the ship. There are many guards around the gangway. There are no flags or sails flying at this time. You approach the guards and say, "Hey dudes, this is where the gold told me to go!" One responds, "Get lost, kid." He is telling the truth. Their disposition improves when you give the lot of them 5 gold pieces. "The meeting, sir, is not tonight, but if you return on the morrow, your questions may be answered." He is still telling the truth. "And who is the Master of this ship?" you ask. "Cirak Mirrorlife, of course." The truth again. You leave.
Response to the Fortune Teller's Tent: Unpolymorph. Check for guards. Cast detect magic. Grab egg. Polymorph. Fly to house.
Done. None. Some. Done. Done. Home.
First Response: Eat breakfast.
Yum. It was good. You are very full. Scrambled Dragon's Egg is very filling. The stolen egg is hidden carefully in your room. It seems real.
Next Response: Buy scroll.
As all good magic-users know, and Instant Summons spell works only on non-living objects up to 8 pounds. I assume that you do not need this spell. However, the magic shop in town is more than happy to sell you a Forget spell for three times its value. You pay 900 gold pieces for the piece of parchment.
Next Response: Polymorph into Falstaff T. Druid and go to Thieve's Guild to hire a thief.
A guild mistress, Johnna Darkblade, agrees to send a thief to the Bloody Ram Pub and Grill at noon. She takes your 100 gold pieces and tells you that a thief known as Sly will meet you there. She describes Sly as a thin man with a long cut over his left eye. She also sells you a sleeping potion for 100 gold pieces. The vial contains one charge.
Next Response: Get wax copy of Amulet made. Meet with Sly.
The copy of the Amulet will take 3 dags to complete and require that you leave it overnight at the jeweler. You decide not to make a copy. Thieves have their own code of honor. Sly agrees to your plan except no spells will be cast on him. The job is child's play, but he will have nothing to do with wizardry. He agrees to meet you at the Harbor Haven Inn.
Next Response: Unpolymorph . Go to pub. Meet with Sly again. Get amulet and directions.
You go to the Harbor Haven Inn to meet S1y. He arrives and not noticing you waits at a nearby table. He does not seem to be followed. You go over to him and introduce yourself. He does not believe who you are and will not give up the information. Finally, you are forced to go outside, polymorph back into a famous Druid and return. The thief seems skeptical, but he gives you back the amulet and a piece of paper. On it is written the following message:
|
The thief tells you that the circle enclosed part of a poem written on the man's chest. Your basic knowledge of topography places the Fetid Swamp in the middle of the Ore Nation. The thief takes the 200 gold pieces and vows silence. Forget ???????
Next Response: Go to Lost Horizon for meeting.
The evening proves to be as foggy and damp as the night before. You are not able to see very far into the night. As you near the ship, you see a man dressed in a brown cloak talking to the guards near the gangway. You can tell by their conversation that the cloaked man is their leader. As you cautiously approach, the cloaked man turns and sees you. You see a leather bound book in his right hand. He calls out, "HYLAX T. BARKER. I should have known that you 'would figure it out." As he approaches you, you see a shadow move in the gloom nearby. Before you can react, a blaze of blue light flashes out and the man's cloak and book drop to the ground. Nothing can seen of the man who once occupied it. The guards near the gangway (thinking that you might have done this) come charging towards you. But before they get near you, a ball of red fire blazes from the gloom-hidden robed figure and kills the men. The man quickly turns towards you.
The robed man is about 30 feet away. The remains of the captain are about 20 feet away. The crew and the gangway are about 30 feet away. There are many crates and boxes behind which you or the robed man may hide.
First Action: Melee.
Hylax casts an anti-magic shell. The cloaked figure casts a fireball - which fails - and flees - limping. Hylax chases him for a few rounds, but his disappears.
Second Action: Look at book. Return book and robe to first mate. Ask about meeting.
The book is a leather-bound tome entitled "Travel Log". It lists the ports of entry, the dates, and the cargoes picked up and delivered for a ship. It seems to date back roughly one year. You are rather hurried, and you do not get a good chance to look at it. The first mate takes the book and robe. The first mate tells you, "Due to the untimely death of the captain, I'm afraid that our plans have fallen through. We are sorry that we wasted your time. But your services are no longer needed. Good bye Mr. Barker.
First Action: Introduce yourself to the men. Question the first mate discretely.
You talk to the first mate for a short time. He does not lie to you about anything. You learn the following information from him. The first mate's name is Drego of the Watchful Eye. He has worked on the Lost Horizon for five years. He does not know who the killer is. The captain was a man known in many ports around the world. He was known as the Sea Dog. His private life was very mysterious. He proved himself to be a clever sailor and an excellent leader. Your name was known when the note was tacked onto your door. With most of the crew killed and the captain lost, the quest seems hopeless. Only the captain knew the plan to get the egg. Without the egg, there is no need to continue. To continue the quest a crew would have to be hired, the ship restocked, and a few minor repairs made. Someone will have to come up with the money. The crew ts very poor. Nobody else solved the puzzle (as far as they know).
Second Action: Read the travel log.
The first mate is reluctant to let you see the book. He said that if you would like to swear to the quest (and to the cost), then you will get to study the book as closely as possible.
Third Action: Return Home. Sleep. Eat Breakfast. Go to mapmaker. Get map to the Fetid Swamp.
You return home without incident. You sleep well. Your breakfast is good. You go to several mapmakers before finding a nice 10 gold piece map to the Fetid Swamp.
Fourth Action: Ask the Collegium Magicium about a limping magic-user.
Nobody knows anything a limping magician. The person must be a free-lancer (or perhaps he is not a magic-user).
First Action: Send Drego to hire crew, provision ship, and repair ship.
Drego is able to do all of the things that you want him to do with exactly as much money as you gave him. Drego does not know anything about what happened to the captain's body. He is telling the truth. He says that he thinks that Baliol may have taken him to the haunted depths. You rather doubt this. Drego still knows very little about the captain's past. Sorry. The Lost Horizon is equipped and ready to sail the next day.
Second Action: Get the travel log from Drego. Study it.
Drego gives you the travel log. It tells you that the Lost Horizon has come up the coast from Sandal. Its last Master was Cirak Mirrorlife the Dream Master. He used the ship to take supplies up the coast from Sandal. The ship made a stop at Thunder and lightning Point to pick up a large package from the pirates. The package was said to contain the dragon's egg. The pick-up was made in secret by the pirates, Cirak, and the captain. After unloading the supplies for the carnival, the crew was told that Cirak would be taking the carnival by land. The crew was still officially under Cirak's hire. Cirak was not trusted or respected as a sea leader.
Third Action: Test egg with True Seeing.
The egg is a genuine dragon's egg. However, the displacement effects have been added. Also, the true color of the egg is green. You conclude that this egg is fake.
Fourth Action: Make insulated crate for egg. Store on ship.
Done. Done.
Fifth Action: Meet followers. In the process of hiring the crew, you meet four rather strange figures volunteering help. They know nothing about sailing (the dwarf doesn't even know how to swim), but they are willing to work for free. You find that they are very loyal type people.
Final Action: Question crew.
The crew very grudgingly allows you to question them. Several of the men want to quit already. They say that they don't want to work for somebody who doesn't trust them, but they agree that answering a few questions is infinitely easier than the Nuclear Option. One man says that he ain't goin' to work for no runty kid that dresses funny (he means your hat). All things said and done, the crew doesn't think too highly of you (low morale in the face of danger). As you are ready to get underway, Drego points out that you questioned only 49 of the men. One man is missing. He might have either missed the boat (too drunk from the night before) or he might be a stowaway. It would be very difficult to find a man who know the ship hidden somewhere in it.
Finally, Drego brings something to your attention. There has been a giant sea dragon of sorts terrorizing boats outside of the Teufeldorf Harbor. The thing is said to breathe fire and acid. Also, he forgot to buy medicine in Teufeldorf.
Final Action: Send Drego and Humphery to get some medicine for the journey.
Drego and Humphery go into Teufeldorf and buy bandages, gauze, sea sickness pills, etc. They manage to spend 29 gold pieces. Drego also manages to find a sailor to replace the missing one. This costs you an additional 40 gold pieces. You question him, and he seems okay. It takes Drego several hours to do all of this.
Second Action: Give crew speech. Offer week's wages for any man who can tell you about the sea monster. Send men to their rooms.
The crew seems pretty uninspired by your speech. You hear a familiar voice say, I ain't goin' to lissen to any skinny runt kid ten me about sailin'." One sail or leaves. After you offer a weeks wages to the crew, you get 45 different accounts of the sea monster. You now owe the 45 crewmen seven gold pieces each. You pay them (315 gold pieces). You do learn some valuable information from them. The only two common denominators in all of their stories is that the monster only attacks at night and always in the fog. (Fog is very common along the coast.) The crew gladly goes to the common room (bunkhouse and mess hall) to count their recent pay. The crew thinks that you may have several screws loose, but they seem to like you a bit more.
Third Action: Conjure bloodhounds. Cast Detect Hagic. Search for stowaway.
Melanie conjures several nice bloodhounds to find the stowaway. You search the ship's holds and stores. You notice several large crates towards the front of the hold which bear foreign markings on them. Drego says that they are used for ballast during a storm. The fake egg is safe in its box.
Hylax casts Detect Magic. There are several small sources of magic onboard. Several of the men seem to have magical daggers. One of the weaponeers has a magical long sword. Other than that you detect the magical sailing charms, and a magical wine flask. There are no sources of major magic aboard. The hounds meanwhile do not turn up any stowaways living in the holds, with the other men, in the staterooms, or on deck. The ship seems to be free of aliens.
Final Action: Unfurl sail. Sail away.
When you unfurl the blue and silver pennant of Hylax, you hear someone say, "1 ain't goin' to sail under the flag of no gopher. I don't care what the little kid says. As is typical of Teufeldorfian evenings, it is foggy and damp when the sun finally sets. You decide not to drop the sails and set anchor. The men have expressed an interest in getting way from the monster-ridden port as soon as possible. You are about 3 miles south of the port. It is about midnight. And suddenly, from out of nowhere, two large icebergs appear in front of you. There appears to be sufficient room for your ship to maneuver between them. However, you have never heard of icebergs this far south at this time of year. To circumnavigate both would require a quick turn. You notice that a red lamp is glowing from the crow's nest. To the best of your limited knowledge, this is a very unusual practice. What are your orders admiral?
First Action: Turn ship hard to port.
You immediately order the ship to be turned away from the icebergs. As the ship veers off away from the encounter, you can see that the icebergs are really part of an elaborate ship. The icebergs themselves are actually giant floating wooden structures. Their fronts are disguised as to look like icebergs to oncoming ships. However, just below the waterline the icebergs are connected by a metal bar. Any ship trying to pass between the icebergs would crash into the bar and sink. The rear section of the iceberg ship has decks on which you can see men standing. The decks are positioned so that if a ship were to crash into the bar, the men would be able to swing and/or climb down onto the sinking ship. Below the decks are large pools full of (you guessed it) dry ice. The dry ice is causing the incredible fog bank that hides the ship. The ship has no means of propulsion itself being rather squarish and bulky. Ho¥ever, you see a small transport barge floating nearby. You can guess that the barge pulls the icebergs from place to place. From your position, it looks as if you can easily outdistance both the icebergs and the barge.
Second Action: Cast Darkness on the crow's nest.
Casting the spell causes the red lamp to disappear from sight.
Third Action: Send Ichabod Nimb1efingers to the crow's nest.
Ichabod climbs into the Darkness spell and disappears from sight. This is a fairly risky
Wrap-Up
Today's date is January 12, 833. It has been a number of months since the strange carnival of Cirak Mirrorlife the Dream Master came into Teufeldorf, and a number of Realm-shaking events have taken place since then. First, what has been happening with your party.
The last time we saw our adventurers, cryptic clues had been left on each of their doorsteps by the captain of the Lost Horizon. He was in need of intelligent and cunning companionship. U-Gene, Vince, and Ernie, however, were caught up in enjoying the life that Teufeldorf had to offer and decided to ignore the plea. There they stayed until the storm hit, and they were forced to flee from the city. Ohm, Fuzzwort, Hylax, Sirfexx, and Falstaff were intrigued by the situation and began to investigate. Ohm ran into many dead-ends and subsequently returned to the quiet city life. Falstaff, in the guise of a humble bookseller, rode the flaming chariot of Sustare to Sandal. Before he arrived, a king's messenger arrived, took charge of his books, told him of the desperate situation, and pleaded for his noble help at Rivershaw castle. Hylax, Sirfexx, and Fuzzwort masterfully travelled to the Ether avoiding many traps and pitfalls along the way. After saving the Realm from the evil usurper Merdebax (which is another story altogether), they were transported back to Rivershaw castle by WorldsWing, the Great Dragon of the Ether. And so the party is gathered together again.... This time to forge a kingdom for themselves.
The time is mid-July, 832. With the exception of a short trip to the Chapel of Silence, the party had been resting and enjoying the spoils of their previous campaigns. Then, the strange carnival of Cirak Mirrorlife the Dream Master came into Teufeldorf. Cryptic clues were left on each of their doorsteps by the captain of the Lost Horizon. He was in need of intelligent and cunning companionship. U-Gene, Vince, and Ernie, however, were caught up in enjoying the life that Teufeldorf had to offer and decided to ignore the plea. Ohm, Fuzzwort, Hylax, Sirfexx, and Falstaff were intrigued by the situation and began to investigate. Ohm ran into many dead-ends and subsequently returned to the quiet city life. The others left Teufeldorf by various means and left no trace as to where they had gone. And so it remained for several months.
