Party at Haggelthorn Hall
| Type | Dungeon |
|---|---|
| Status | Explored November 907 TA |
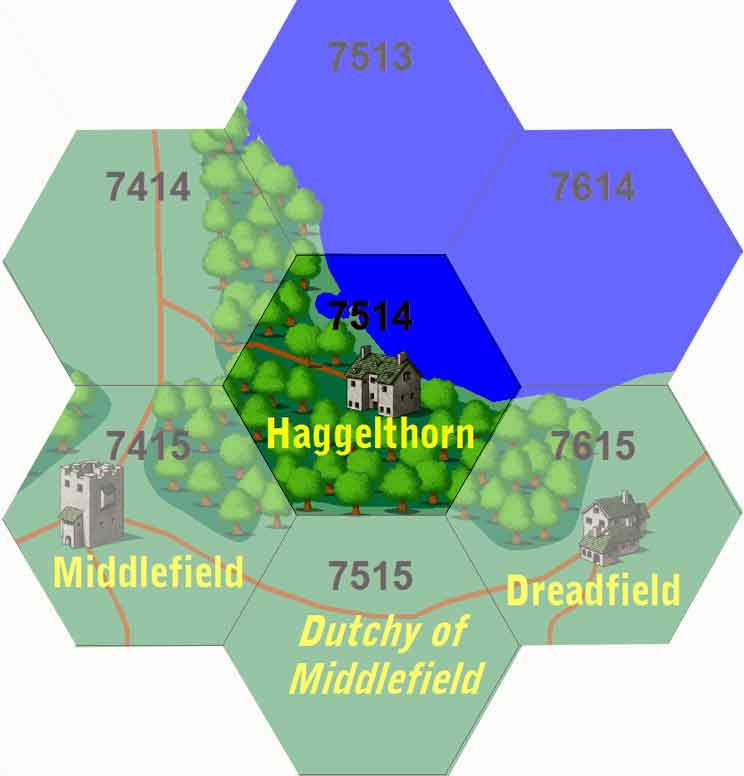
| Location | Haggelthorn |
| Hex | 7514 |
| Campaign | The Siren's Song |
| Adventure # | 128 |
What Has Gone On Before...
The Party at Haggelthorn Hall is a celebration of the destruction of the Great Storm and the finding of the wings of the Wanton Wench. In Elias' mind, it is also marks the beginning of a business partnership with the Merchants of the Wanton Wench.
The necklace stones will glow when a Haggelthorn needs him. It also lets him know where the Haggelthorns are all times.
The party is ushered into the ballroom of Haggelthorn Manor to meet with Elias, who is sitting in an overstuffed leather chair near the fire. A small table with a whiskey decanter sits in the middle of five additional chairs that have been arranged around the fire.
Elias Haggelthorn is the patriarch of the family.
He was married to Henrietta Haggelthorn, but she died many years ago - apparently of a poisoning. His father took the Hall back over from the Brimbleweeds who squatted on the property some seventy-five years ago. Elias has two sons - Mortimer and Maxwell. Mortimer is tall and fair, Maxwell is tall and dark. Both look slightly elven, although their mother Henrietta was a short, stout woman of human descent. Mortimer is currently is Teufeldorf, and Maxwell is on a Tang Trader on the Great Sea - both on family business.
- He will ask their tale.
- He knows of the Wanton Wench having met with Henry Hyde in early May (May 1-3) and concluded business with him - giving him a chest to take to the Overlord. Where is it?
- He is intensely interested in Java. He had heard about her from his man in town (Ashby Baker) who had bought a few barrels of coffee beans from Jareth just a few months ago. Ashby had told stories about how Java could imitate any sounds and even cast spells. He will treat Java like a most important person.
- Elias takes the letter and reads it. After a few moments, he gets up and paces to the fireplace, crumples the letter and tosses it in. "You don't know any assassins in Portsmith, do you? I need to have Jana Blackfire killed. The bitch is proposing a search of all ships and cargo coming into the port for contraband and other items of a sinister nature. Sinister nature. Bah. Enough. She is going strangle my trade east to the dwarves."
The Gifts
- Gretchen Horn - upstairs maid + book thief
- Marisol Merrywidow - downstairs maid
- Zachary Pearson - groundskeeper/handyman
- Anna Lee Morrow - housekeeper (matron)
- Chase Wallace - footman
On staff:
- Eleanor Lacy - cook
- Frederick Morrow - butler
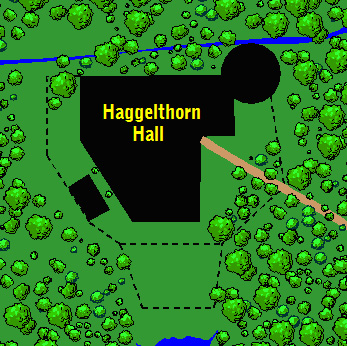
Approaching Haggelthorn Hall
Outside
Graveyard
This is the corpse of the last person to have betrayed the Haggelthorns. He will do his duties until a new traitor is found. Current = Roland Dumpt (see Room 17). Current - Gretchen Horn who stole books from him to sell at Bull & Finch.
Graves of note:
- The head of Derek Brimbleweed is buried under a headstone that reads: Grave Of Unnamed Baby Boy, October 31, 790 TA. Digging through the reddish-brown clay yields a cloth sack containing a severed and slightly decomposed head. You also find a small plain wooden coffin. The coffin is child-sized.
- A fresh, unmarked grave in the yard contains the body of Sebastian Finch.
- A fresh grave with an elaborate tombstone reads, " Ostelinda Gray, Mystic, Friend, Advisor".
Front Entrance
Haggelthorn - West - First Floor
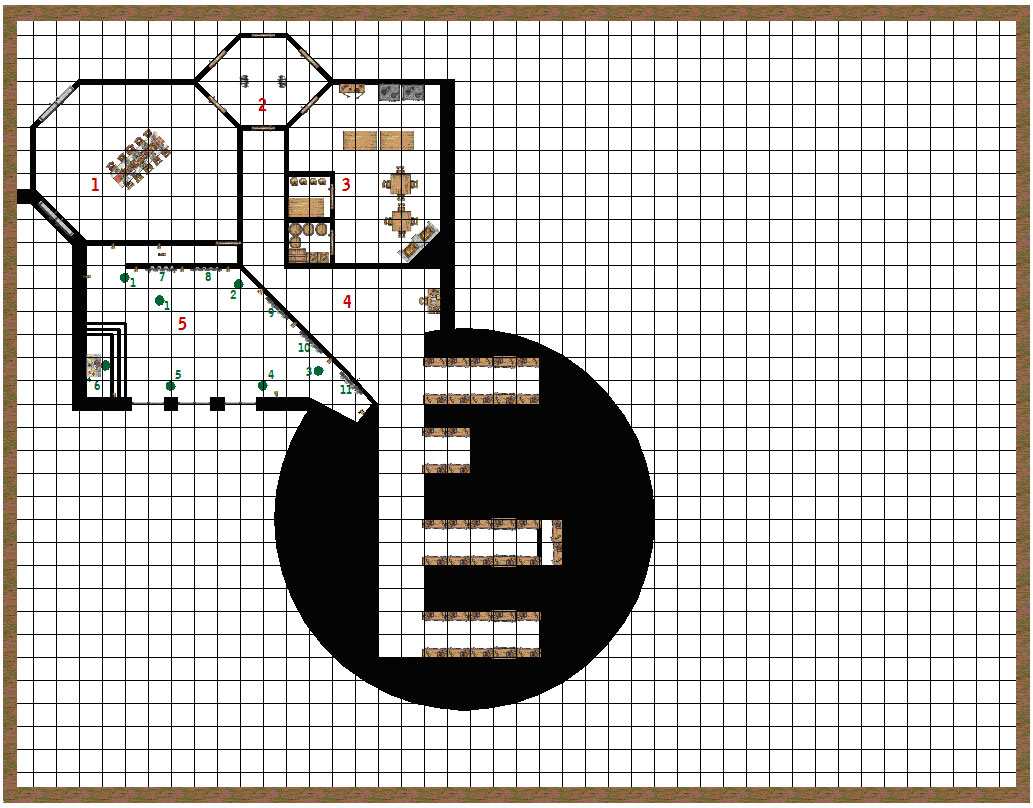
Room 1: Entryway
The three silver candlesticks are quite heavy, and you think that they may be very old and solid silver.
Room 2: Anteroom
Room 3: Kitchen
Two doors lead to pantries. The first is a small room containing several large wooden casks, a rack of wine bottles, a pan of tepid water, and about forty tankards. Behind the second door, you find four deer and carcasses hanging to cure. There are several very sharp knives in this room.
Room 4: Wine Cellar
NOTE: The ledger book is for the Haggelthorn household (the Brimbleweeds never opened it). If studied carefully, one will find that there are several bottles of poisoned wine for unwanted guests.
It looks as if the second hallway was under construction as it is shorter than the rest.
At the end of the third hallway is a secret room containing several bottles of priceless wine. In addition, several Potions of Healing and Poison antidotes can be found by a careful search.
Room 5: Art Gallery
NOTE: There are only two magical items in the room: the door in the northeast corner and the altar.
The door in the northeast corner is very strange. It has a blue and red haze across it. Several strange runes are carved on the door, and you notice a slight shimmering around the edges of the door.
The exact source of the magic seems to be strange runes: a petrifaction glyph of warding.
The large windows on the east wall looks out over a dark courtyard filled with trees and hedges.
- This is a statue of a old woman wearing a large hooded cloak. Her hunched form and disfigured face are quite revolting. In one old gnarled hand is a staff, and the other carries a lantern. The workmanship of the statue is very good.
- The scene portrayed by the gruesome statue makes you want to turn away. Carved in a black polished stone is the effigy of a young man being eaten by a large lizard-like creature. From the look on the young man's stone face, it appears that he is in great pain.
- This is a statue of a young man dressed in a chain mail shirt, leather trousers, and leather boots. The young man is dark-featured. From his belt, hangs a plain long sword. On his right hand, the young man wears a falconry glove. A young hunting hawk sits on the extended forefinger of the man. This statue seems to face statue 4.
- This is a statue of a young woman. She is very pretty with fair features. She is dressed in a formal court dress with a large voluminous cloak. Her hands are crossed and she seems to be watching statue 3.
- This object is not really a statue. On a dark pedestal sits a large glass crystal. The crystal is about three feet in diameter. It is a sphere with many facets. The crystal glows slightly.
- In the corner is an ancient wooden altar of some sorts. The altar sits on a large dais. Several steps lead up to the altar. There is a canopy hanging over the altar. In front of the altar is the statue of a priest wearing robes. All that you can make out of the priest is that he is praying. The altar area is very dark, but you can see four small objects on the altar. To the left side of the altar is a standing candelabra. A black taper sits in the holder, but it is not lit. On the back wall (above the altar), several strange runes of some kind can be seen. (see the Bricklebon below)
- This is a painting of three figures. The first figure is that of a dead boar. Sticking from the bloodied hog is the shaft of a dagger. Next to the boar is an injured young man. His blood stained shirt belays the fact that he has been gored by the boar. He is crawling towards the third figure, an old man. The old man is sitting just out of reach of the young man. His hands are cupped and filled with water. An evil grin runs across the old man's face.
- This painting is mostly black. From the blackness peers the leering face of an old man. Yellow stained teeth and wild unkempt gray hair are the most prominent features of the painting.
- This is a painting of a young knight dressed in plate armor carrying a lance. He sits on his horse overlooking a great chasm. On the far side of the chasm is a large white castle. The knight seems to be watching the castle closely.
- Two figures are battling on a great battlefield of corpses in this painting. The stormy plain shows no signs of life except for the two figures. The first figure faces you. He is dressed in a red cloak and tunic. He is fighting with a spear and wears a silver helmet with golden wings on top. He sports a red beard and long red hair. The second figure is dressed entirely in black. He wears black plate and a black cloak. He is fighting with a black longsword.
- The final painting is simply an dark silhouette of a skeleton against a red background. The skeleton is standing with arms crossed, but no other features can be determined.
The Bricklebon
The canopy overhanging the altar radiates a strong aura of magic (or perhaps something on top of the canopy). It is impossible to climb up to see on top of the canopy.
The priest statue is actually a human skeleton bent into a kneeling position. Over the skull of the skeleton is a mask of sorts. The mask looks like a symbolic representation of a hideous demon. Covering the rest of the skeleton is its cloak. The mask, cloak, and skeleton do not seem to be magical.
The candelabra is a large brass object, very large and very heavy. It is obviously not the same as the ones on the table in the dining hall. The black candle in the holder radiates a strong aura of magic.
On the back wall (above the altar), several strange runes of some kind can be seen. These runes seem to be different from the ones on the magical door. One might interpret the symbols as a chant of sorts. The symbols radiate an aura of magic.
The four objects on the table are: a tinder box (with flint), a book, a jar of dried herbs, and a small brazier (with a candle underneath). The brazier and herbs seem to be magical. The book is bound in a dark red leather. The pages are very well worn and a black bookmark is present in the tome.
Picking up the book, you scan the pages quickly. The book seems to be a series of incantations and prayers. The marked prayer has to do with summoning a creature called the Bricklebon. It is hard to glean much from the prayer except that the Bricklebon is a wily beast that will provide great service to any who is more clever than him. To summon the Bricklebon one needs to light the big candle, chant the prayer on the wall, light the brazier, add the herbs, and read the incantation from the book.
The Ceremony of Summoning
The Bricklebon Contest
The three-foot tall demon is leaning against a golden two-pan balance scale. The scale is almost as tall as the demon. Bricklebon holds a small bag in one hand. In the other, he holds a set of forty weights. The weights are small metal cylinders with the numbers "1" to "40" marked on them. The forty cylinders are set in eight rows of five in a wooden block. "In my left hand, I hold a bag of gems and jewels. The total weight of the bag is between 1 and 40 dragoons." The demon places the bag on the left side of the scale. "In my right hand," Bricklebon continues, "I hold forty weights ranging from 1 to 40 dragoons. They are yours." Bricklebon hands you the wooden rack and weights. "This is the Scale of Logic. He who masters the scale, masters me. Several of the weights that you hold in your hand are real, and the rest are deadly. You must choose the minimum number of weights that you might need to weigh this bag of gems. If you choose incorrectly, you will be my servant and must give me all of your precious possessions. If you choose correctly, I will be your servant and you may keep this bag of gems. Which of the weights do you need to weigh my bag of gems?" Bricklebon smiles thinking himself terribly clever. (ANS: 1 3 9 27)
Haggelthorn - East - First Floor
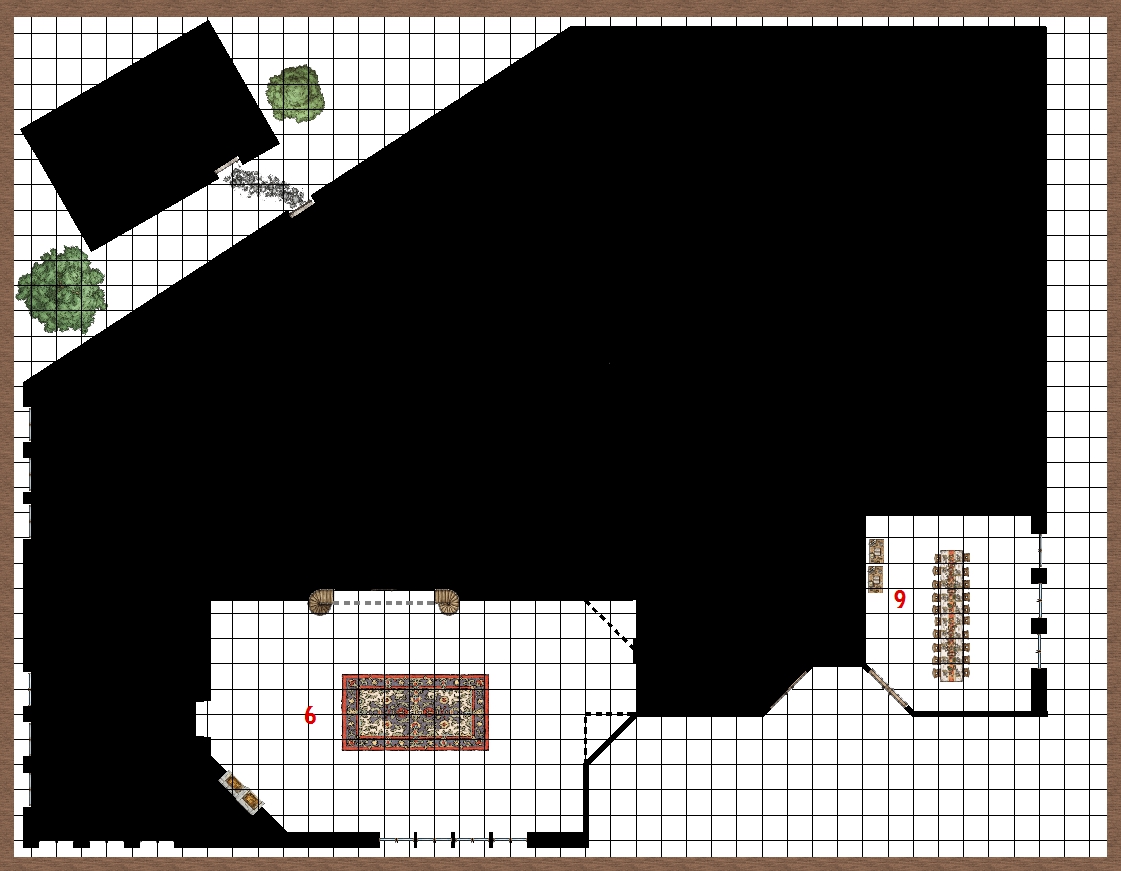
Room 6: Formal Ballroom
Stained Glass Golem
Room 9: Private Dining Hall
Haggelthorn - East - Second Floor
Room 18: Gameroom
The man is Thaddeus Haggelthorn (770-832 TA) - who steps out of the painting to chat with the party.
Room 19: Upstairs Maid's Room
This is Gretchen's room. She shares the bed with the other upstairs maid - Marisol. They are away on holiday at the Inn.
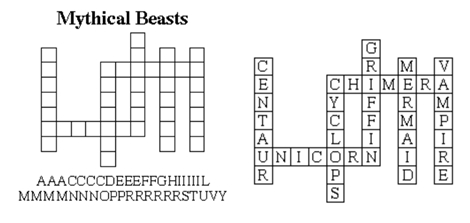
If searched, the party will find a lead-lined box at the bottom of the dresser. It covered with small etching of mythical beasts - although upon looking away, the image is forgotten. It seems impossible to remember what beasts are on the box. The top is locked with a grid of squares and letters.
It is locked with a puzzle. The box is non-corporeal in the dreamlands unless the puzzle is solved.
Inside, the box contains a bag of rubies worth several thousand gold and a bag of 200 gold pieces. A card inside the box reads "Finch & Bull".
Gretchen is selling the books to Sebastian Finch - a seedy little man who is giving her rubies in exchange for them.
Room 20: Nanny's Room
The door to this room is locked.
Upon entering, you notice the room is cold and a breeze is coming through a broken window in the corner of the room. This indistinct figure suddenly takes on a nightmarish shape, not quite human or animal or fiend.
Room 22: Office / Library
This is where Thaddeus's Book - "Edges of the Dreamland" was taken by Gretchen.
A number of volumes stand out in color in dreamland - most of them ancient tomes - several on summoning creatures from beyond the world, a number of treatises on death and the afterlife, several on contacting the dead, etc.
Room 25: Toy Room
The door to this room is locked.
In dreamland, this door is scratched near the bottom creating an opening large enough for a small creature to crawl through. The door is locked.
This is where the gremlin lives.
Gremlin Filcher
Room 26: Children's Bedroom
The door to this room is locked.
This belonged to the children in the portraits. It looks as if little has been changed in the last 30 years. The bones of the youngsters can be found here.
NOTE: A magical bow and quiver of arrows hang on the wall. The heads on the arrows show the outline of a bear. They will instantly slay black bears.
Room 27: Old Bedroom
On a desk in the corner are a number of letters written to the abbot in town asking his help in killing the other Brimbleweeds and splitting the treasure.
This magic circle is made of thaumaturgic powder and has been used to keep a malevolent presence out of the dreamscape.
Room 28: Parlor
Room 29: Phantasmagoria
Room 30: Smoking Den
NOTE: Upon entering the room in the mundane world, the party will be attacked by the gremlin - who will try to steal Finn's glasses and take them back to the dreamlands.
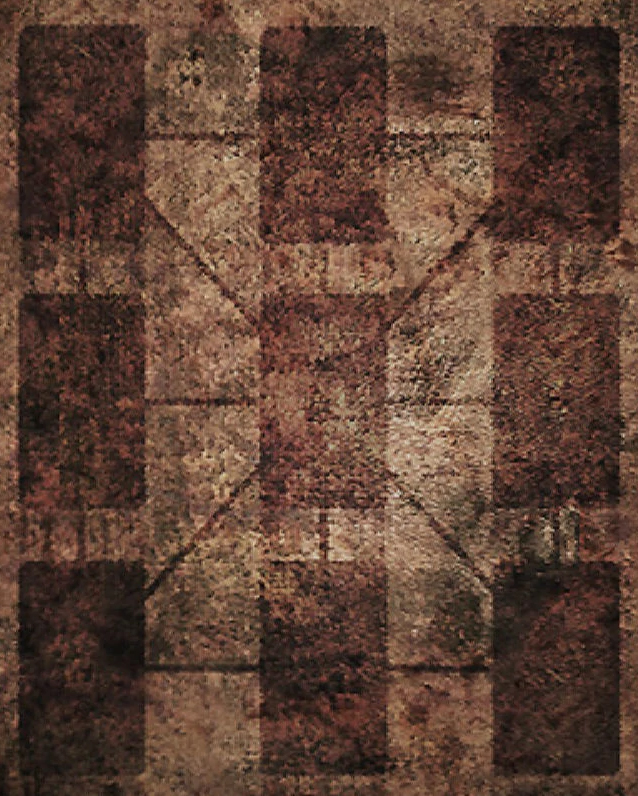
In the center of the room is a round table with several chairs. A set of tarot cards sit in the center of the table. A small leather mat sits in the center of the table - its slick surface appears almost wet and the hide shimmers.
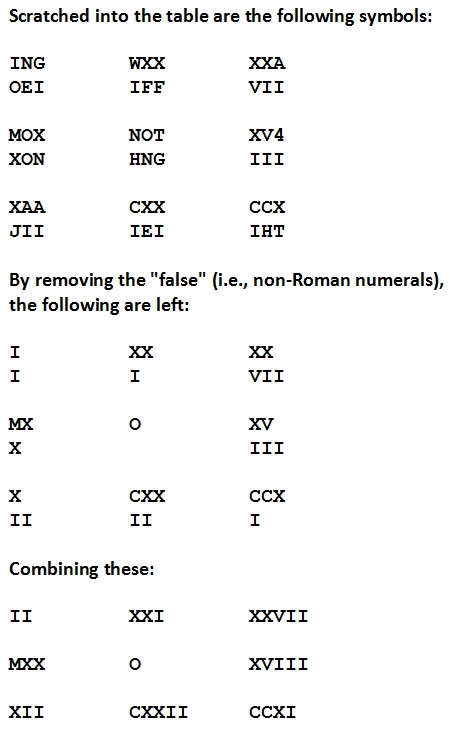
Slumped over the table is the form of a young woman, premature grey streaks running through her auburn hair. She is thin and dressed in dark green robes. Her hands are bloody, having scratched something into the table. Her face is red and bloated - eyes bulging and mouth open gasping for another breath.
These yield the cards of the tarot which need to be put into the appropriate spots:
- II = high priestess
- XXI = the world
- XXVII = FALSE
- MXX = FALSE
- 0 = fool
- XVIII = moon
- XII = hanged man
- CXXII = FALSE
- CCXI = FALSE
If the party solves the puzzle, the room will go grey - as if washed with color. The temperature will drop becoming chilly with a damp, oppressive weight. Chironomous will feel removed from the Gyre.
Room 31: Hallway of Trophies
In the dreamlands, the dead animals begin animating - disturbingly gasping for breath as other bleat and mew.
Animal Zombies
Dreamlands
In the Dreamlands is Lucy Haggelthorn - wife of Thaddeus Haggelthorn - grandmother of Elias Haggelthorn. She was killed by a nasty artifact that transformed her into the Dream Render. Now, she walks the Dreamland halls of the Manor looking for souls to take. She is glad her husband escaped and looks kindly on her grandson Elias. All others, she hates!
Lucy Haggelthorn - the Dream Render
