Hidden Skerry
| Type | Dungeon |
|---|---|
| Status | Explored November 907 TA |
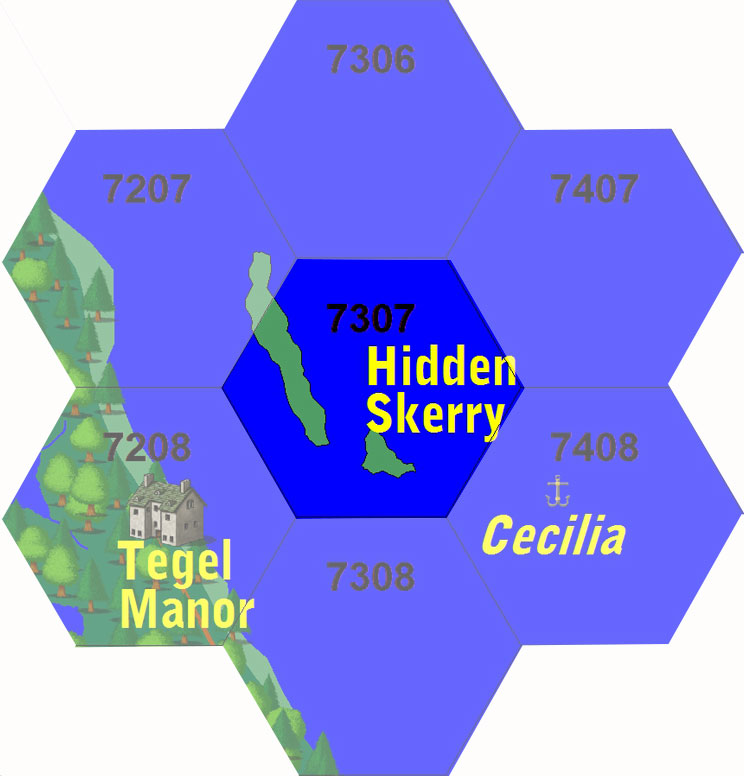
| Location | Hidden Skerry |
| Hex | 7307 |
| Campaign | The Siren's Song |
| Adventure # | 134 |
Current Situation
Ships of Roland Carver, the High Baron
- Cruel Doubloon - now under the command of Nathaniel Livings, currently lying in Ambush at Hidden Skerry. The previous commander, Captain Rookings, has been executed. The Giants (Ironbender and Hardmantle) and catapults have been transferred to the Mayfly for a later siege on Dragonsford Castle. - STORMCROW, GREMLINS
- Captain's Doom - Ship of Murkwell - Captain Algernon Hayhurst - STORMCROW, GREMLINS
Ships of Oliver "Three Fingers" Winters, Sea Baron of the East Winds
- The Urchin - at Broken Teeth
- Gray's Rage - at Broken Teeth
- The Black Lie - at Dragonsford in ambush
- Singing Strumpet - at Dragonsford in ambush
- Privateer's Plague - at Haggelthorn in ambush
- Stormrage - at Haggelthorn in ambush
- Night's Plunder - at Hidden Skerry in ambush
- The Rover - at Hidden Skerry in ambush
- Vile Compass - patrol northern waters
- Golden Barnacle - patrol northern waters
- The Silent Slip - patrol southern waters
- Warder of the Seas - patrol southern waters
Other Ships
- Mayfly - Captains Bates from the Old Kingdom arrived at Hidden Skerry for the delivery of the giants - pissed they are so far behind schedule
- Gilded Lady - gypsy ship
- King's Crown - Ship of the Reaches
- Lady of the Waves - Ship of the Reaches
Contract for Delivery of Goods - June 23, 907 TA
Captain Rooking and the crew of the Cruel Doubloon will pick up four magical dwarven trebuchets and its crew of two hill giant engineers at Courtshore on or before Jesterscap 907 TA. The cargo has been paid for by Overlord Theodric XIX. In addition, an advance of 10,000 gold has been paid to Oliver Winters, Sea Baron of the East Winds upon contract signature.
Captain Rooking and the crew of the Cruel Doubloon will deliver said equipment and crew no later than October 28, 907 TA to Captain Bates of the Mayfly at the rendezvous at Hidden Skerry. The contract balance - 10,000 gold - will be payable at that time.
Your signatures below, Captains Bates and Rooking, will be proof that this contract has been completed and payment has been made.
Oliver Winters, Sea Baron of the East Winds
| 9 November 907 TA
Sea Baron Winters, The situation in the western waters of the Inner Sea has become unbearable. As the ice slowly closes the Frozen Sea, our quarry is trapped. My orders remain the same. First priority is to capture the Wanton Wench and return her to me. I fear our quarry has become too powerful, so all ships should move in convoys of two vessels from here on out. As a priority, do not let Captain Bates leave on the Mayfly. Yes, I know it sounds odd, but I have my suspicion that the Overlord will make some claim to my ship. Since Bates cannot make his planned voyage to Teufeldorf with the four magical dwarven trebuchets, make him your guest at Hidden Skerry. I repeat, make sure the Mayfly remains in port. Meanwhile, the Cruel Doubloon will remain at Hidden Skerry as well. Captain Livings will represent me in discussions with the Old Kingdom. Keep them all well-fed and housed. Spare no expense. The ambush at Hidden Skerry remains. The Captain's Doom will remain hidden at the ambush as my representative and to take control of the Wanton Wench when she is overrun. Night's Plunder and The Rover will remain in the ambush fleet. I realize this is an extreme situation, so I am ordering you to deploy the remainder of your fleet thusly.
All ships are to attack the Wanton Wench on sight - but not sink her. All encounters with ships from Portsmith, the Old Kingdom or the Crown are to be friendly. Drop key personnel on shore to gather information when appropriate. We must find the Wanton Wench. Quickly. Roland Carver High Sea Baron |
Hidden Skerry Environs
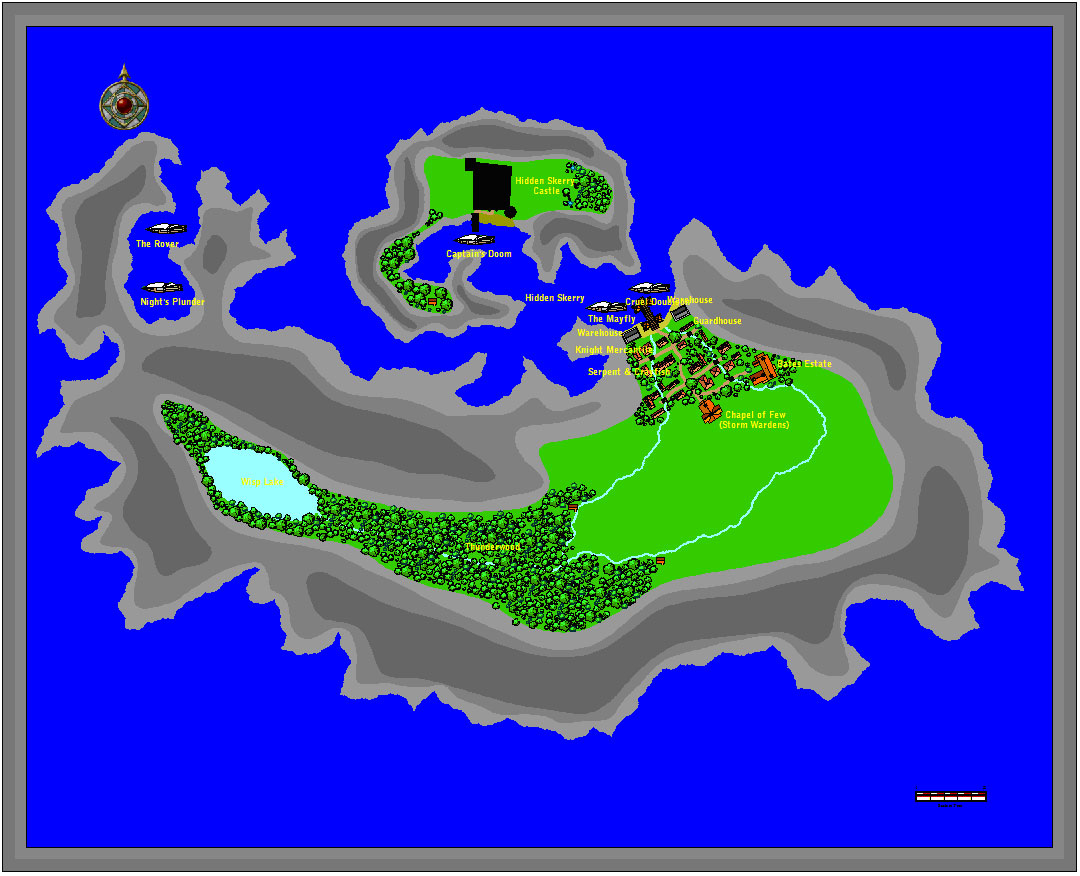
Hidden Skerry Town
- Merchant Keymaster/Dockmaster - Jessica Bates, Dockmistress
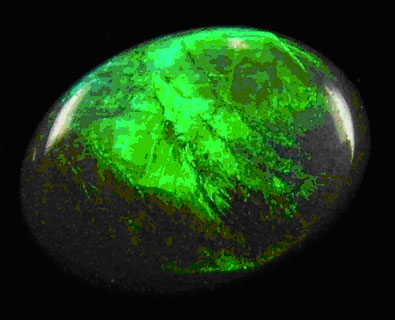
- Father Evan Black - Priest of Heh (see the Blue Baron) - has a glowing green emerald necklace about his neck. "My faith as given me a seat of the table."
- Mia Hawkins - Owner, Serpent & Crayfish
- Jake Knight - Knight Mercantile
- Vincent Hurst - Captain of the Guard
Rumors
- The ghost of Soliania (an ancient elf druid/paladin) walks the castle at midnight looking for any true neutral soul to bring back her knights.
- The Storm Crow is coming to Hidden Skerry Castle - which is why there are so many stormcrows here.
- Oliver Winters son - Jamie Winters - has disappeared. And Abigail Bates, the youngest daughter of the Bates family is thought to be complicit. Something happened. Secretly, they were engaged - onyx ring - but now Abigail hides in her room.
- The gibberlings from the Madman's Forest have been seen in town at night. It is not safe to wander the streets alone after dark.
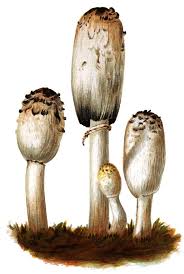
- Darkscape mushrooms will protect you from the gibberlings. Can only be found at the edges of Wisp Lake.
Secrets of Hidden Skerry
NOTE: Hidden under "fake" crenulations are a number of large ballistae on the ramparts point directly at the narrow cove and dock - the only approach by water. These are manned by guards dressed in gray, stone gargoyle suits.
NOTE: There are gremlins and stormcrows here!!!
The ghost of Soliania (an ancient elf druid/paladin) walks the castle looking for any true neutral soul to bring back her knights.
Tilden's Hunting Lodge
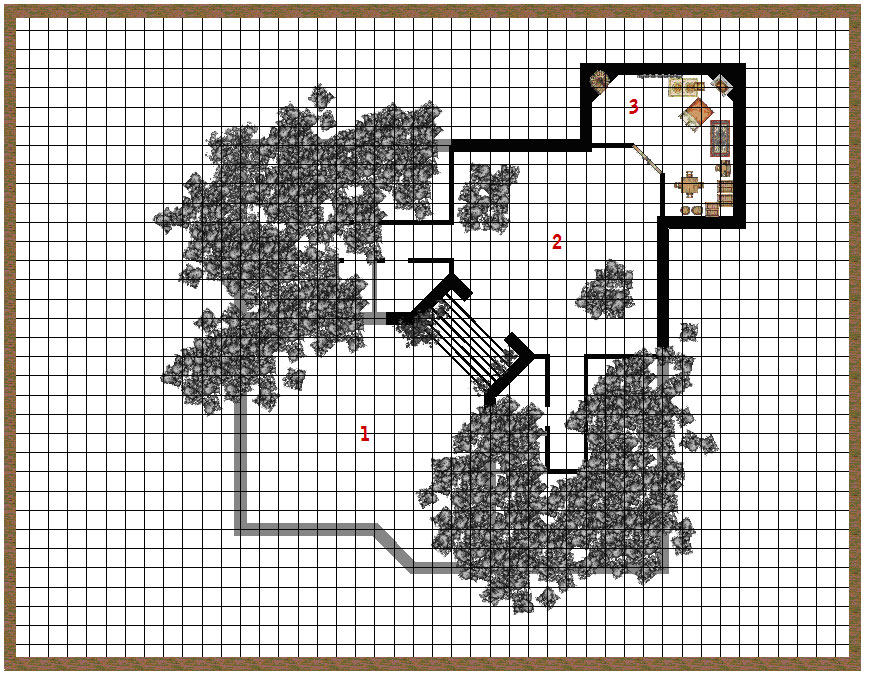
Legend of the Madman's Forest
In the late 860's TA, Hidden Skerry was under the control of a Sea Baron named Tilden Stampes. His reign was short-lived and mostly unremarkable. Having survived an orcish attack at a young age, Tilden harbored a deep-seeded resentment of orcs. Under his command, the fleet undertook a number of raids on the Orc Nation. He was fond of orcish trophies - heads, armor, weapons and banners. Most of these were too grisly for the castle - which served as the center of commerce and business. So, Tilden decorated his hunting lodge at the far end of Wisp Lake with his trophies. It is rumored that orcs were released into the forest in order to provide hunting sport for the Sea Baron.
Towards the end of his reign, Tilden spent more and more time at the hunting lodge - much to the consternation of his subjects. Some thought he had gone mad. One day, in late October 869 TA, an earthquake shook the islands of Hidden Skerry. The hunting lodge collapsed and Tilden disappeared - presumed dead. Shortly thereafter, strange hunched creatures - called the gibberlings - started appearing in the forest. Only seen at night, these creatures attacked those who entered the forest which was renamed the Madman's Forest after Tilden (previously, it was known as Thunderwood).
The forest is still used for hunting wild game during the day. But, nobody ventures into the forest at night. The hunting lodge remains ruins, and the gibberlings are blamed for any mischievous accident or missing person in town.
Real Story
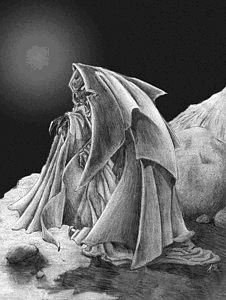
The source of the madness is the Grim Tapestry. It has the likeness of a hunchbacked, grinning creature in black robes embroidered on its surface. The creature magically trapped within the tapestry is the gibbering brood mother, a twisted, deranged horror from the Void. The brood mother feeds on psychic and magical energy - raw emotions of noble men and women give it power.
Recently, Jaime Winters and Abigail Bates - in a vain attempt to get away from their controlling parents - snuck off to the old hunting lodge (always during the day). There, they were free to love each other in private. In fact, Jaime gave Abigail an onyx ring as a betrothal token. The Grim Tapestry, however, has been watching over this exchange. It has convinced Abigail that Jaime is going to betray her. It has empowered the ring to allow Abigail to turn Jaime to an onyx statue. If this happens, TRUE LOVE WILL BE BETRAYED and the Brood Mother will be released!
NOTE: The party will stumble across Abigail heading - at night - to the hunting lodge with the ring.
Room 1: Courtyard
DC 20: Sets of human footprints lead across the courtyard and up the stairs. Hundreds of sets of small footprints can be seen randomly scattered about the area.
Room 2: Collapsed Great Hall
Room 3: Jaime Winters' Bedroom
NOTE: He will eventually be turned to onyx in this room.
The Journey of Abigail Bates
NOTE: The onyx ring is not cursed, Abigail is cursed by her proximity to the Grim Tapestry.
Gibbering Abomination
Gibberling
Hidden Skerry Castle - Level 1
NOTE: Hidden under "fake" crenelations are a number of large ballistae on the ramparts point directly at the narrow cove and dock - the only approach by water. These are manned by guards dressed in gray, stone gargoyle suits.
NOTE: There are gremlins and stormcrows here!!!
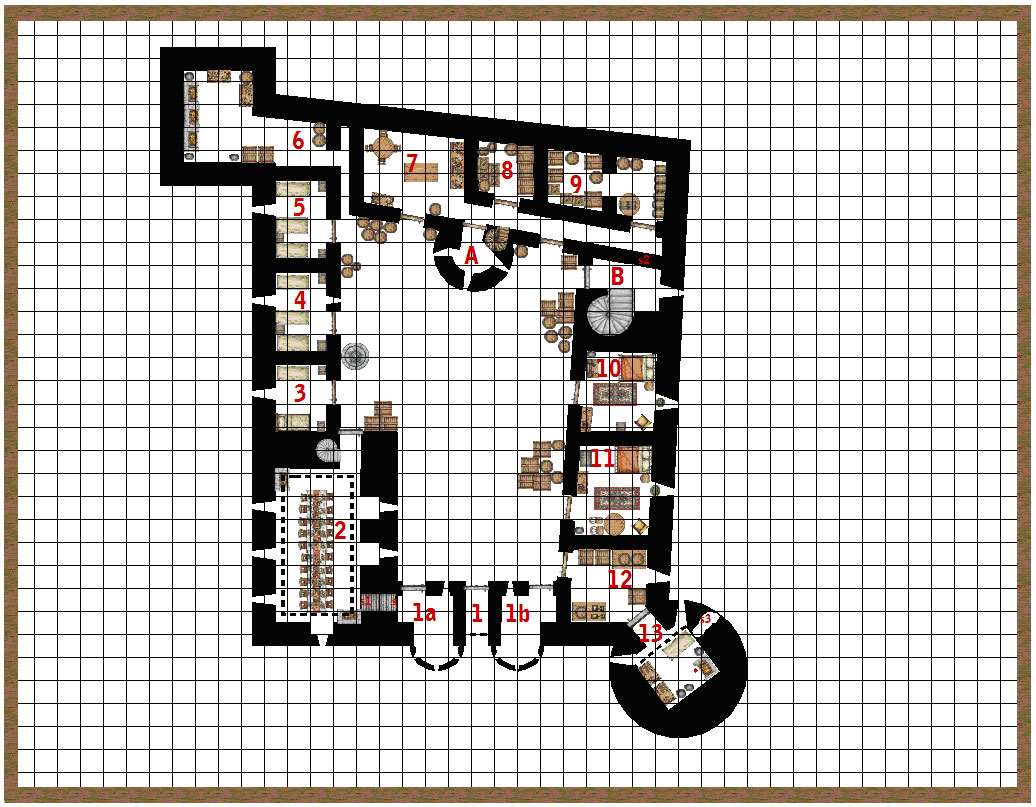
Room 1: Main Gate
The main entrance and the Rooms 1a and 1b always have three guards each in them. Each room has a bell in it which will be rung to signal the castle that invaders have been spotted. Otherwise, the rooms are empty.
Room 2: Old Hall
A number guards will be here at any time.
Rooms 3, 4, 5: Guard Rooms
Room 3 - 3 guards + captain
Room 4 - 9 guards
Room 5 - 9 guards
Room 6: Bakehouse
One oven is roasting a wild pig.
Room 7: Kitchen
Room 8: Storeroom
Room 9: Wine Cellar
The small chests contains seven very old vintage elderberry wine bottles from the Western Reaches. Sells for 250 gp per bottle on the Inner Sea market.
Room 10: Makeshift Nobles Quarters - Tillamun of the Old Kingdom
This is the room of Emmissary Tillamun of the Old Kingdom. He came on the Mayfly to conclude a deal with Oliver Winters.
Room 11: Makeshift Nobles Quarters - Stormcrow
This room is currently unoccupied. A bottle of Elderberry Wine from the Western Reaches in on the table here. A note of the bottle says, "Welcome."
Room 12: Brewhouse
Room 13: Dwarven Forge
This room is the domain of three dwarven prisoners who have been put into slavery to repair the weapons and other devices of Oliver Winters and his men. They are confined to the forge behind bars because of their refusal to pledge to the Sea Baron. The dwarves have a secret tunnel bored to escape, but they lack a means of transportation off the island.
Throdrek Grumblefoot
Skydock Steelstone
Thurgog Bloodsword
All from Clan Hammerfist in the Shadowyarn Mountains. They were in Hidden Skerry to trade steel weapons to the pirates, when they were drugged, locked up in the forge. The ship they arrived on was a merchant ship, The Merrymaker. The captain - Marcus Moran - seems to have sold them. They are anxious to get out and find Captain Moran and teach him a lesson. They are reasonably well fed and cared for, but they are prisoners.
- They have burrowed an escape tunnel behind the bunk beds - when the guard goes to relieve himself or get wine or water.
- They have also bored a shaft to the room above - which they think might be Oliver's bedroom. They plan to fill it with poisonous gas when the time is right. Never cross a dwarf.
Hidden Skerry Castle - Level 2
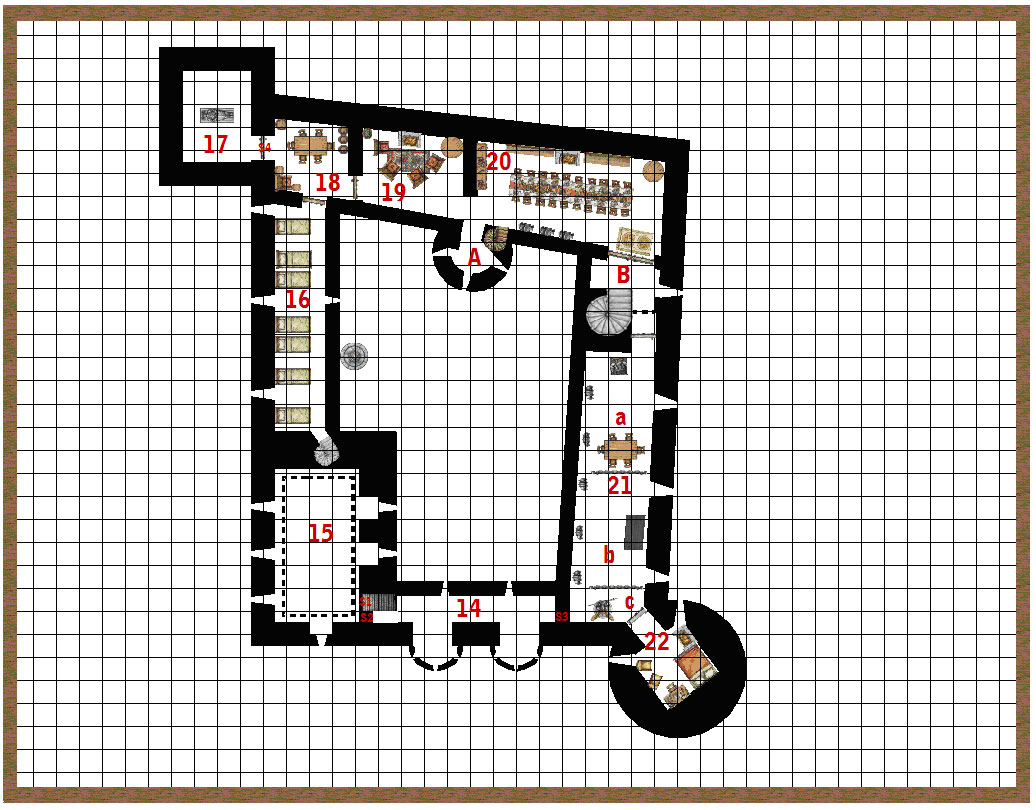
Room 14: Guard Room
This room always has six guards (or more) posted. Secret doors (S2) and (S3) lead to the upper hallways of the castle.
Room 15: Walkway
This narrow stone walkway has a wooden railing that provides cover for archers on the ledge. Otherwise, it is open to the Old Hall (Room 2). There are six arrow slits in the walls that can be manned if needed.
Room 16: Servant's Quarters
Room 17: Paladin of the Balance
This room has been sealed over with stone.
The stone in this room is much, much older than the rest of the castle - an ancient tower around which the existing structure has been built.
A single stone sarchophagus is in the center of this room. The effigy on top is that of an armored knight (much like the statues in Rooms 20 and 21). A phrase has been carved into the stone: U RUE TEN FERAL CAT
FACE TRUE NEUTRAL
Discoloration in the stone shows that originally eight statue-sized objects stood in a circle around the crypt.
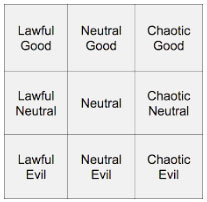
NOTE: These are the statues in Rooms 20 and 21. Each of the statues are slightly different, although they all are of armored men. On the base of each is a two letter designation: NE, NG, LE, CG, CE, LN, CN, LG.
When arranged around the tomb, the tomb will open and the ghost of the Paladin of the Balance - Soliania (an ancient elf druid/paladin) - will appear.
If the tomb opens, Soliania will animate her eight "knights" to fight for the party. Once they are destroyed, they will reappear in her tomb. They are actually Feyward Trees. Each is aligned to an alignment and will only fight those who are not touching on the alignment chart.
Feyward Trees
Room 18: Common Room
This room is a servant's common room. The head butler (Liam Stanton) is usually sitting, sometimes snoozing, in the chair in the southwest corner. A table and chairs and a number of casks (doubling as tables) are also pushed into this room. A tapestry hangs on the west wall.
DC 25: The stone on the tower wall is much newer that the rest of the wall. This hides S4.
Room 19: Lord's Chambers
Room 20: Formal Dining Hall
DC 25: The three statues have the initials of their creator (?) carved into them: LE, CG, and LN.
Room 21: Gallery
A:
All three statues radiate a faint aura of enchantment.
CN, NG, NE
B:
LG, CE
C:
The statue radiates a faint aura of enchantment.
Room 22: Oliver Winter's Bedroom
NOTE: Under the bed is a hole leading to the Dwarven Forge.
Sails of Speed (trapped with puzzle), 2000 gp, eye-stealing locket (usually on him).
A large crate is made of a steel-like mesh. The mesh is warm to the touch. The crate weighs about 400 pounds. Inside is a large pile of folded cloth. On top of the crate is a grid with glowing numbers.
Denizens
Tillamun of the Old Kingdom
Old Kingdom Guards
Home Guards
Soliania (Unfettered Phantom)
Stormcrows
Gremlins
