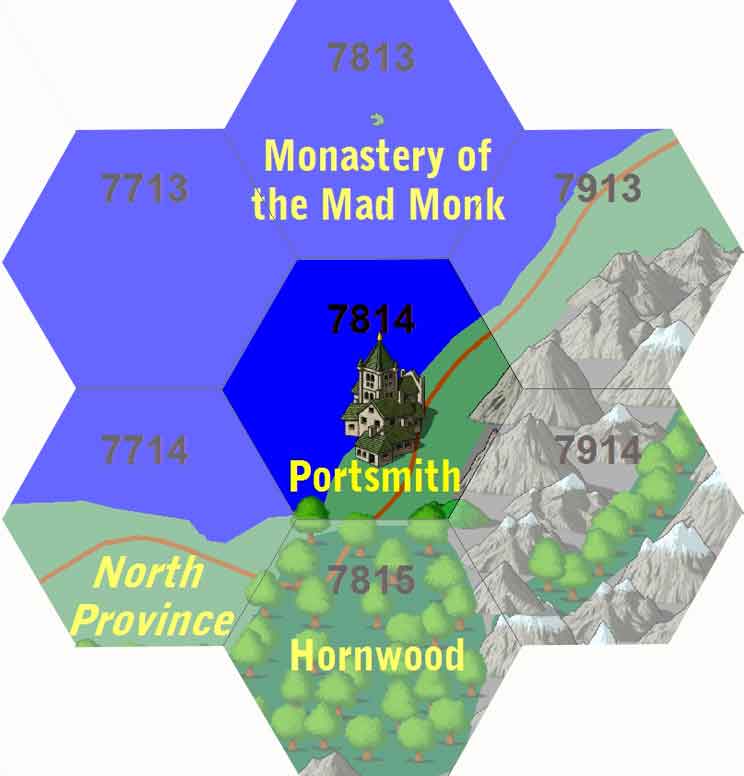
Return to Portsmith
| Type | Dungeon |
|---|---|
| Status | Explored December 907 TA |
| Location | Portsmith |
| Hex | 7814 |
| Campaign | The Siren's Song |
| Adventure # | 136 |
Return to Haggelthorn Hall
Frederick Morrow, the butler, greets you at the door:
- Frederick is an impossibly tall and thin man with thin lips and haughty expression. He wears a fine suit of excellent weave, albeit a design that went out of fashion some decades ago. He wears a simple silver necklace with a set of small stones set in a circle about his neck. He is exceedingly old and slow.
- "This is quite the night for guests. Young master Mortimer is visiting as well. Now, now, the master is going to be surprised...."
Mortimer Haggelthorn, the youngest son of Elias:
- Mortimer is tall with a slightly elven appearance. He is fair complected. He is dressed in a luxurious robe of red and black velvet with an intricately woven dragon on its back. He wears a ring with three stones set in gold on one hand. The other is a signet ring of the Family.
- Mortimer is currently tending to family business in Teufeldorf.
Mortimer greets you with a flashing smile - radiating warmth and deadly power simultaneously. You realize that you have seen his portrait - along with his older brother Maxwell and late mother Henrietta in one of the upstairs rooms.
- Haggelthorn, Henrietta - (late wife of Elias Haggelthorn) - Described as a short stout woman of human descent, Henrietta died many years ago, apparently of poisoning.
- Haggelthorn, Maxwell - (elder son of Elias Haggelthorn) - Unlike his parents, Maxwell is tall and dark with a slightly elven look about him. Maxwell is rumored to be on a Tang Trader on the Great Sea on family business.
- He warmly greets Finn as brother. Father sees great potential in you. If you are ever in Teufeldorf, look me up. Now, to be clear, the Family is run by Brill from the Enclave in the old city, but I am not without my influences. The Haggelthorns are active in many areas of trade. Yes, we should meet for coffee.
- And speaking of coffee, this must be Java. I am honored to make your acquaintance, young bird. What a fine parrot you are - from the Keelhaul area of the Wilderlands, if I not mistaken. Have you ever had coffee beans roasted at my favorite coffee house? It's called The Trident, and its down by the dock in Teufeldorf. The beans are so rich and deep and smoky, you can almost taste the plant they were plucked from. I've brought you one.
- To Wrane - ah, yes, father I see what you mean.
- To Nomed - and this one too, fascinating. There's rumors of your types roaming about the City-State.
- Brother Chironomous - I heard you have found our town unfriendly to the Gyre. A pity. But I hear you have made followers elsewhere on the Inner Sea.
- And you Brother Syllia - what is one from the oldest religion doing with one from a new religion - you two must have interesting talks. Sea and land - you have it covered.
- C.J - ah, yes, we trade with Greenvale - you are from there, are you not? I'll be passing by the March on the way back to Teufeldorf. Any message you would like me to pass on to your kin?
Elias will provide the following information on Portsmith:
JON
- Jon Singleshadow has gone missing. Our spies around town have been unable to provide us any additional details. We know he is not dead, but we cannot find him. We have sent two reconnaissance missions to his estate and neither have returned. There are three suspects for his disappearance:
- Jana Blackfire - if which is true, he is undoubtedly held in the newly-fortified Barracks. Too bad they didn't put him into the Vault - that place is a sieve from which even novices could escape.
- The Brotherhood - our constant enemies, although Gabriel Gloommantle has also disappeared, so he seems less likely.
- Juju - your traveling companion came to me with an interesting story about your treachery and how you were intent on betraying the Brotherhood. I sent him back to Portsmith with a "valuable" package for Jon Singleshadow - something of a test of honor. That was a few days before everything went dark. He didn't seem powerful enough to do anything, but maybe he is responsible. He has certainly failed the test. <this is a lie>
- Either save Jon or confirm his death.
- Equally important, you must retrieve for me six items of staggering importance to the Family. These are items that cannot be lost if Jon is overthrown. They were entrusted to him and kept in his safe. Since we cannot scrye them, the safe must still be closed. Jon was a collector of artifacts. NOTE: the Bricklebon (p. 40) will know if he has the bottle.
- A small leather purse with a simple gold clasp in the shape of a sea serpent - the bag may wriggle a bit. Don't open it.
- A large jewel-encrusted gold chalise that emits a faint light. The bowl would hold a gallon of liquid, so it is easy to spot.
- A large jade stone - egg-shaped - the size of a small fist. A cut black sapphire in the center makes it appear similar to a large eye. It tends to roll about by itself. You might not want to touch it directly.
- A set of ancient theives tools rolled in a plain leather case. To all except Finn, the item will simply look like a roll of leather
- A small stringed lute with four strings made of inlaid mahagony and rosewood. The design on the back of the lute is that of labyrinth maze.
- A set of very strange shaped dice - twenty in all of different numbered sides. They appear to be made of lead or some other dull, silver metal.
JANA
- Your pact to kill Jana Blackfire is still in force. You must kill her, although she seems to have retreated from public view.
- I give this coin to you as a means to determine when your contract is complete. For now, the face is shiny. When Jana is dead, this coin will transform into a dull, black object.
Elias will not provide:
- Juju left the Wanton Wench during the night of November 11, 907 TA as the other members of the crew were at the party at Haggelthorn Hall. Watching the manor house, he saw the others leave during the wee hours of the morning. He went to Elias and talked deep into the night. At the end of the meeting, Elias provided him with a high-level anti-scrying amulet to keep his whereabouts unknown to the party. A rider and horse were sent north from town as a decoy. Juju has been left to guard the vault of Jon Singleshadow - and to make sure that Nemod doesn't take anything he shouldn't. If Juju can get the ship for Elias, maybe he can replace Jon as the head of the Family in Portsmith.
- Elias thinks that Finn is a good, young lad - not terribly imaginative and creative, but faithful.
- Elias strongly dislikes Nomed - who has stolen a bag of rubies from him. While the rubies themselves are not that important, Elias hates being taken advantage of. He has put Juju on the task of watching him and recovering the ship, if possible.
- Elias has bound Finn to slaying Jana Blackfire and returning the Singleshadow jotter. The party must come back to Haggelthorn to get the jotter. So, he will know when they are going to Portsmith.
NOTE: If Elias learns of the bottle (by being in with the Bricklebon), then he will try to get word to Juju to acquire the item. The party may overhear his communication.
Other rumors Elias will confirm (or not):
- (confirm) The Siren's Song has arrived in Portsmith. The ship is spectacular, and the town is awash in rumors of the ship's capabilities. The Captain is Hugh Edge.
- (confirm) Jana Blackfire has taken ill and is recuperating in her keep. In order to assist in her recovery, the Old Kingdom leaders are staying at the estate as well. This includes Tillamun and Tobyn the Quiet. The party still needs to kill Jana.
- (confirm) The City Guard have been rounding up all "undesirables" and putting them into a special prison constructed in the bunkhouse of the Barracks.
- (not known) This includes Sienna Bell. Miranda Clay is under house arrest.
- (not known) use the Bricklebon. Jon's home has a collection of antique nautical artifacts - including the Impossible Bottle.
On Jotters
We call these items, the Family Jotters. They appear as simple wooden writing desks, like those used by travelling monks. A compartment below the writing surface holds ink and paper securely, and several have folding legs for easy transport. What is unique about these desks is that each has a slot near the top. Any note written on the desk can be sent by simply dropping the parchment into the slot. The note then appears magically beneath the door of the recipient within a few hours.
Using the Haggelthorn Family Jotter, I can send a message to any Jotter or anyone who voluntarily wears the Elderberry signet ring. As you can imagine, the Jotters are central to running the Family - a network that stretches across the Reaches.
There are some peculiarities to using the Jotters. One such oddity is that a copy of all messages are sent to the nearest Jotter. We are not sure why this happens, but we have incorporated this feature into our operations - security against rogue elements, so to speak.
My Jotter is connected by proximity to Mycroft Mistsworn's Jotter in Dragonsford. So, Mycroft should have received a copy of all my messages to you, Finn. After the first message, however, Mycroft's Jotter stopped receiving my messages.
From this, we concluded that another Jotter has been moved near Haggelthorn. After some trial and error, we have identified the missing Jotter as that of Jon Singleshadow of Portsmith.
Return to Portsmith
Portsmith is on high alert. The names and images of the crew are posted on every lamppost (complements of Juju) - even Java. A reward of 1000 gold for each individual - living or dead, in part or whole is offered. 10,000 gold for the entire party. No mention of the Wanton Wench.
A town patrol (hexmen) consists of:
- Cleric (Order of the Silver Throne)
- Paladin (Order of Crusaders)
- A Knight of Rembia
- 3 guards
- Usually, they are mounted on horseback
Town is under military curfew. Everybody is to be in by 10:00pm. Pubs close then. Anyone found outside after 10:00pm will be brought to Amelia Wood for questioning.
Blackfire's Keep Overview
RUMOR: With the arrival of the Siren's Song, Jana Blackfire has retreated to her Keep. She is rumored to be very ill, although she has been seen several times in the house. In her place, Amelia Wood, Paladin Knight of the Holy Order of the Crusaders, has been left in charge. Amelia has been given very limited access to Jana.
The Old Kingdom nobles have taken up residence in Blackfire's Keep. They are currently in the process of "replacing" Jana Blackfire with a duplicate - a woman who is fanatically loyal to the Old Kingdom. Right now, they have three candidates. Afraid of magical detection, they are undertaking this "replacement" the old-fashioned way.
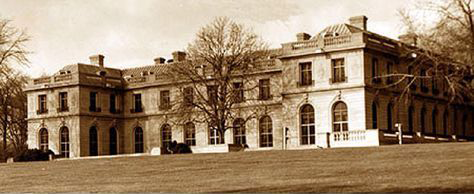
Blackfire's Keep, as the old building at the top of the road is now called, is more of an estate house than a defendable fortification. The house has been the private residence of the Governor of North Province for the last 80 years. Before that, the house was the home of a wealthy iron ore trader, a dwarf named Steelhorn, who built the home for his human wife, Esmae. Esmae was a patron of the arts - especially music - and enjoyed spending money as quickly as her husband could make it. The home boasts a magical organ that dominates a central music room. Esmae enjoyed an unnaturally long life and outlived her husband by many decades - during which she continued to entertain as the grand dame of Portsmith. Upon her death, the house was seized by the Crown for use an official residence.
Current military residents include the Old Kingdom diplomatic party from Broken Teeth, the original contingency of eleven from the Old Kingdom, some borrowed crew members from the Siren's Song, and the doctor and fake Janas teleported in by Tobyn.
DEAD OR TURNED
- Commander Timothy Featherstone - leader killed at the Giant's Castle.
- Captain James Jambel (Haggelthorn squad) - currently an anti-paladin (knows only of Featherstone, Band and Martin)
- Scout Charles Band - killed at Blisworth Chapel
- Scout Hayden Martin - killed at Blisworth Chapel
ALIVE - OLD KINGDOM (24)
- Tillamun of the Old Kingdom - diplomat and diabolical charmer
- Tobyn the Quiet - miliatary leader. He is a mage, who, like his name, does not speak much and never above a whisper.
- Captain Patrick Likeman (Dragonsford squad)
- 2 Dragonsford Scouts
- Captain Erza Cobb (Broken Teeth squad)
- 2 Broken Teeth Scouts
- 16 Guards from the Siren's Song
ALIVE - PORTSMITH (8)
- Doctor + 3 Assistants
- Jana Blackfire
- 3 Duplicate Jana Blackfires
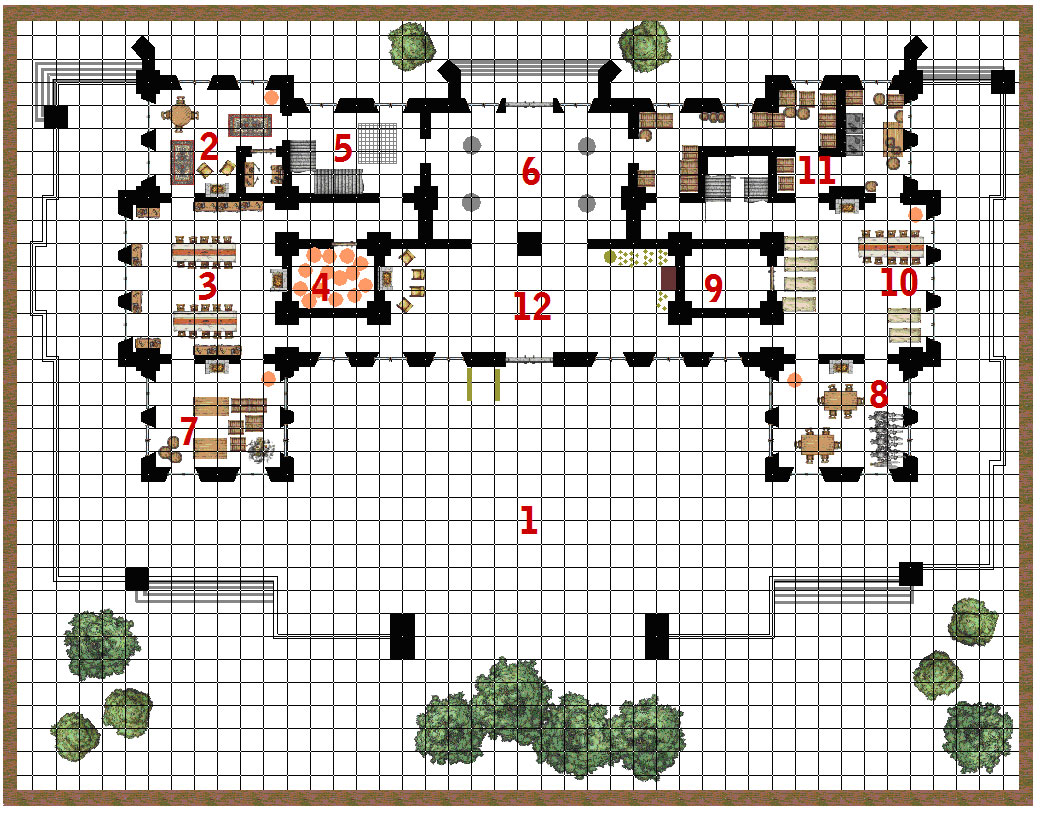
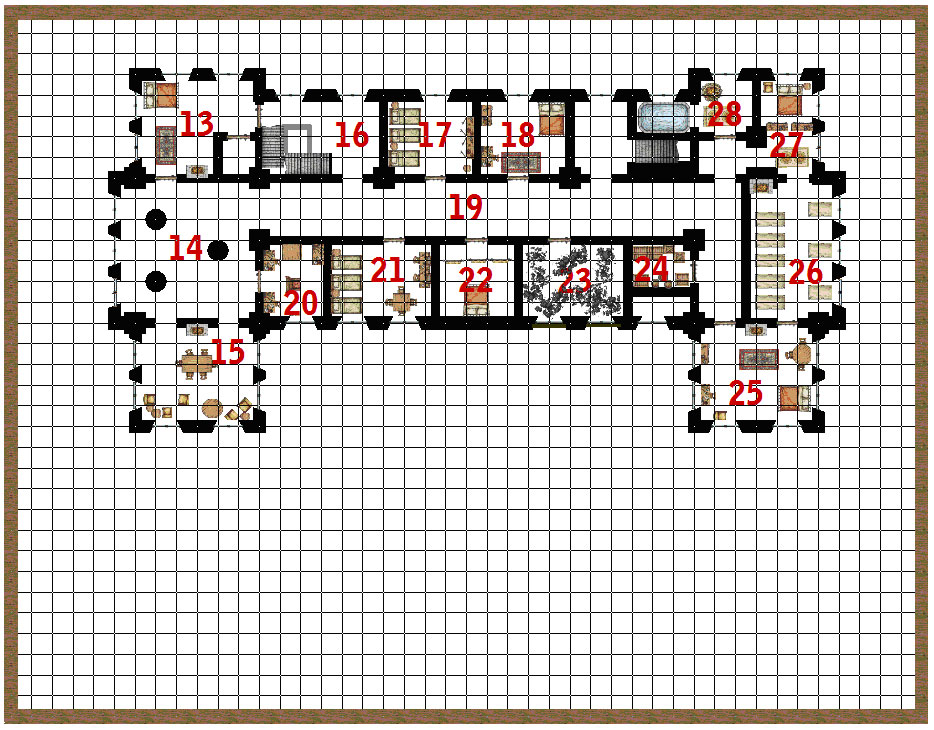
Blackfire's Keep - Ground Level
NOTE: There are statues throughout the house that can be activated via the organ. Roll each hour to see if a new statue appears.
NOTE: When an evil (or demon) character enters, the general alarm will go off "Evil in the house. The angel pillars are activating!"
Room 1: Rose Terrace
Room 2: Reception Room
A small locked room off this area has coat racks, a bureau and other places to stow guest's hats and coats.
Room 3: Library
Room 4: Angel Room
In addition to music, Esmae Steelhorn loved young men - scantily clad and waiting on her every whim. Her husband thought she was crazy but indulged her anyway, as he was busy building his fortune and his wife's parties were quite spectacular.
When Jana arrived, she moved most of the statues to this room. However, they randomly reappear throughout the house. Recently, the staff has given up trying to put them all back.
Room 5: Stair Hall
Room 6: Vestibule
Careful examination will show that the pillars are carved with a checkerboard pattern of silver and gold.
NOTE: If a demon or evil character has entered, then the pattern on the pillar will be glowing - slowly increasing in intensity.
Very strong aura of conjuration (summoning) radiates from the light - which will be bright white. When the creatures come, they will appear in an explosion of light.
Music - as if voices singing can be heard. 4 per 15 minutes.
4 (each pillar) - Choral Angels - This shimmering being looks like a miniature human with broad, iridescent wings and hair that slowly ripples through the air.
2 (front door) - Planetar Angel - Muscular, bald, and tall, this humanoid creature has alabaster skin and two pairs of shining, white-feathered wings.
Room 7: Loggia
Room 8: Breakfast Room
There are always guards here.
Room 9: Organ Room
NOTE: The Organ is used to control the "statues". Esmae Steelhorn would play (or have played) music to entertain her guests and herself with the young men dancing, cavorting, or doing whatever. The house is filled with statues of beautiful young men in various stages of dress. These are posed in real-life situations (i.e., carrying a tray of glasses, gardening equipment, etc.).
Nothing needs to be done here. The organ works fine. It can be disabled or destroyed, however.
Room 10: Dining Room
Room 11: Kitchen
Room 12: Music Room
The largest pipe was named, Angel, for her dwarven husband. She used to stand and stroke it and talk to it after his death.
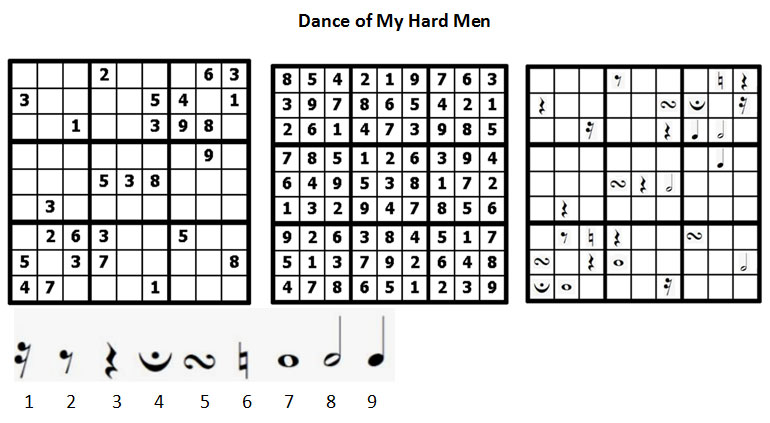
Sitting on the organ's music stand is an old piece of parchment entitled "Dance of My Hard Men".
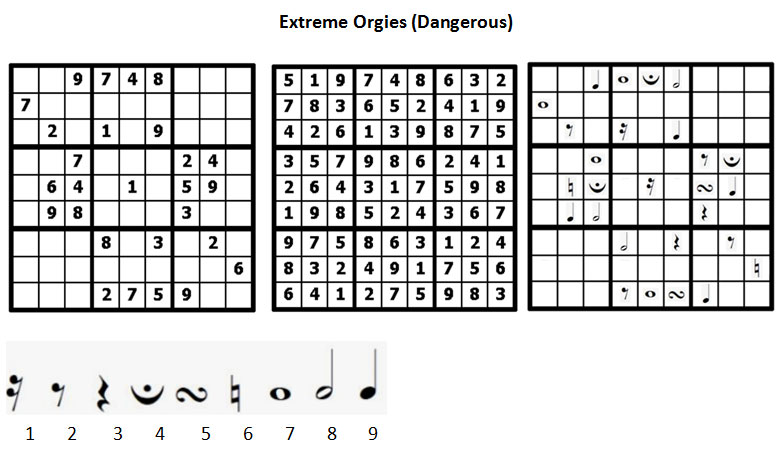
Hidden in the seat of the organ is a second sheet of music entitled "Extreme Orgy".
Solving either will allow the party to play the organ - Performance (Music) DC 10 for Hard, DC 15 for Extreme. This will cause all the statues to come to life. They will attempt to grab the nearest person and dance with them. Missing the DC will cause them to attack.
Blackfire's Keep - Upper Level
Roll each hour to see if a new statue appears.
Room 13: Tillamun's Room
Tillamun of the Old Kingdom is staying in the NW room. He is the diplomatic leader of the mission overseeing Jana's "transformation".
NOTE: This used to be the bedroom of Esmae. Her rocking chair rocks whenever music is played. Moving the chair just brings it back. Esmae is here and can be hear gently humming to the music. She hates demons. She loves angels. Elderly woman dressed in green velvet and lace. She has an emerald necklace and ring that appear to be part of a set. Her eyes are green.
Room 14: Organ Chamber
NOTE: Slits in the columns allows the music upstairs!!!
Room 15: Sitting Room - War Room
There is always a guard here.
Room 16: Stair Hall
Room 17: Green Dragon Room - The Doctors
The possessions contain three white butchers gowns which tie in the back and completely cover the front. Pockets for tools are at waist level. The gowns are clean but well-worn. One of the gowns is sized for a child, the other are medium-sized.
This is the doctor's rooms - Karver White and his wife, Zero Willow, are surgeons who are making "adjustments" to the girls. Liudolf Langham is a hobbit who is a linguist who is attempting to adjust speech patterns from the Old Kingdom.
Room 18: Stateroom of Adam Gnash
The door to this room is locked. DC 30: The slightly acrid odor of the dead is coming from beneath the door. It is subtle and slightly altered as if mixed with sea water.
The crushed remnants of an emerald are on his chest.
The man is actually dead. This is Adam Gnash. Adam was a cleric/paladin of Portsmith - and the personal doctor of Jana Backfire. He was also secretly a priest of Heh. Like his brethren, he was sent here to send ships to the temple - which he did via subtle suggestions planted in her brain. Since being "imprisoned" here, he has been totally forgotten - mostly because of a spell that he cast to allow him to be ignored by the guards.
He was killed by the party at the Temple of Heh.
Room 19: Hallway
NOTE: Outside room 23 the party will have "disadvantage" on all rolls.
Room 20: Operating Room
NOTE: Some of the chemicals are bleach, hair dye, and permanent tatoo ink.
Room 21: Blue Kraken Room
Fake Janas are staying in the second guest room.
A table near the windows is filled with books - literature and school books - many on Eastern Reaches history and nobility. Several books on grammar and writing can also be seen.
DC 20: There are three piles of papers - all duplicates of each other near the chair nearest the window. This is where Langham "tutors" the girls.
The girls are: Bethany Hughes, Kara Ward, and Isabel Webb. They are all young noble daughters from the Old Kingdom - chosen for their loyalty to the Overlord and their close resemblance to Jana Blackfire.
Room 22: Jana Blackfire's Room
Trap Springer’s Nightmare Trap - This trap wipes out novice adventurers and leaves experts waking up in cold sweat with the memories. A simple and almost-impossible-not-to-find javelin trap hides a devastating heightened symbol of death. A single Perception check (DC 34) is enough to find both traps and identify the danger of disabling the first trap.
This room is dark (no windows).
This is where Jana sleeps. She may be here - or one of the girls may be here.
Room 23: Burnt-Out Room
Traces of the smell of smoke can be detected here, and while the door to this room is sealed, the door is charred around the edges.
The door has been sealed with a number of iron spikes driven into the stone frame of the door. Although burnt, the door appears to be structurally sound. The lock on the door is closed but simple to open.
What went on here? This was once the room of Jana's priest - Brother Zachariah - who was a priest of the Order of the Silver Throne. His room mysteriously caught on fire a month or so ago. While the blaze was contained, the priest was killed, and room sealed.
Brother Zachariah is buried in Portsmith. He can tell you that he was murdered by Stormcrow after discovering her "secret" room next door.
This room now contains Gremlins. The gremlins will retreat to the secret room if threatened - leaving tiny footprints.
Secret Room
This room is accessed only via a six inch ledge that runs along the southern facade of the house. The window here has been missing - maybe for decades. The room is empty except for a nest of stormcrows which relay messages to their mistress of the happenings at Blackfire's Keep.
Room 24: Storeroom
Room 25: Tobyn's Suite
This room is actually warded to appear abandoned.
When revealed: A bed has been hastily pushed into the corner making the room into a makeshift sleeping quarters. Chairs, desks and tables are sparse but make the space functional.
Tobyn the Quiet is staying in the room. A half-written letter to the Overlord sits on the desk.
| December 7, 907 TA
My Overlord. There have been no sightings of the Wanton Wench since the disaster at Hidden Skerry. I have pulled some of the crew from the Siren's Song to help with duty at Blackfire's Keep and to patrol Portsmith - much to Captain Edge's consternation. I remain confident that the Wanton Wench will return to Portsmith, and we are ready. While those preparations are completed, the training of the new Jana Blackfire nears its conclusion as well. All three subjects have progressed nicely - they are smart, articulate and fast learners. Already they are able to fool Jana's staff from a distance. I have decided to keep all three alive and continue their education and shaping for the time being. Kara Webb appears to be the most promising of the lot. Once the Wanton Wench is back in your possession, I will depart with the others and turn the governance of Portsmith back to Blackfire. |
Room 26: Living Room
The door in the south is locked.
There are always four to eight guards here.
Room 27: Old Dwarf's Quarters
The walls are actually bookcases and are jammed into their current position - too narrow to allow passage into the room.
This is Steelhorn's private quarters. The shelves are lined with books on stonecutting and ledgers of his old business 90 years ago. There are a number of carved statues here, but the odd gaps on the shelves show that items have been removed.
DC 20: The stone table next to the bed is actually a cleverly disguised chest with a mechanical lock.
The chest is empty.
Room 28: Bath Room
This room may have one or two of the girls in it if approach early in the evening.
Singleshadow Estate Overview
The Singleshadow Estate was raided by the Crown. Jon was tossed into the Barracks. Janet Meekson is his go between. She is looking for a way to break him out of prison.
Jon released a monster, the Confounding Bandersnatch, as he was being taken that is now guarding the estate. He has also summoned a darkness about the house which has resisted all attempts to remove. This six-limbed beast stalks forward with a fluid grace. Barbed quills run along its back, and its eyes glow with a blue light.
- Return to the Singleshadow Estate and find out what happened to Jon.
- Jon is in love with Janet Meekson - daughter of Henry Meekson - Justice of the Order of the Silver Throne.
- Return the blotter.
- Return six artifacts to Elias.
- Juju will be here lurking.
- Slip - tapwoman for the Family
- Sternbrew - Lantern & Gargoyle - is loyal to the Family
Impossible Bottle
Unknown to almost all, Singleshadow collects naval oddities - artifacts from early seafarers to remnants of strange marine life.
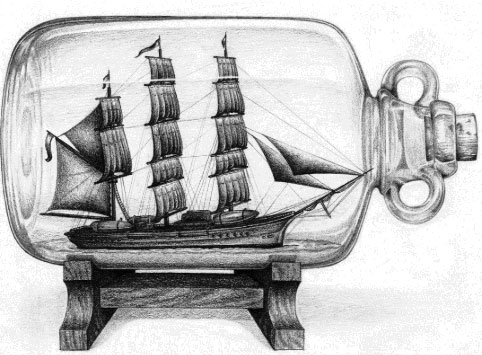
One the prized items in his collection is an Impossible Bottle made in the seventh century of the Third Age and attributed to the merfolk wizard Alaric Bond. Alaric was notorious for capturing and sinking ships in the Inner Sea during the expansion of trade during that time. The Impossible Bottle was rumored to be able to suck in a ship - crew and all - creating a still life miniature scene within the glass confines. A cork stopper is marked with a rune that must be traced in order for the stopper to be removed and the ship exchanged.
The Impossible Bottle is in the library (Room 10) of the compound.
Feyward
A young man dressed in the green robes of the Order of Druids, but wearing an insignia that you do not recognize approaches you. He is clearly elven, although large for his race. He bows and addresses you.
Wooden Ring sought by Druids - the Ring of Equilibrium. Sycilla will be approached in the woods outside Singleshadow's residence to steal it.
The Old Man of the Sea
Was watching the execution of Sienna Bell - and saw you appear. My heart leapt with joy at the sight.
Singleshadow Estate
Room 1: Taproom
Two giant snapping turtles have come up here from a breach in the tunnel which has led to a freshwater path to the river below.
Giant Snapping Turtle
Room 2: Storeroom and Tunnel
The staircase leads to an earthen tunnel of questionable construction. The tunnel runs east-west and is only about 5 feet high. In several places, the tunnel's ceiling sags. Near the middle, there is a place where the tunnel floor has collapsed into a larger sinkhole. The sinkhole is filled with water, and a number of amphibian claw marks show several very large creatures have recently exited the water and moved to the west.
Room 3: Kitchen
It appears as if some sort of wild animal has been through this area by the general chaos.
Room 4: Lookout
The room itself is empty. Dust on the floor show no footprints or other signs of habitation.
Room 5: Guardroom
Room 6: Wine Cellar
NOTE: This building cannot be entered from the outside - only via the secret passage to the bar (see Room 2).
Room 7: Common Room
The bandersnatch will be here waiting for any movement towards this room. It has been sent to guard the library specifically but will venture out of the building to respond to outside threats.
Room 8: Jon's Room
Room 9: Janet Meekson's Room
Rub the paper to get, "My love has been taken, and my father is to blame. I will do what I must to get Jon back. Damn my father to hell, the self-righteous bastard."
Room 10: Library
Sitting in the chair in the corner is Juju. Waiting to see if the party can solve the puzzle....
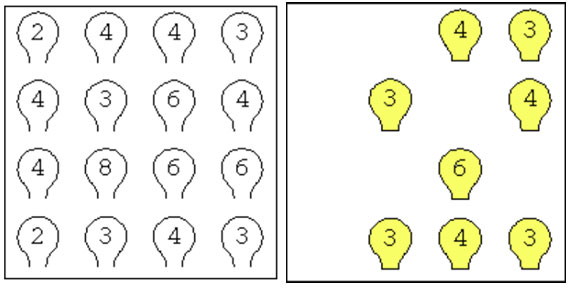
The box containing the Impossible Bottle trapped with a puzzle.
- A small leather purse with a simple gold clasp in the shape of a sea serpent - the bag may wriggle a bit. Don't open it.
- A large jewel-encrusted gold chalice that emits a faint light. The bowl would hold a gallon of liquid, so it is easy to spot.
- Knee-high boots are made of a soft, supple leather. Appear to be almost weightless.
- A large jade stone - egg-shaped - the size of a small fist. A cut black sapphire in the center makes it appear similar to a large eye. It tends to roll about by itself. You might not want to touch it directly.
- An ancient roll of leather.
- A tiny metal rodent with a command word written on the bottom.
- Delicate circlet of spun gold is adorned with four crystal 'stars' that shed a soft sparkling radiance.
- A small stringed lute with four strings made of inlaid mahagony and rosewood. The design on the back of the lute is that of labyrinth maze.
- A set of very strange shaped dice - twenty in all of different numbered sides. They appear to be made of lead or some other dull, silver metal.
- A set of crystal lenses.
- An exquisite dagger, perfectly crafted, from weight and balance to its intricate detail. To say that its impossible-to-dull edge was razor sharp would be an insult
- A helmet crafted from the skull of some monstrous minotaur etched with goblin runes and adorned with odd, crude totems made from exotic feathers and bits of bone.
- Business ledgers from businesses around Portsmith and the Inner Sea.
- A set of old treaties between the Sea Barons.
- Adventure novels (very popular in the Western Reaches).
- A set of books on picking locks, cutting glass and other rogue skills.
- A very large set of History of the Reaches books - written in 810 TA. Seem to focus on the Western Reaches nobility.
Room 11: Servant's Room
Room 12: Bedrooms
Confounding Bandersnatch
Barracks Bunkhouse
NOTE: It is actually a cube that has a "fake roof" attached. The iron door is also fake. When touched, it teleports the person into the jail at Room 1.
There are six "alternate" jails here.
The Barracks is run by Monmax, the Constable of the Dungeon. He is a labyrinth minotaur shrouded in a black cloak. Jailer's key - black stone passkey (slab). Terrible memory. The jail will teleport away
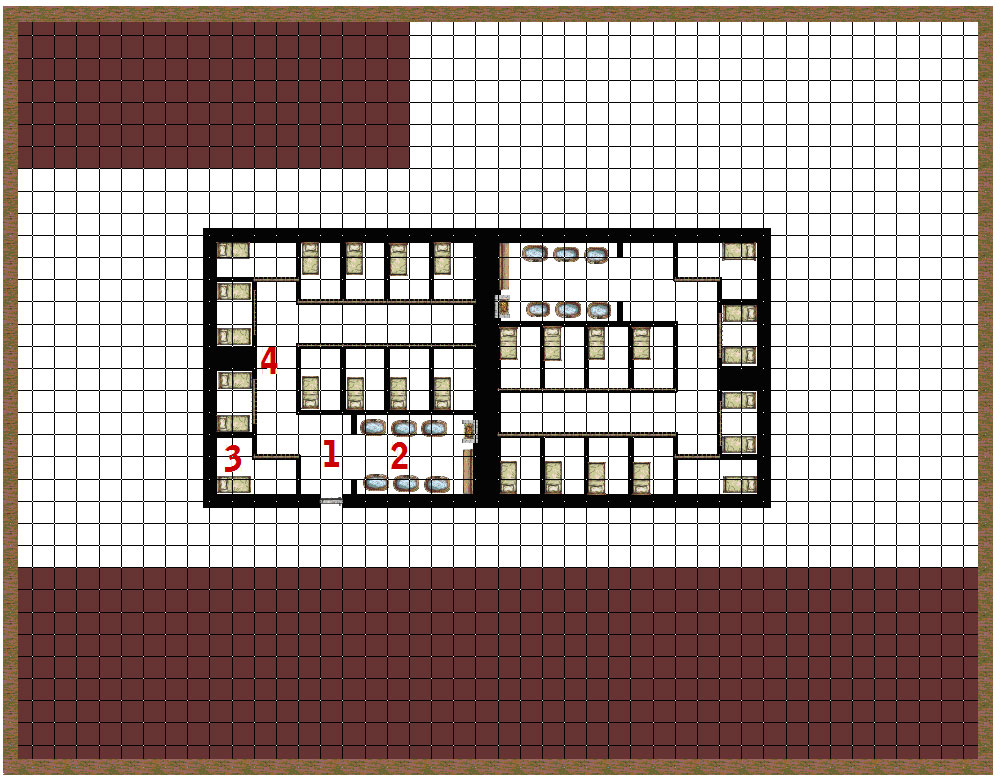
Room 1: Hallway
DC 25 Fort save - or be Shaken: -2 penalty on attack rolls, saving throws, skill checks and ability checks. Feel like you have slammed a few too many beers.
Room 2: Baths
The bath radiate an aura of enchantment (charm). They are used to keep the prisoners docile - although still alert.
Room 3: Cells
Room 4: Teleport
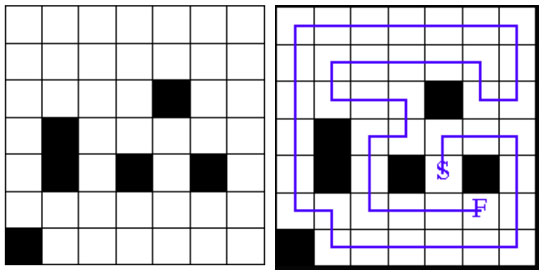
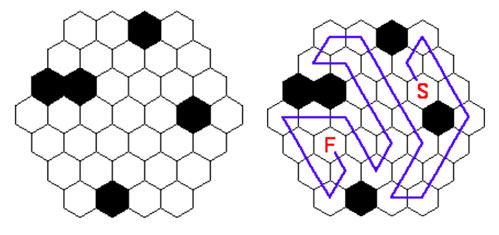
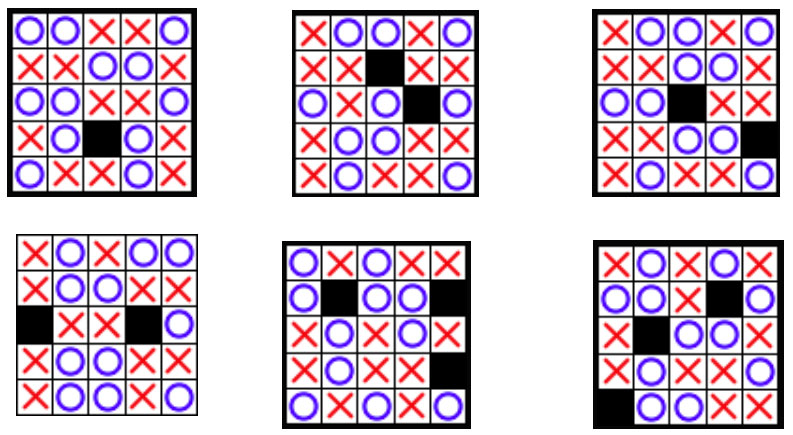
Against the wall are six patterns that glow slightly. One appears to be complete. The others are missing many marks.
The solved puzzle is Level 4 - where Sienna Bell is kept.
- Level 1 - Ayden, Clara and Erin Rees (rebels), Niko (assassin), Oliver Burton (noble), Gabriel Gloommantle has escaped and is looking for Juju and the crew!
- Level 2 - Father Cannon, Kiara Bradley, Aaron Holmes, Jenson Shaw, Nadia Hill (blow up barracks), Hattie (drunk)
- Level 3 - Jareth, Leila Lane + Frederick Harper (song against Jana), Vincent Woods (spy - Dragonsford)
- Level 4 - Catherine Hill (master bomber - sister of Nadia), Miranda Clay, Sienna Bell, Bluntbrew, Orehead, Hornfall (Balinshold Stone Dwarf traders)
- Level 5 - Noak Bailey - only one on this level - Jana's Ex-lover
- Level 6 - Jon Singleshadow (left), Montgomery Walsh (barkeep at Long Star Inn), Four townies were converted - they led a revolt on the prison. Jana had all of them killed including the priests that you were to meet. However, the old man is here (who first gave you the coin). He wants to install you as a proper high priest. Snow Alder and Oakbeard - druids
Labyrinth Minotaur
