Adventures in Dragonsford
| Type | Dungeon |
|---|---|
| Status | Explored October 907 TA |
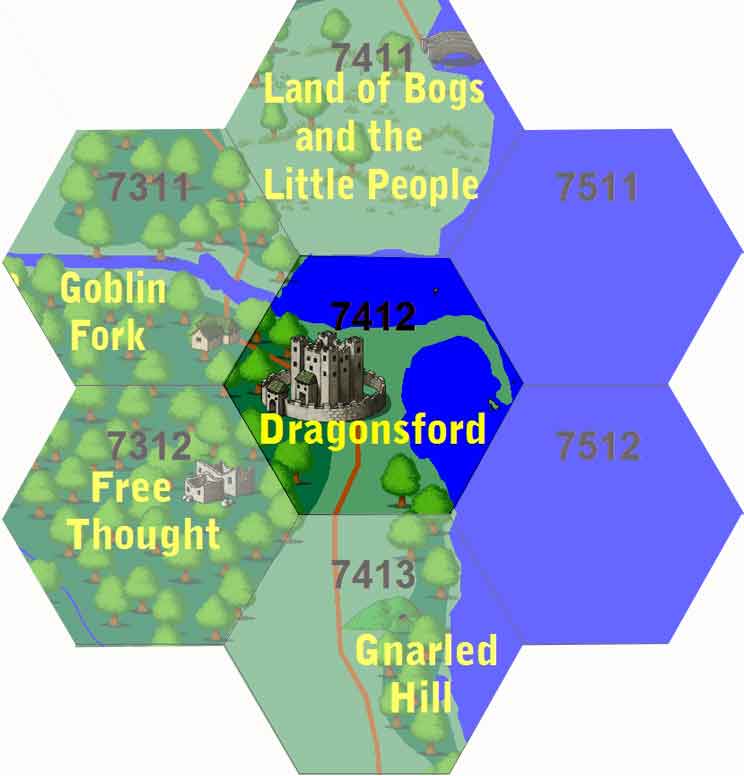
| Location | Dragonsford |
| Hex | 7412 |
| Campaign | Voyage of the Wanton Wench |
| Adventure # | 124 |
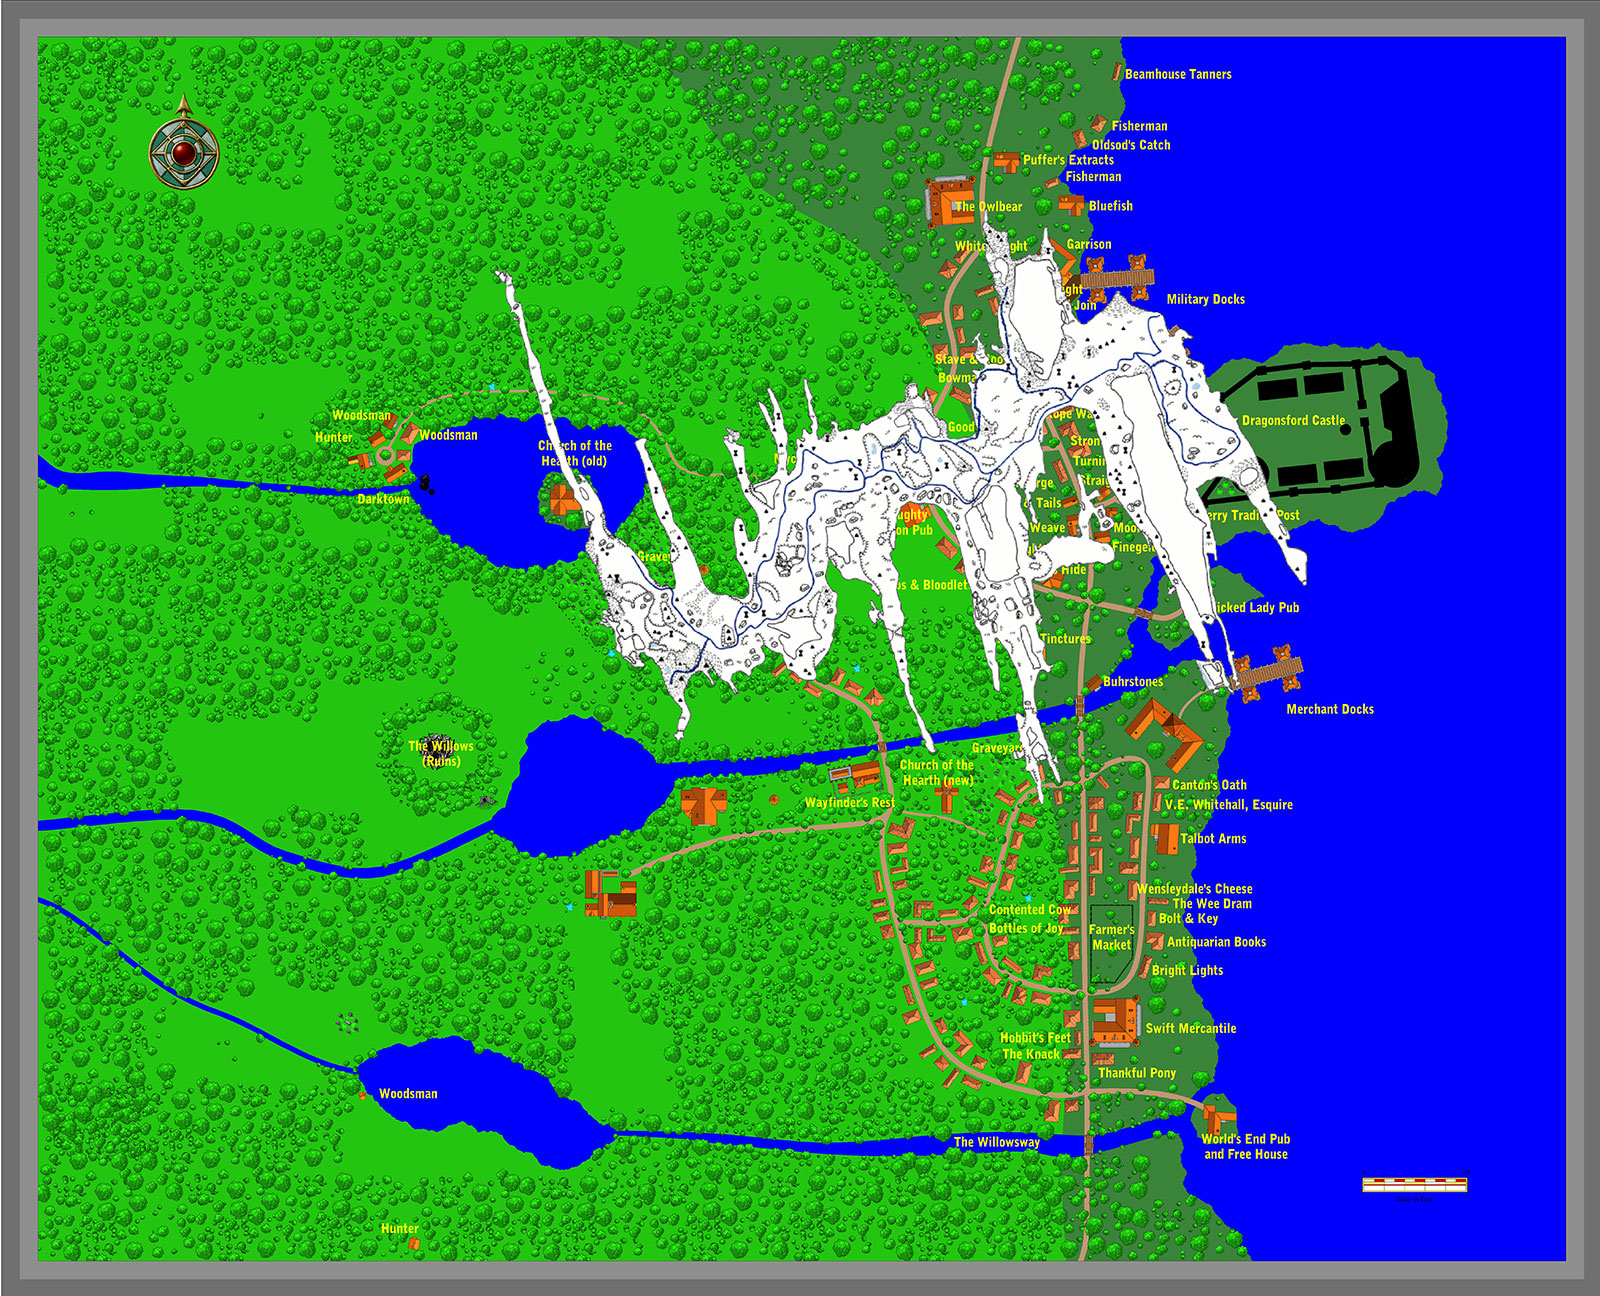
DM's Note: The Town of Dragonsford is described here. What follows are the actual missions undertaken in this campaign.
Mission 1: Crakesbone's Crypt
He has 50 gp and three large iron keys in his pocket - two are plain and one has a woman's face on it.
NOTE: Glows yellow when in the presence of undead (thus the mummy in Room 7). This provides illumination in the dungeon for him. Also, invisible to carrion crawlers - who won't attack him when activated (glowing red).
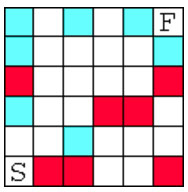
Activation is a puzzle. A pattern he traces on the amulet.
NOTE: He often sleeps at his room at Mycroft Mistsworn's estate. This is really for show, although he does live here.
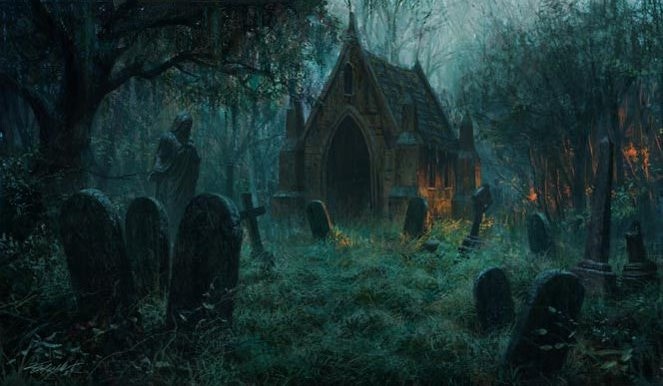
The Crakesbone Crypt
DC 20 to pick.
The door is locked.
NOTE: Careful examination, they are screaming. Door opened by maiden key.
Wailing Maidens; Type mechanical and magical; Bypass hidden switch (Perception DC 30); Perception DC 25; Disable Device DC 25; Trigger location; Onset Delay 3 rounds; Reset automatic (after 5 rounds); Effect stunning wail (stun and deafened for 1d4 rounds, Fortitude DC 15 negates); spike barrage (Atk +12 melee, 1d6 spikes per target for 1d6+5 damage each); multiple targets (all targets in hallway).
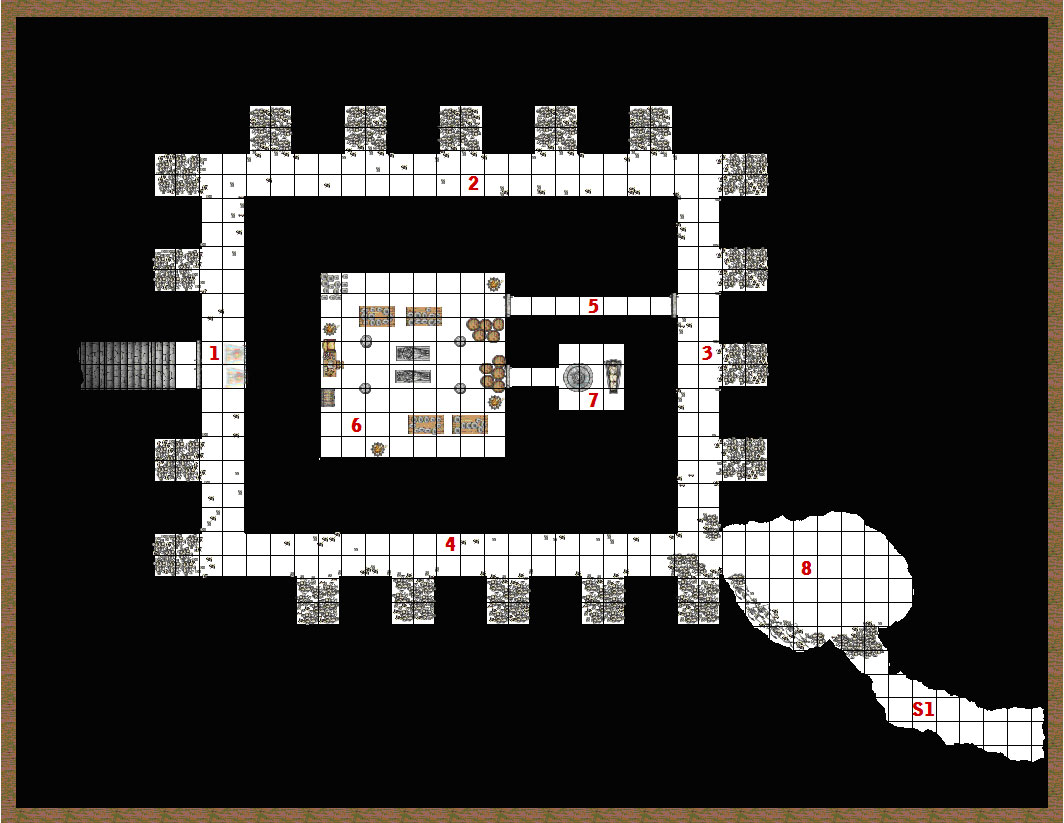
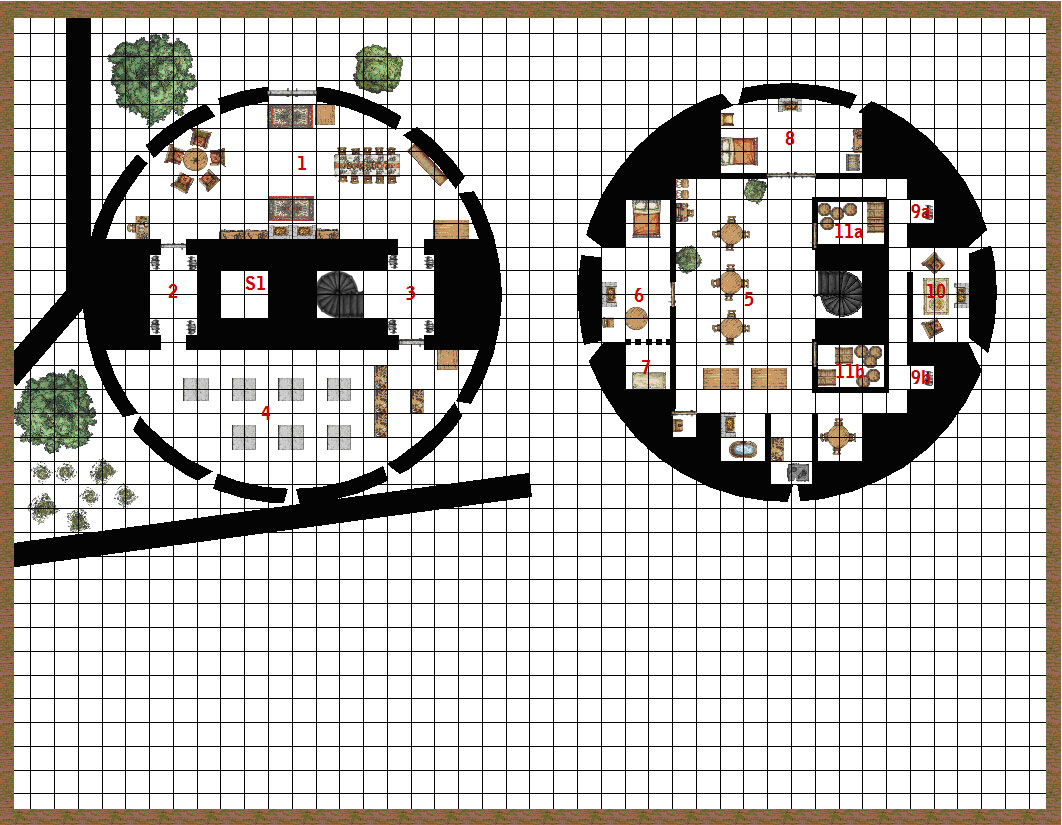
Rooms 1-4: Hallways of Skulls
NOTE: Each skull has a carefully written name in brown ink.
If the adventurers enter without Crakesbone, they will be attacked by 4 carrion crawlers. Typically, two will come from each direction. One will engage while the other crawls on the ceiling to surround. A typical carrion crawler is about 12 feet long and weighs about 800 pounds. A carrion crawler attacks with its tentacles, trying to paralyze as many opponents as possible but if particularly hungry may stop in the midst of battle to feed on anyone it has disabled.
Room 5: Hallway
An iron door is closed here - although it is not locked. A simple latch will open the door.
Room 6: Crakesbone's Laboratory
NOTE: These are the heads that Crakesbone speaks to. He records their thoughts on parchment carefully labeling each sheet and placing it into the chest for safekeeping. Some of the barrels are filled with a pungent licorice-smelling liquid.
The desk contains ink, parchment and quills, several paperweights, and other clerk's tools sit on the desk as well. A small book of romance sits on the desk near the leather chair.
Room 7: Mummy's Room
DM's Note: This room was unexplored.
Room 8: Carrion Crawler's Room
It contains more carrion crawlers - plus 3 sac-like eggs.
100 gold, 300 silver, 600 copper, +2 Elven longsword, +3 Heartseeker dagger
Room S1: Tunnel
NOTE: The party will need to dig for several days to get to the tunnels under Dragonsford Castle. But it would eventually lead to the tunnels.
Mission 2: Sir Randall, Paladin and Demon Hunter
Mission 3: Morgan the Enchanter and the Wizard's Tower
When Ernie is not in residence, the castle is protected by the Crystal Heart of Masking which causes anyone coming near the keep to fall asleep. DC 30 Fort Save. Once asleep, they will continue to sleep until aroused by vigorous shaking and shouting. Outside of this area are the barracks and the Wizard's Tower. The place is run by Morgan the Enchanter.
NOTE: The chair is a ruse and disguise. Morgan is actually able to walk and is younger than he appears.
He is calm in contrast to the brashness of Sir Randall.
NOTE: Brightaxe (the last of the Bluestone Dwarves) and Rukh's friend Rocky are here too.
Room 1: Audience Chamber
This is where Morgan meets with visitors and dignitaries. Servants enter through Room 3. The door to Room 2 is locked and trapped.
Room 2: Old Hallway
NOTE: Careful note will see that the eastern wall has been sealed much more recently the rest of the room. There is no easy passage here - just hammering through stone to get to the caves below.
Room S1: Shaft
Room 3: Stairway Up
The armor can be animated as needed.
Room 4: The Artifact Room
Each case has runes that flicker over its surface.
NOTE: If the party comes back at night, the gremlins will be here. Two - one to watch and one to report to the Stormcrow.
- Case 1 - A set of mithral armor is carved with a woodland scene. As you watch, animals on the armor move about dodging in and out between the trees.
- Case 2 - A sword with three blades glows from within this case. Although simple in design, the blades fade in an out with only one blade ever being solid at a time. Each blade shimmers with a rainbow of colors - like fresh oil.
- Case 3 - A simple vial of black goo hang suspended in the column. The goo moves as if alive but cannot escape its glassy confines.
- Case 4 - A small ivory chest designed to hold four rings looks impossibly old and delicate. Inside, three rings are nestled in blue velvet. A fourth ring is missing. Gems twinkle on the three rings in bright blue, red and green.
- Case 5 - Four books bound with large black iron locks are set on a steel table inside this case. The books are unremarkable in their outward appearance.
- Case 6 - Three staves rest in a block of ironwood - each pointing upward. Staff made of brushed steel with an elaborate headpiece of radiating spikes. Staff made from ebony with images of bones and skulls mingled with a strange spidery rune. An oak staff topped with a huge ruby that flickers.
- Case 7 - An ivory helm, simple in design with streaks of black in the otherwise perfect stone.
DM's Note: Only Case 6 was opened, and only the steel staff was taken.
Room 5: Common Room
This large room serves as the nerve center of the tower. Morgan has his bedroom here as well as a guest room. Servants prepare meals here and many household meetings are held in the area. Two guards in Rooms 9a and 9b will come as needed.
Room 6: Rukhs' Room
This is a guest room that has been taken over by the ogre scholar, and he will be here reading or sleeping when not studying with Morgan. The room is well appointed, although the furniture is somewhat small for Rukhs.
Room 7: Cell
The cell is unlocked - a testimony to the trusting nature of the ogre.
Room 8: Morgan's Bedroom
DM's Note: This room was unexplored.
Rooms 9a and 9b: Guardians
Room 10: Private Retreat
Rooms 11a and 11b: Storerooms
Room 11b holds a number of casks of very fine Elderberry Downs wine and a small cask of Tegel pipeweed.
Mission 4: Caves Under Dragonsford
DM's Note: This area is mostly unexplored.
Rukhs will tell the party of a large cavern system under Dragonsford Castle. He is doing excavations under the military outpost where he thinks the Bluestone Dwarves built an early tower.
Xorn
He will warn the party not to venture too far from the main cavern that he is working in because there are Xorn. He escaped by melding into the walls - but the xorn can do the same. He's not sure why they are in the cave, but they are there.
This squat beast is as wide as it is tall. Strangely symmetrical, it has three arms, three legs, three eyes, and one huge mouth.
Patrols & Wardings
There are also a number of magical wardings set by King Goodfellow to keep the tunnels from being used to storm the castle.
And, a patrol of guards is usually in the cave somewhere, although they keep to the eastern edge and make quick work of their rounds - they seem to be afraid....
Cavelight Moss
A patch of tangled, lacey moss clings to the ceiling above, slowly pulsing with an eerie glow. Among the soft, feathery mass, stems gently writhe, periodically dusting the ground below with a twinkling of phosphorescent spores.
Clawbats
Rukhs have heard these.
Mission 5: Vampires
Looking in, you see through the shadows three figures. One is clearly a human, dressed in a dark cloak, pulled up tight against the cold. He is sniffling and shifts nervously about in his seat. The second looks like a vampire - his pale skin and stiff posture are noticeable, but his clothing is clearly of an ancient style. He is dressed in a black cloak and has a gold ring with a large ruby in it on one finger.
The final figure is hidden in the shadows in the corner. He is not really visible, although the light should illuminate him better. He is speaking.
- Well, as I have told you, Mr. Vabsley, you were correct to inform me of Mr. Dourmoor's arrival. I have been looking for my wayward clerk for quite some time now. He is, how shall I say, a loose end that needs tying up. And you say that he on this ship, this Wanton Wench, but refuses to leave. And the local constabulatory is unable to find him aboard. That is a shame, Mr. Edwards, I would have hoped that you could have rustled him out of the ship so that he could be, disposed of properly.
- Never-the-mind, I have important business to do here in Dragonsford - you see King Goodfellow and I are not on the best of terms. He is a thief and a scoundrel, and I have a score to settle with him. But for now, let's focus on the immediate problem.
Mr. Edwards - do you have a fellow guard who is of poor eyesight? NODS. Well, then you will see that his glasses are broken tonight and replaced with these.
Mr. Edwards moves forward and takes a pair of spectacles.
I do so much hate to let these out of my possession, but I cannot see another way around this issue. Make sure your bespectaled friend and you are on duty at the Wanton Wench tomorrow night at midnight. What was his name again? Mr. Dabs. I see. Very well then. Make sure that Mr. Dabs sees the part that Mr. Vabsley is to play. Then, make sure he gets on the boat and identifies where Dourmoor is. I need Dourmoor off the boat.
Mr. Vabsley, you are to remain in Dragonsford as my spy. Keep me informed on the matters that I have told you are important. As for this plot, please feel free to feed on some more of the local delicacies - just make sure they are discovered. At midnight tomorrow night you are to fly to the Wanton Wench - make sure that Mr. Dabs sees you with these spectacles seeming to board the boat. Then remove yourself to safety. After Dourmoor is removed - make sure you get my glasses back from Mr. Dabs and Mr. Edwards. They can't fall into the hands of Morgan or the others.
What do they do?
Why, they are Wolfshaunt Spectacles - they can see my kind in our full glory - invisibility, mist, it matters not, vampires in these glasses positively glow. Now, you can see why I don't want them lost.
I must admit it is almost suppering time. I will take my leave of you two gentlemen. Do not disappoint me. Good evening.
NOTE: Vampires have been blamed with digging up Fenton Langdon's grave.
Sea Encounter: Heart of the Glacier Giant Munro
A cry from the crow's nest - a small dinghy is floating several hundred yards off the ship's bow.
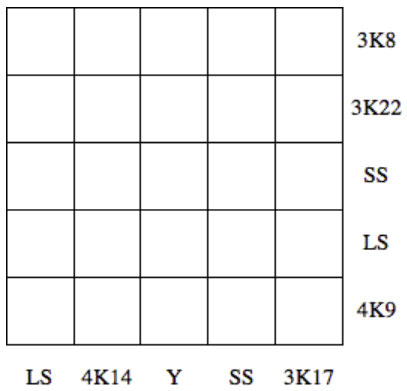
As the Wanton Wench approaches the dinghy, it is clear that there are no sailors aboard it. The small craft, built to carry a dozen men with two sets of oars, is empty except for a large iron chest, bound by rusty chains that is in the center of the boat. The chains are locked to hold the chest in place. One long chain is wrapped about the chest to keep it closed. A chainmail bag hangs from the binding chain. A square grid is carved into the top of the chest along with the word "MUNRO".
A bag of bones are my crew's remains,
Taken from the giant slain,
Rests he now in a watery pool,
Unmelting heart eternally cool,
Fear his glacial floating hold,
Filled with death and gems and gold.
The bag contains 36 dice each about an inch on a side - just the right size to fit into the square grid of the chest.
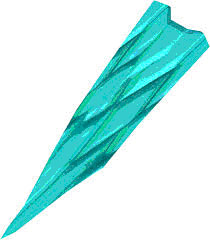
Inside, the chest contains a large shard of what appears to be ice. It is clear with a bluish tint, two feet long and six inches in diameter. The ice is melting and the item is cold.
NOTE: The shard does not melt - at least it never gets smaller.
DM's Note: The party has not discovered the location of the glacial home of Munro.
